
How to add pace and heart rate to your running video
Export your run as a FIT file from your watch's app (or connect Strava), open your video in Telemetry Studio, add the run and click Auto Sync This Clip. Pace, heart rate, splits, cadence and your route then follow the video second by second. Export it wide for YouTube or 9:16 for Reels and TikTok.
It works with runs from Garmin, Coros, Suunto, Wahoo and Apple Watch (or anything on Strava), on Mac or Windows. The 14-day free trial covers everything below.
What you need
- Video of your run: a phone, a GoPro, a DJI Osmo or anything else that films.
- The same run recorded on a GPS watch, or on Strava. Heart rate needs a watch or chest strap; phone-only runs give you pace and the route.
- Telemetry Studio for macOS or Windows (free 14-day trial).
01Get the FIT file of your run
FIT is the file your watch records, with every reading: pace, heart rate, cadence, elevation and GPS. GPX works too, but usually carries only the route and time, so you lose heart rate and cadence.
| Watch | How to get the file |
|---|---|
| Garmin | Garmin Connect on the web: open the run, gear icon, Export Original. You get a .zip with the .fit inside. |
| Coros | COROS app: open the run, ••• menu, Export, choose FIT. |
| Suunto | Suunto app: open the workout, ••• menu, export as FIT (all data) or GPX. |
| Apple Watch | Apple has no export. A third-party app such as HealthFit exports the workout as FIT. |
| Any watch on Strava | Connect Strava inside Telemetry Studio and pick the run from your list. No file needed. |
02Open your video and add the run
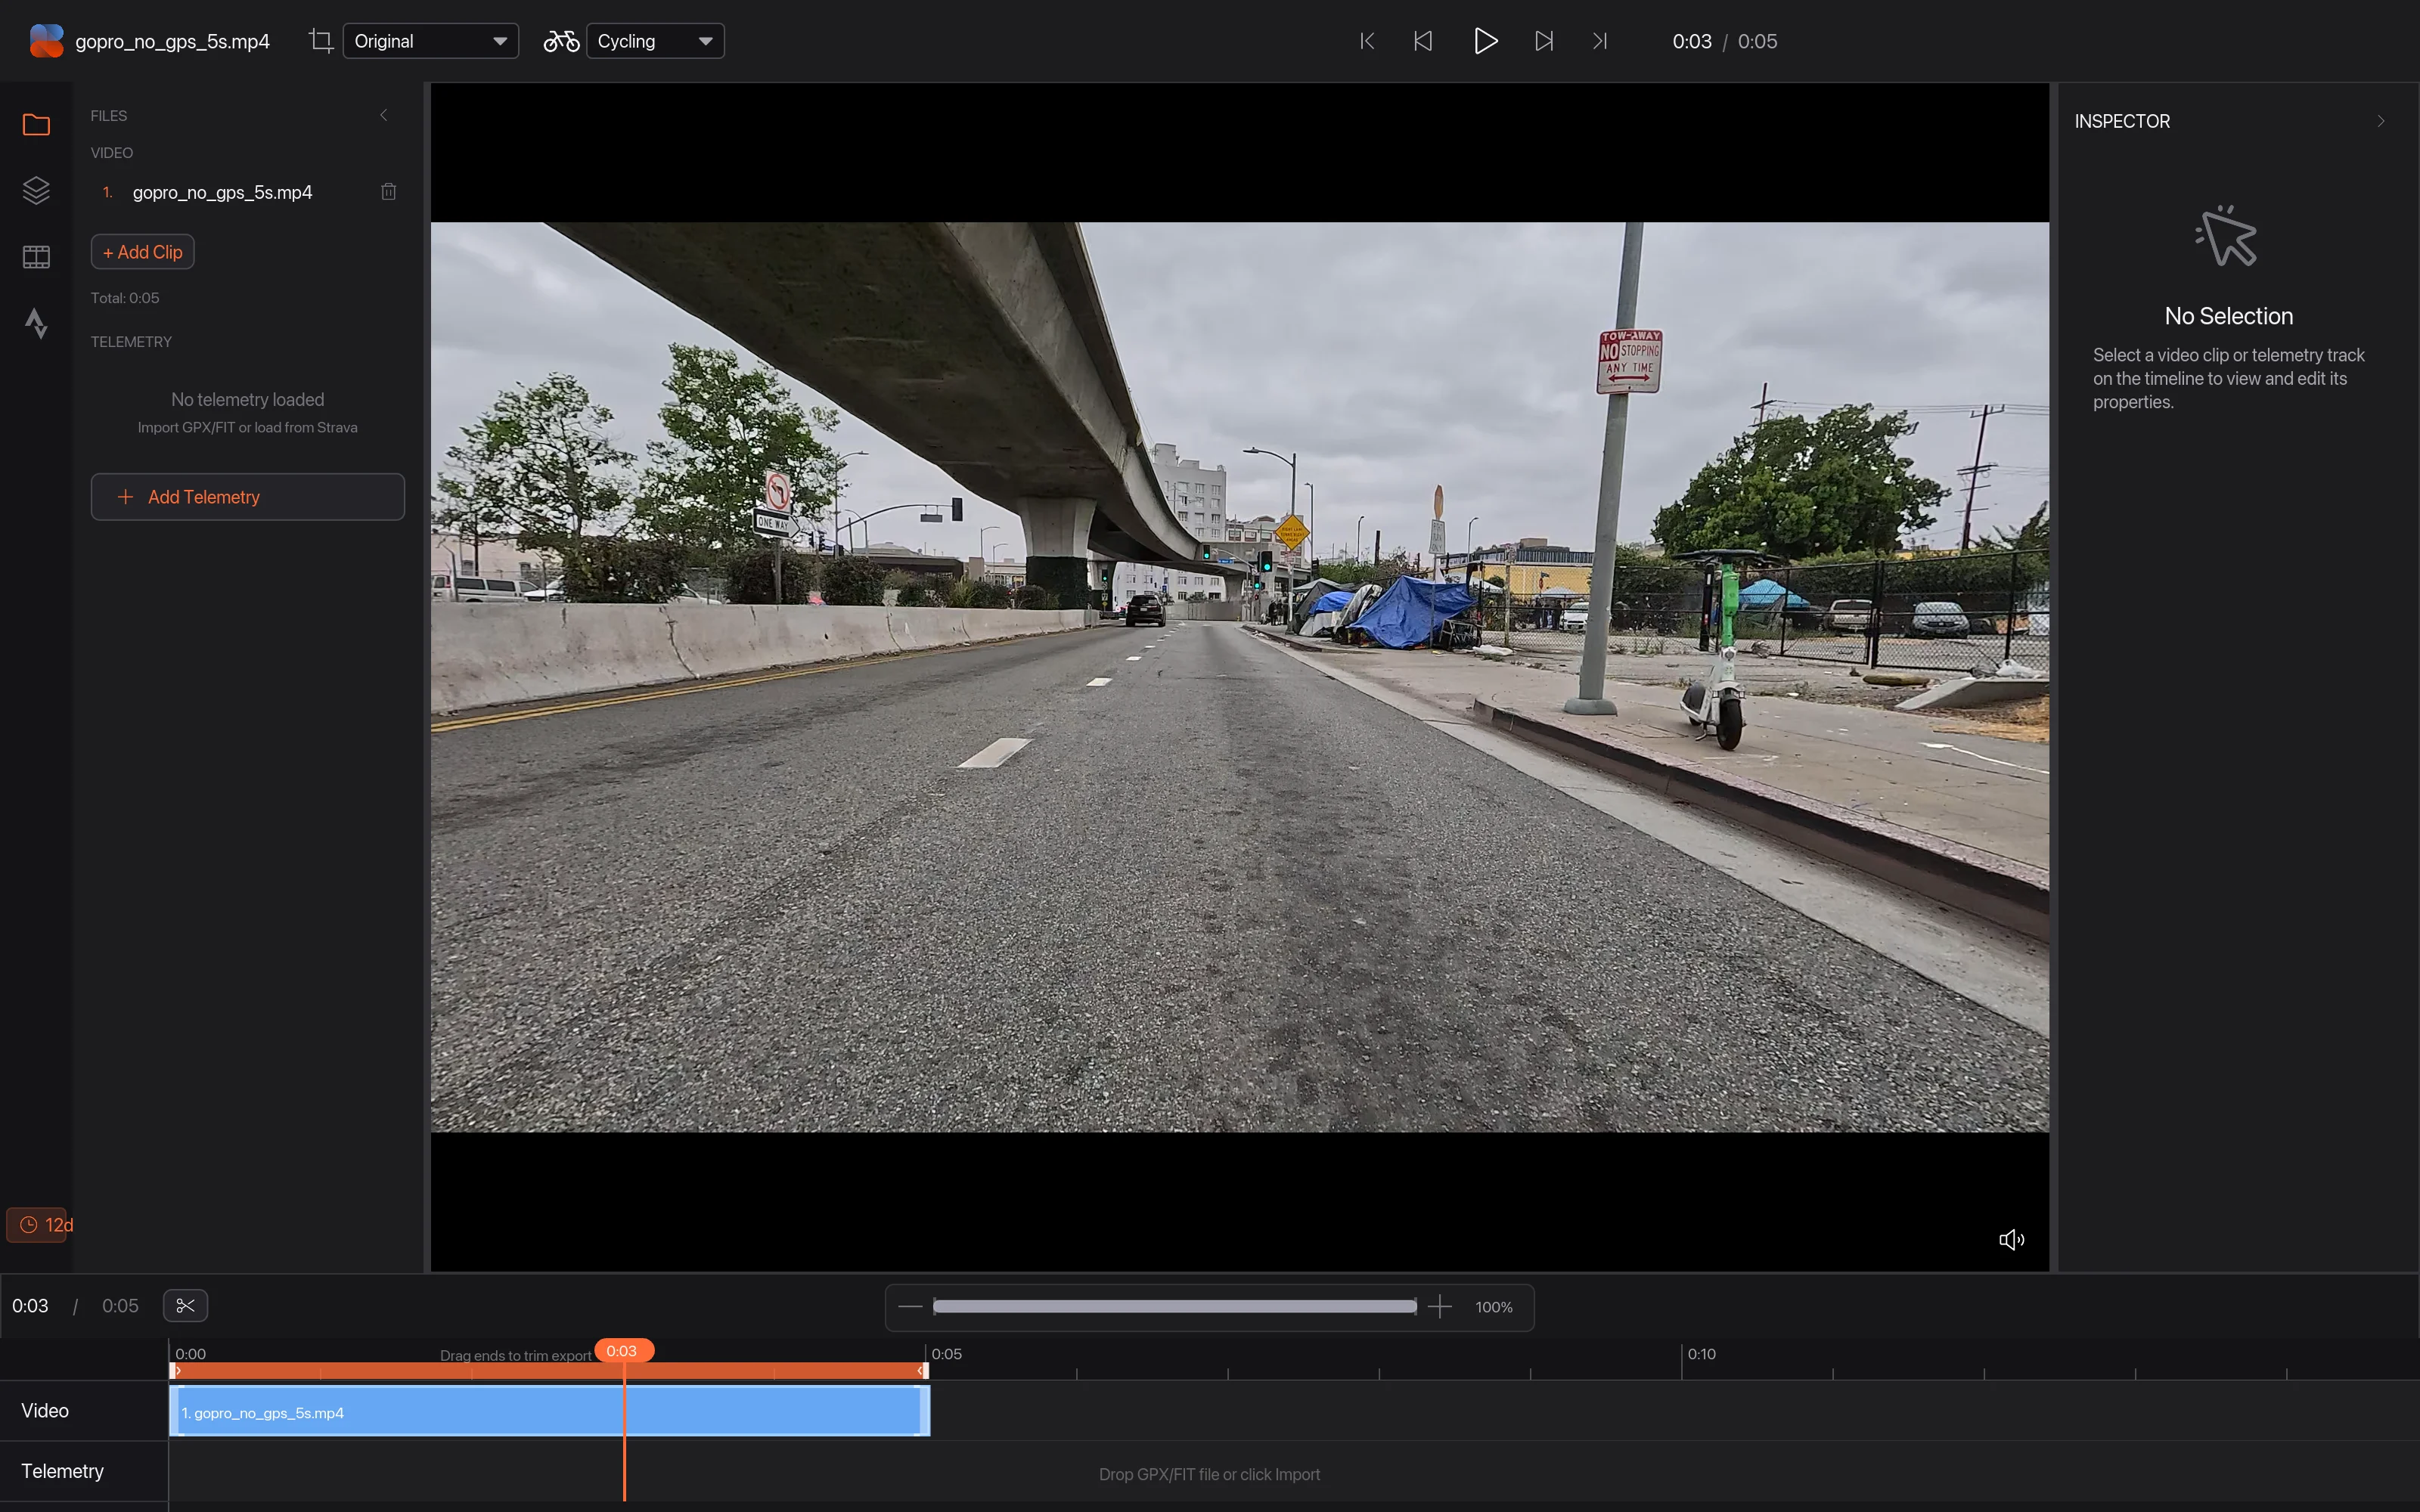
Open your video, then click Add Telemetry 1 and choose the FIT file, or drag it onto the Telemetry row 2. Telemetry Studio reads the sport from the file and switches to running overlays: pace instead of a speedometer, steps per minute instead of pedal cadence.
03Auto Sync the clip
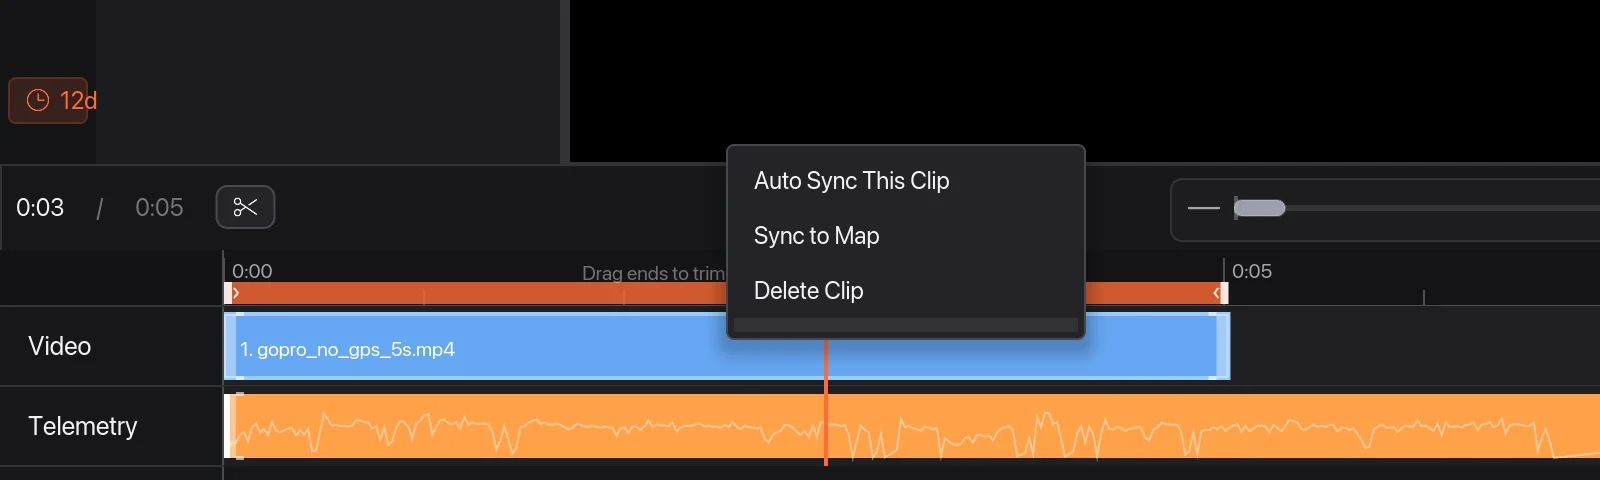
Right-click the clip on the timeline and choose Auto Sync This Clip 1. It uses the time the camera started recording to find the right moment in your run. If your phone or camera had the wrong time, use Sync to Map: click a landmark in the video, then the same spot on the map.
04Add pace, heart rate and splits
Open the Overlays tab and add what you want to show 1. The running ones:
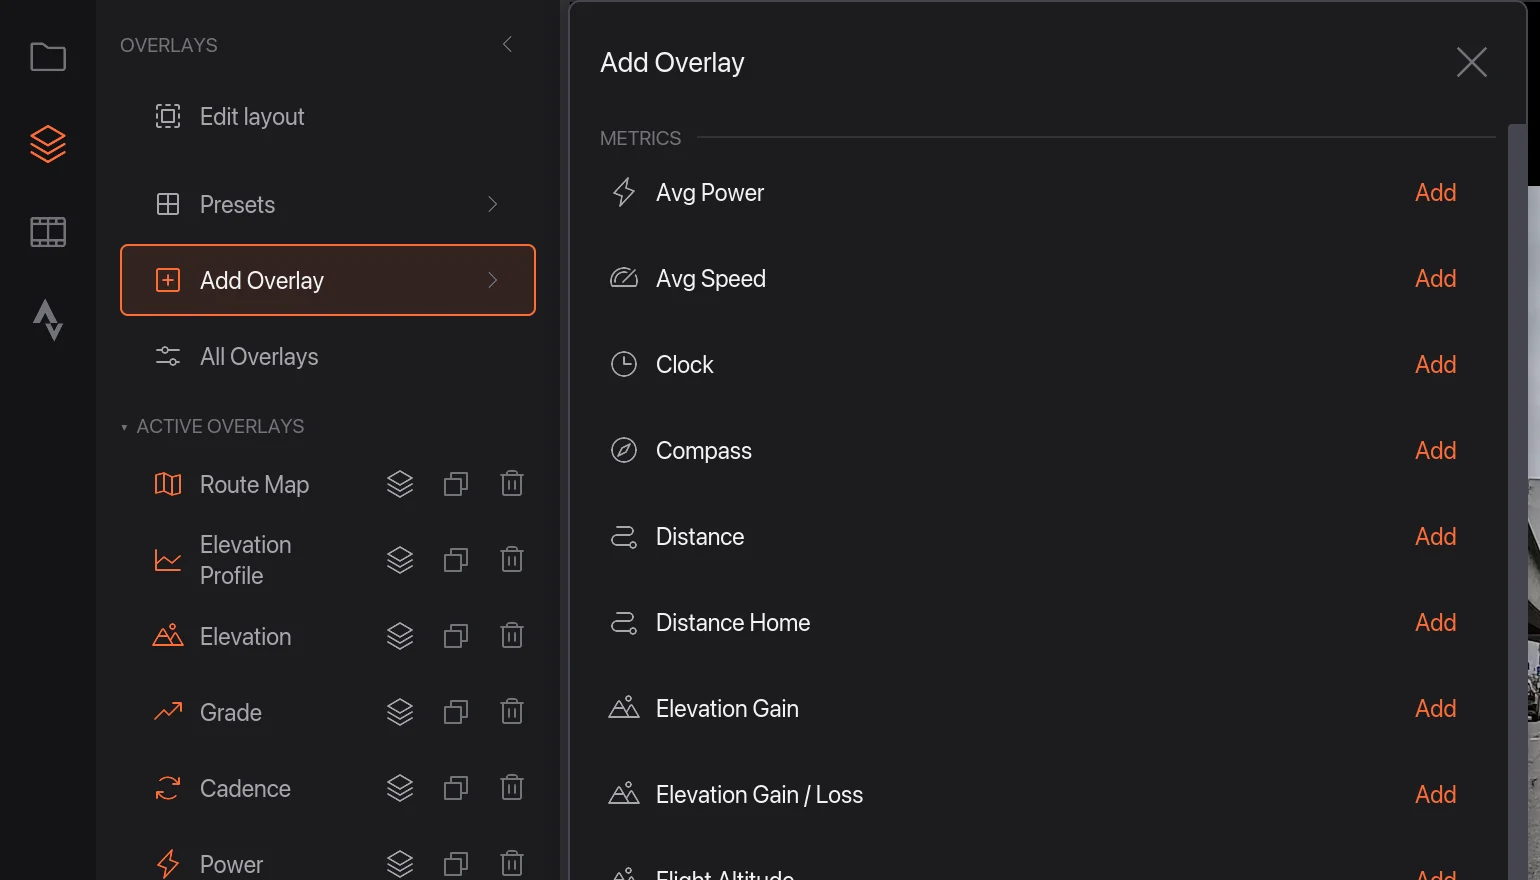
- Pace and average pace, in min/km or min/mi.
- Splits: a table of each kilometre or mile, with the live one highlighted.
- Grade-adjusted pace: what your pace on a hill is worth on the flat.
- Finish projection and pace vs target, for race videos ("on pace for 3:29:47").
- Heart rate, heart rate zone and a heart rate graph.
- Cadence in steps per minute, elevation gain and loss, an elevation graph, the map, distance and time.
05Export, vertical or wide
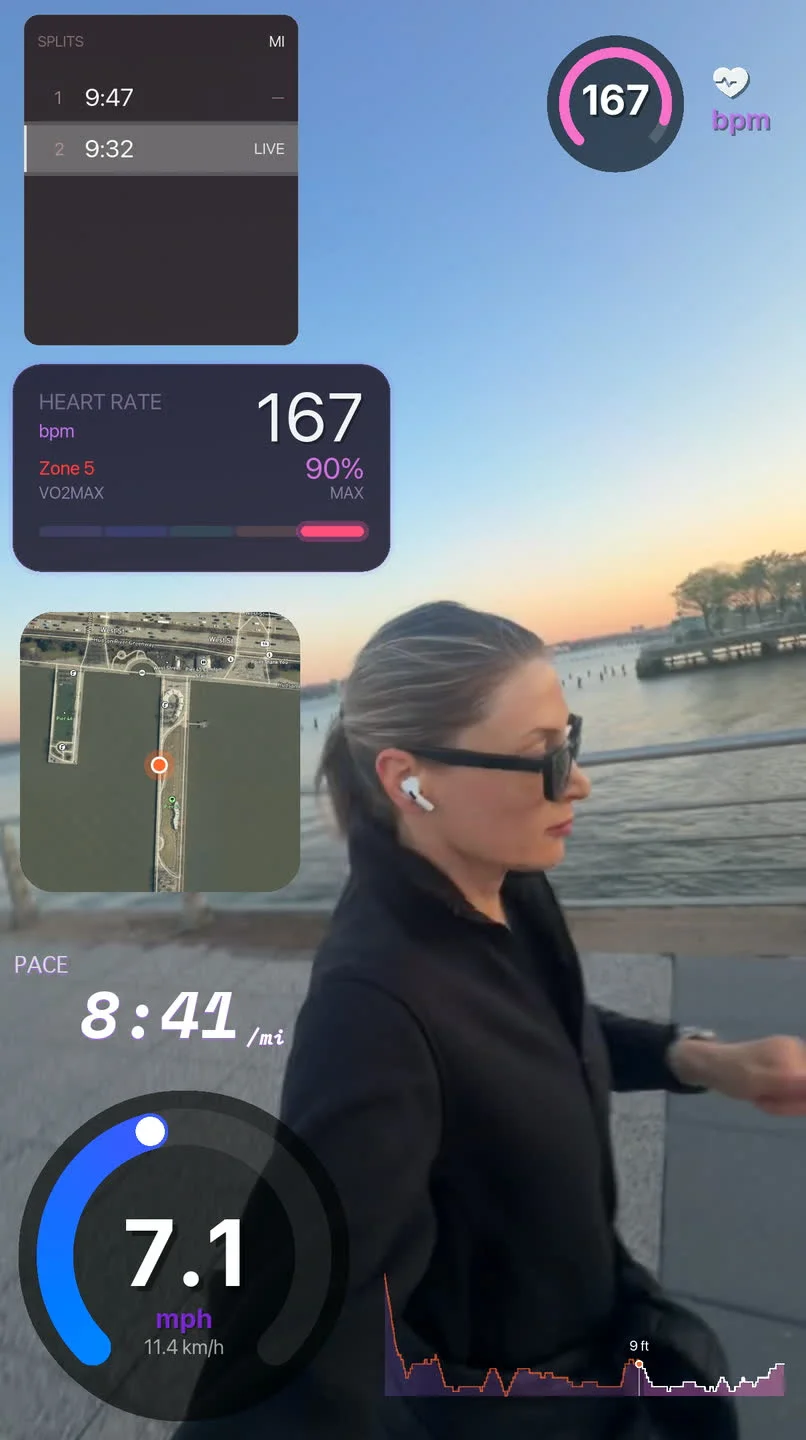
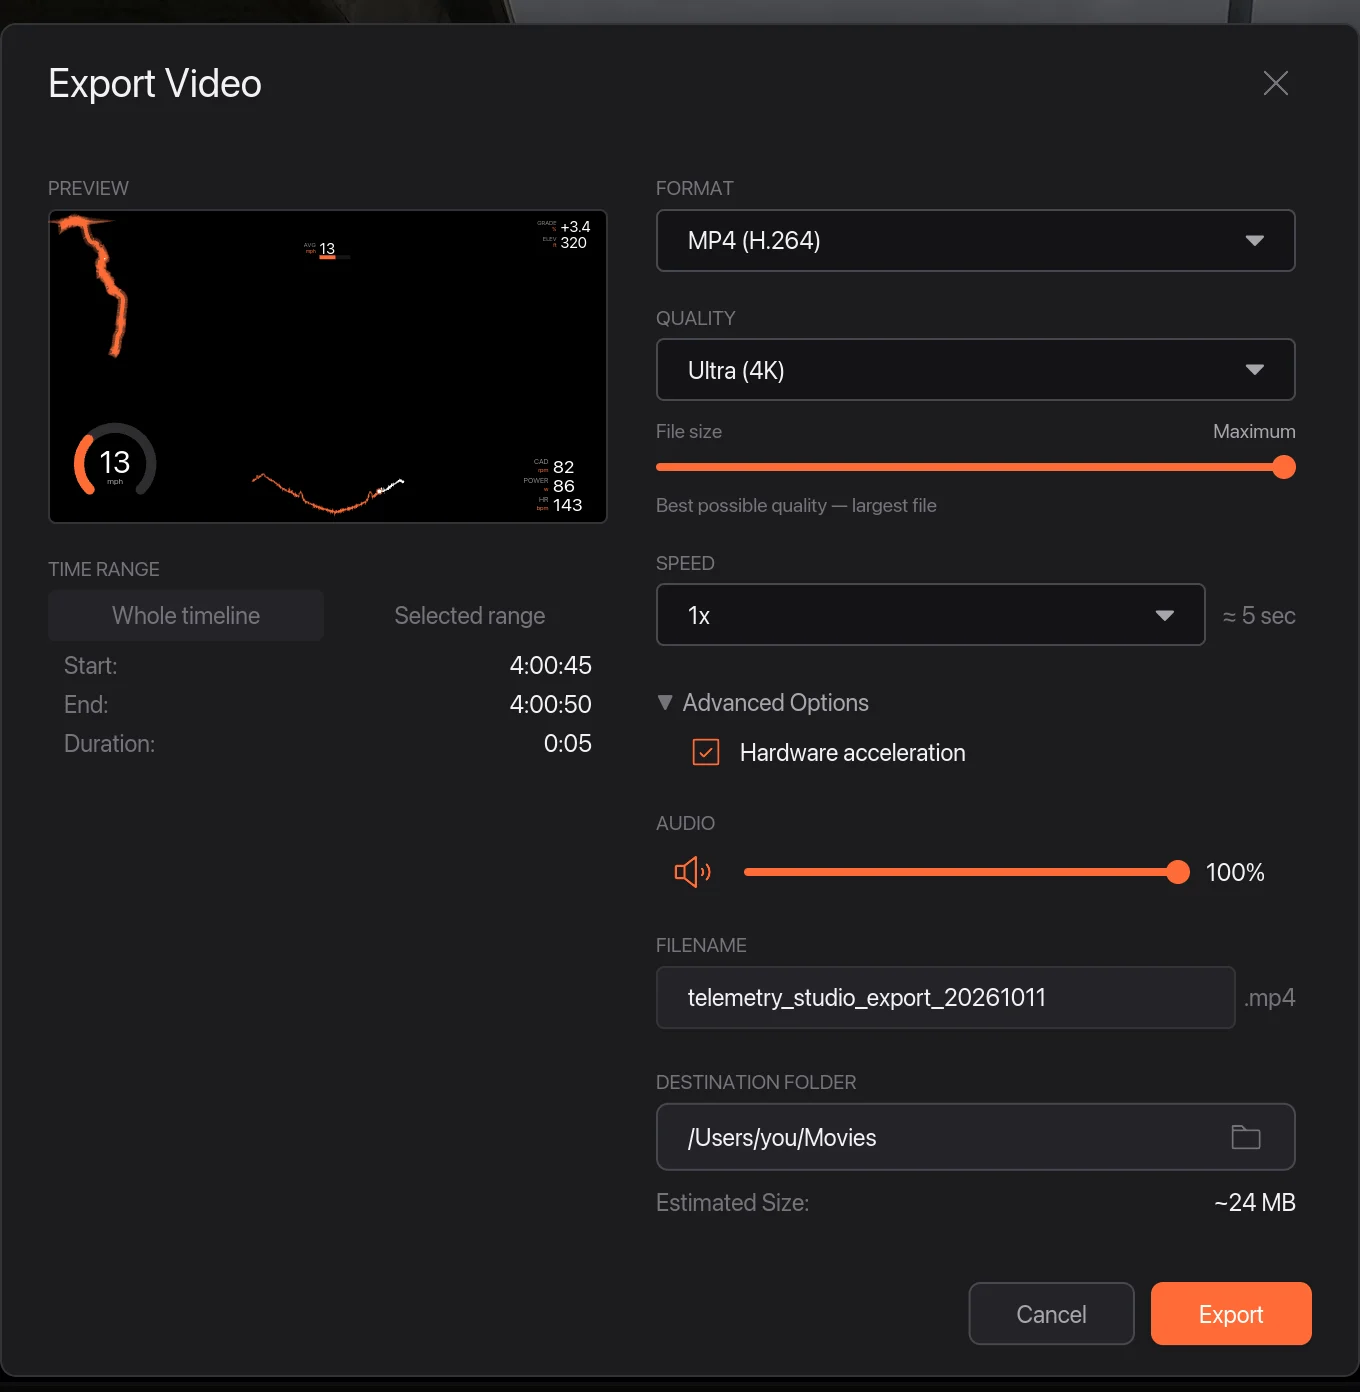
Choose File › Export Video…, pick the format and quality, and export. Choose 9:16 for Reels, Shorts and TikTok. Exports go up to 4K. Editing in Premiere, Final Cut or DaVinci Resolve? Export only the overlays with a transparent background and put them on top of your edit.
If something looks wrong
- Pace jumps around: GPS is noisy at running speed, under trees and between buildings. Pace is averaged over 15 seconds to smooth it out.
- No heart rate: the file has none. A GPX export or a phone-only run doesn't record it. Use the FIT file from your watch.
- Cycling overlays instead of running ones: set the sport to Running in the top bar.
Other ways to do it
Garmin VIRB Edit used to do this for free but is no longer developed (see VIRB Edit alternatives). Telemetry Overlay is the other paid option (how it compares). Relive makes 3D route videos from your activity, but it doesn't put your data on your own footage. Riding instead? Here's the cycling guide.
More guides
- Garmin VIRB Edit alternative: what to use in 2026
- Telemetry Studio vs Telemetry Overlay: an honest comparison
- DashWare alternative: data overlays for your video in 2026
- How to add Garmin data to GoPro video (speed, power, heart rate)
- How to add a telemetry overlay to Insta360 360 video
- How to add lap times, speed and g-force to track day video
- Telemetry Studio vs RaceRender: an honest comparison
- How to add DJI flight data (altitude, distance, route) to drone video
- How to add speed and altitude to ski and snowboard video
- All guides and comparisons
- Frequently asked questions