
How to add Garmin data to GoPro video (speed, power, heart rate)
Export the ride's FIT file from Garmin Connect, open your GoPro clip in Telemetry Studio, add the FIT file and click Auto Sync This Clip. Your speed, power, heart rate and cadence line up with the video automatically. Pick a theme and export. It takes about five minutes on Mac or Windows.
Garmin's own tool for this, VIRB Edit, is no longer developed, so this guide uses Telemetry Studio. The 14-day free trial covers everything below.
What you need
- Your GoPro video. Any GoPro works; Hero 5 Black and later also record their own GPS, which helps the sync.
- The same ride recorded on a Garmin Edge, Forerunner, Fenix or any other Garmin. A Wahoo, Coros or Hammerhead works the same way, since they all save FIT files.
- Telemetry Studio for macOS or Windows (free 14-day trial).
01Export the FIT file from Garmin Connect
Open the activity in Garmin Connect in a web browser. Click the gear icon at the top right and choose Export Original. You get a .zip file; the .fit file inside is your ride, with every sensor reading.
02Open your GoPro video
On the welcome screen, click Open Video 1 and choose your GoPro file. GoPro's MP4 files open directly, including 4K and HEVC, with no conversion.
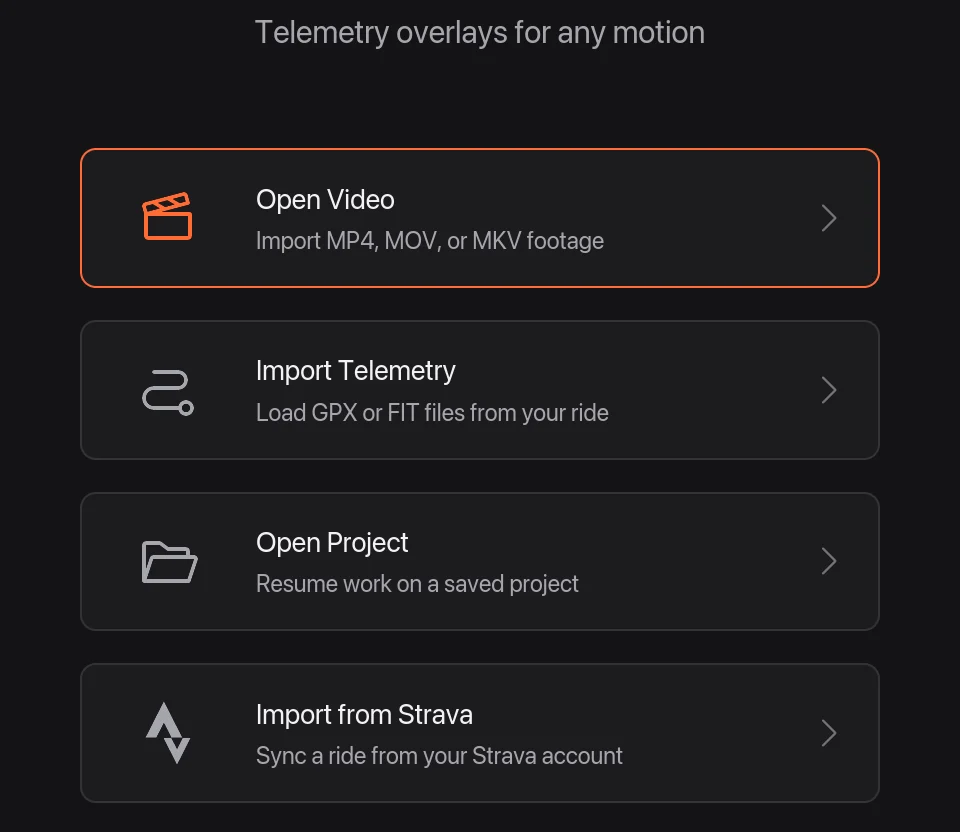
03Add the FIT file
In the Files tab, click Add Telemetry 1 and choose the .fit file, or drag it onto the Telemetry row of the timeline 2.
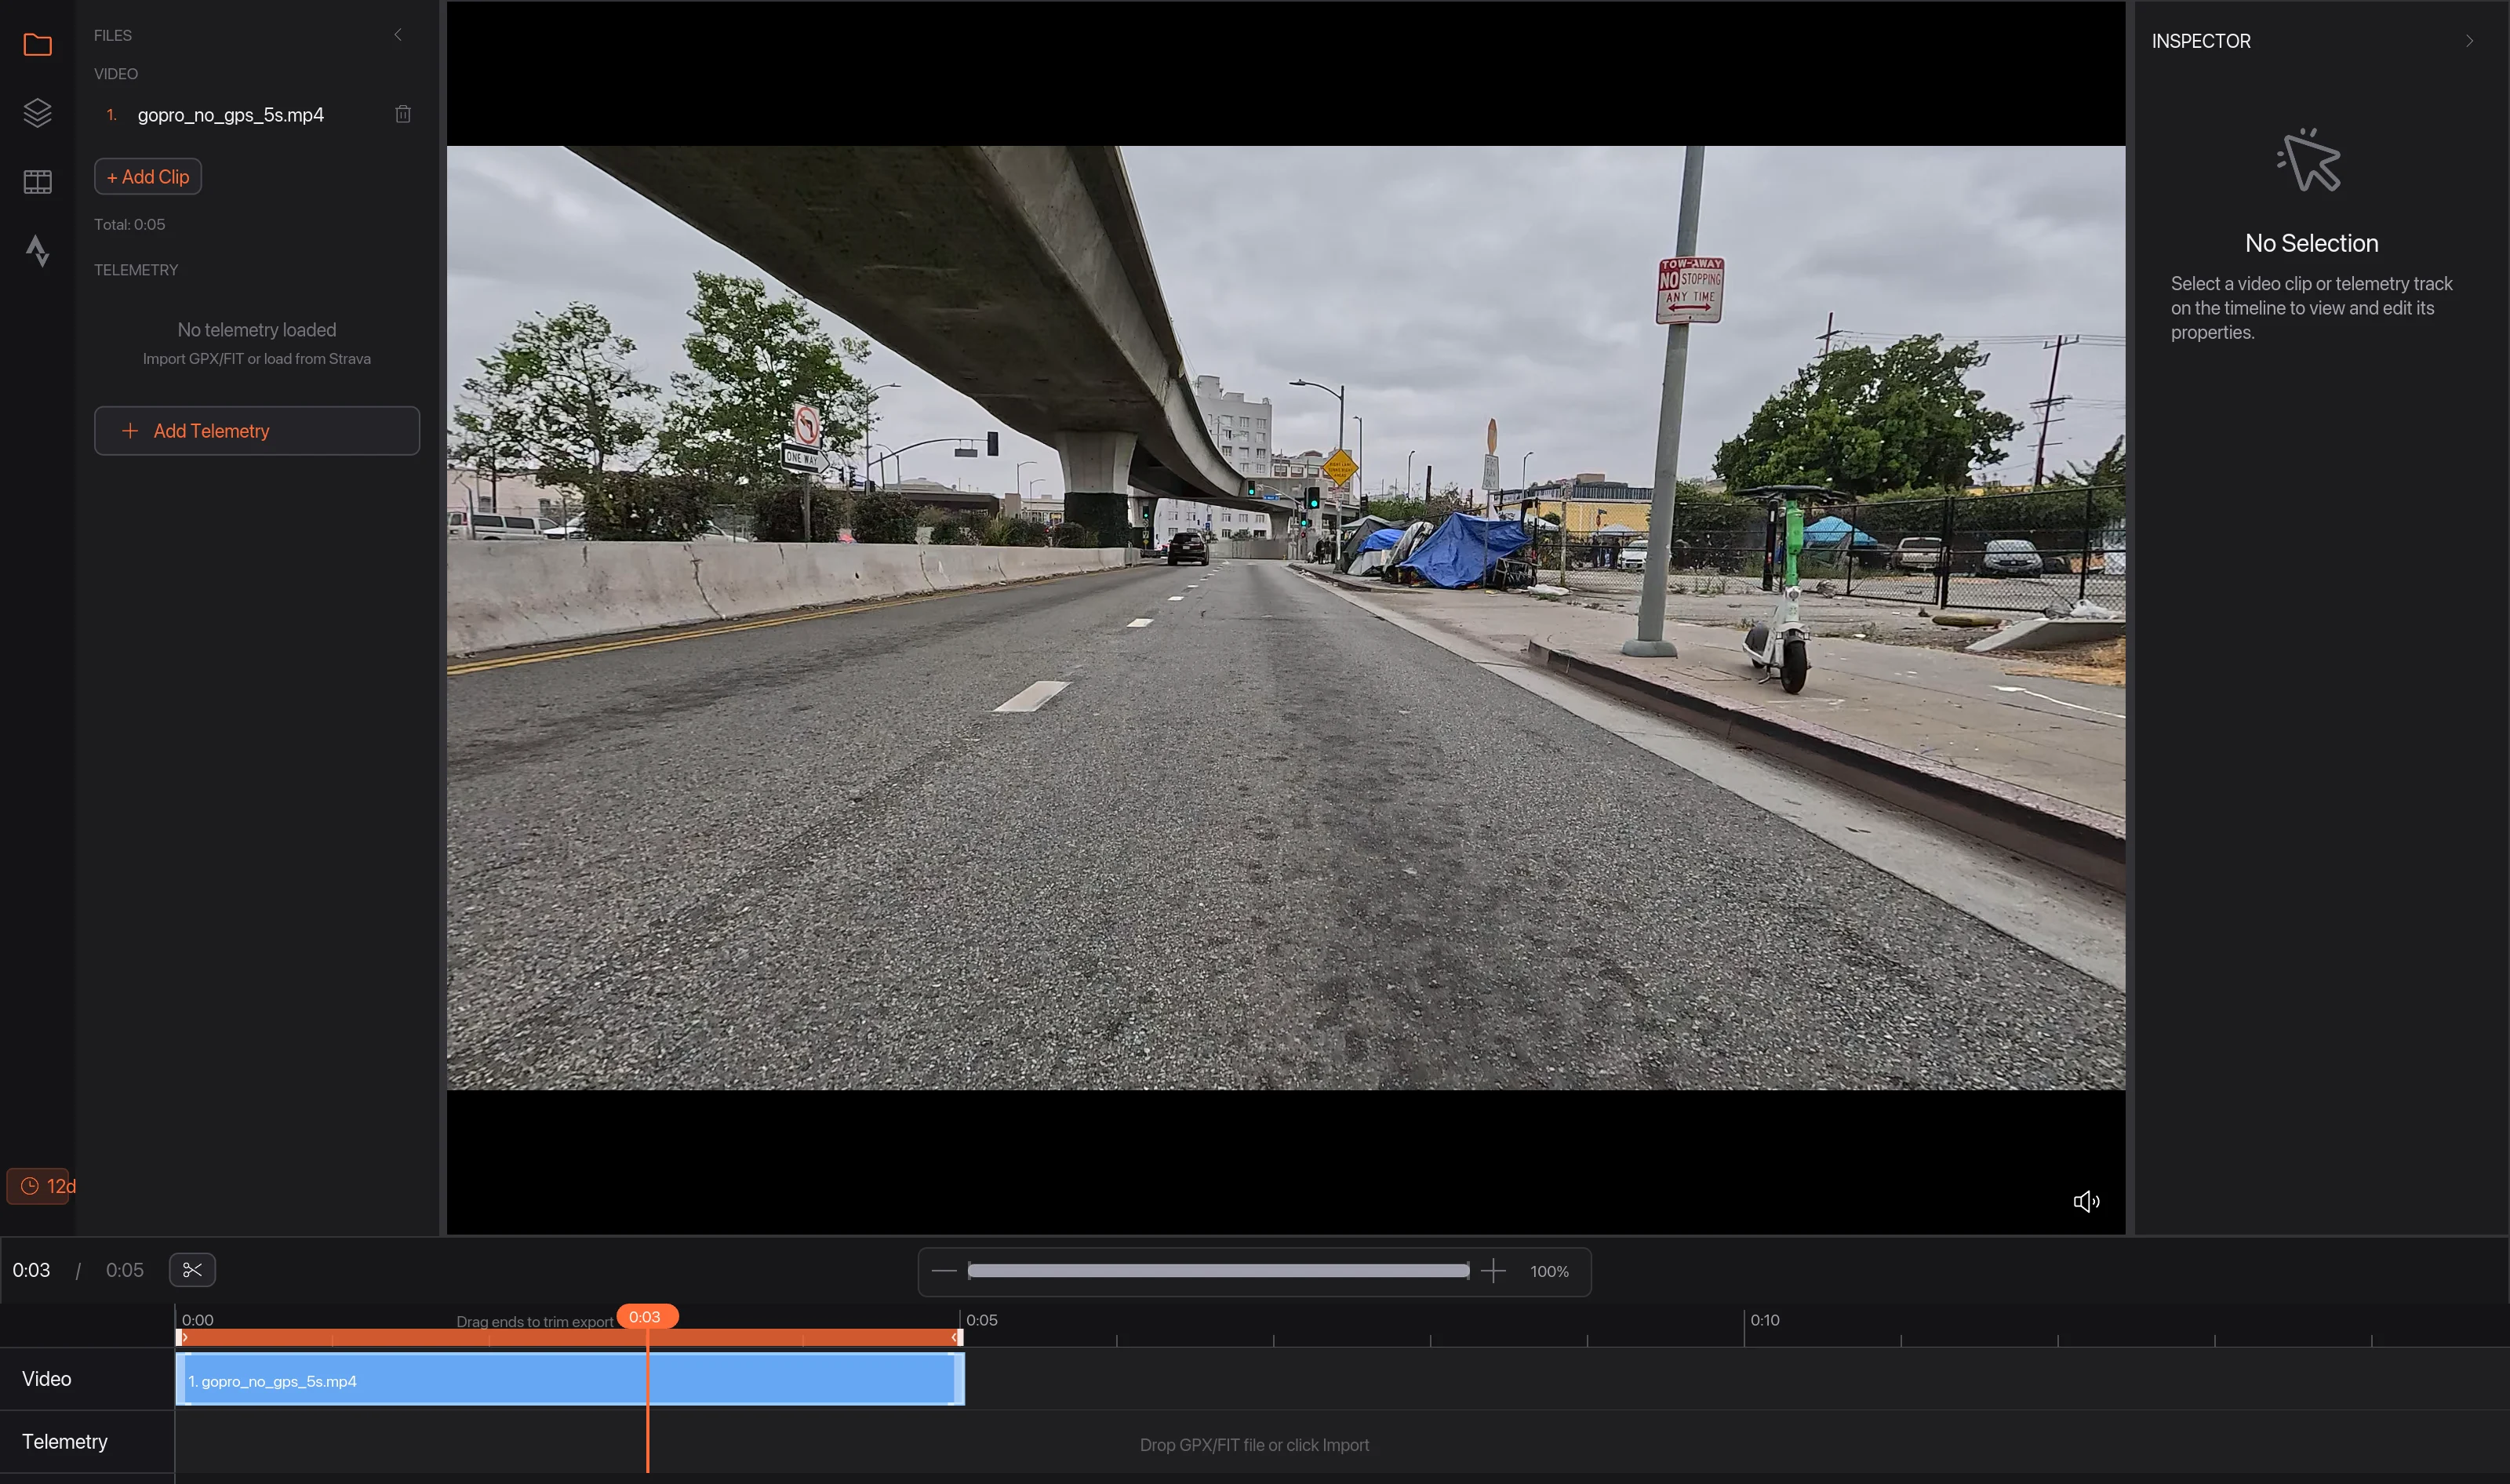
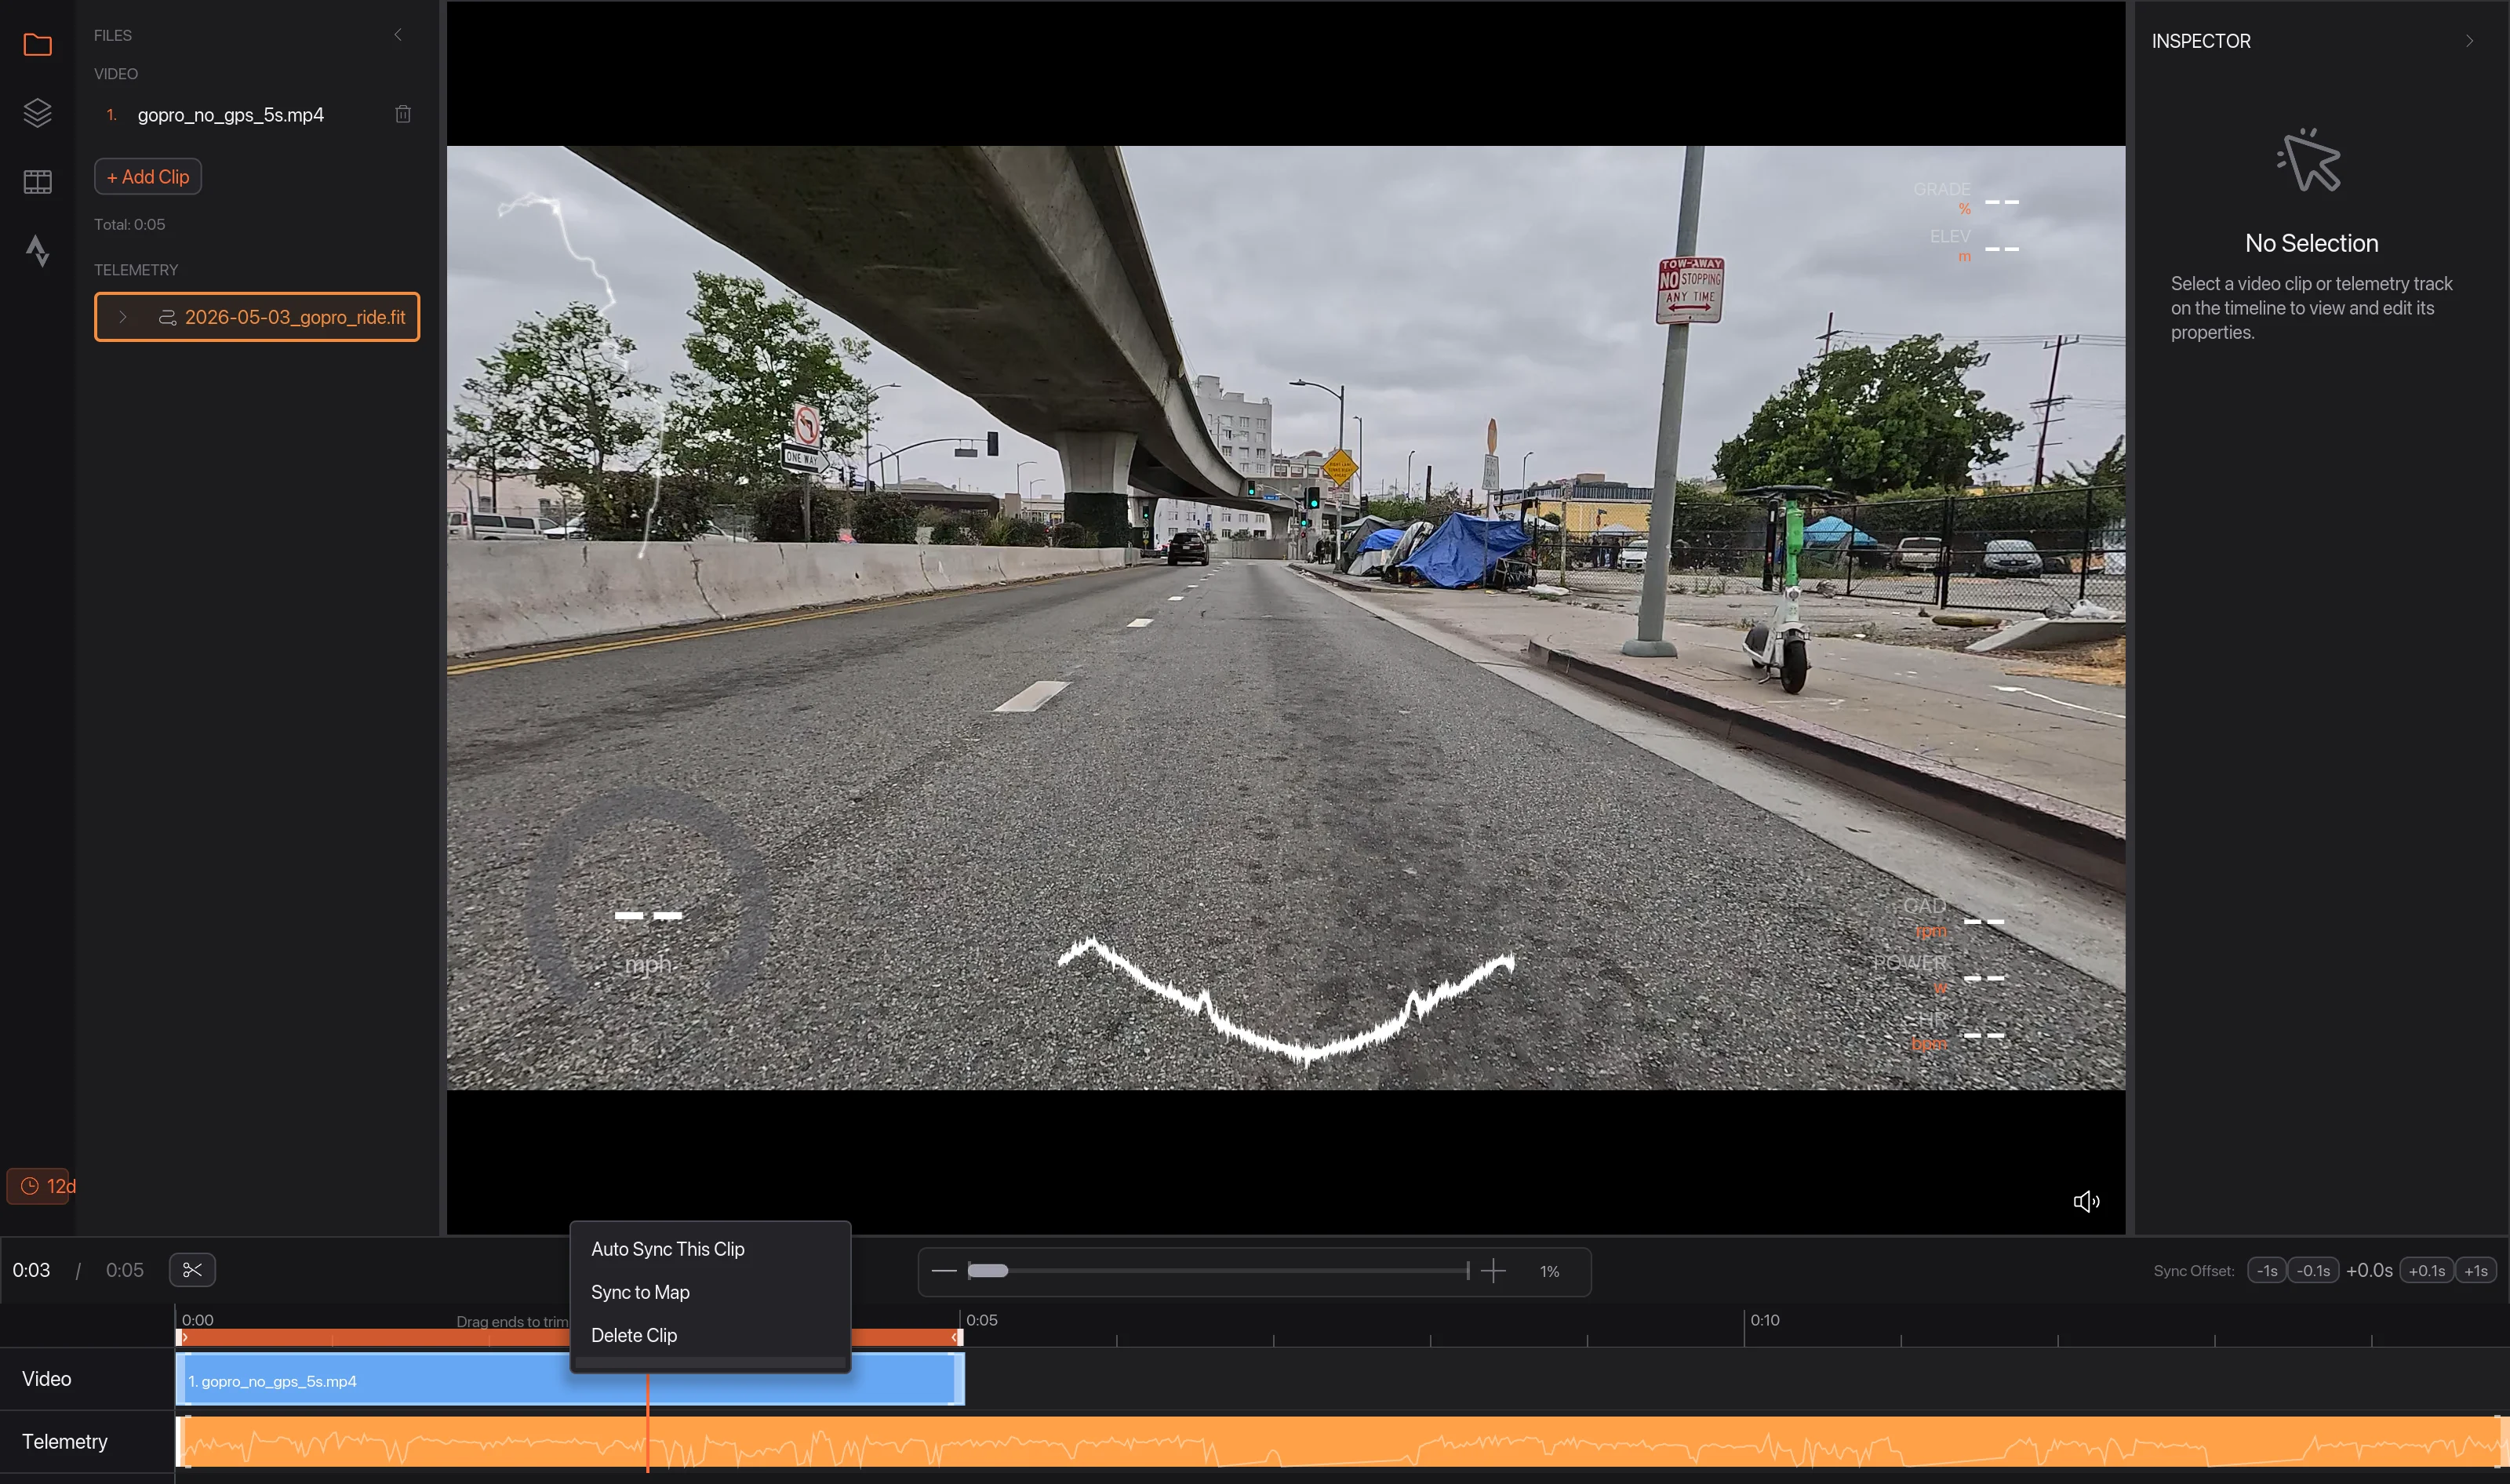
04Auto Sync the clip
Your ride is added 1, but it starts at the start of the video, so the numbers aren't right yet. Right-click the clip on the timeline and choose Auto Sync This Clip 2.
Telemetry Studio finds the moment you filmed. It uses the camera's clock, and if the GoPro recorded GPS, it also matches the speed in the video to the speed in your Garmin file. A message confirms the sync 1 and the overlays now show your real data 2 3.
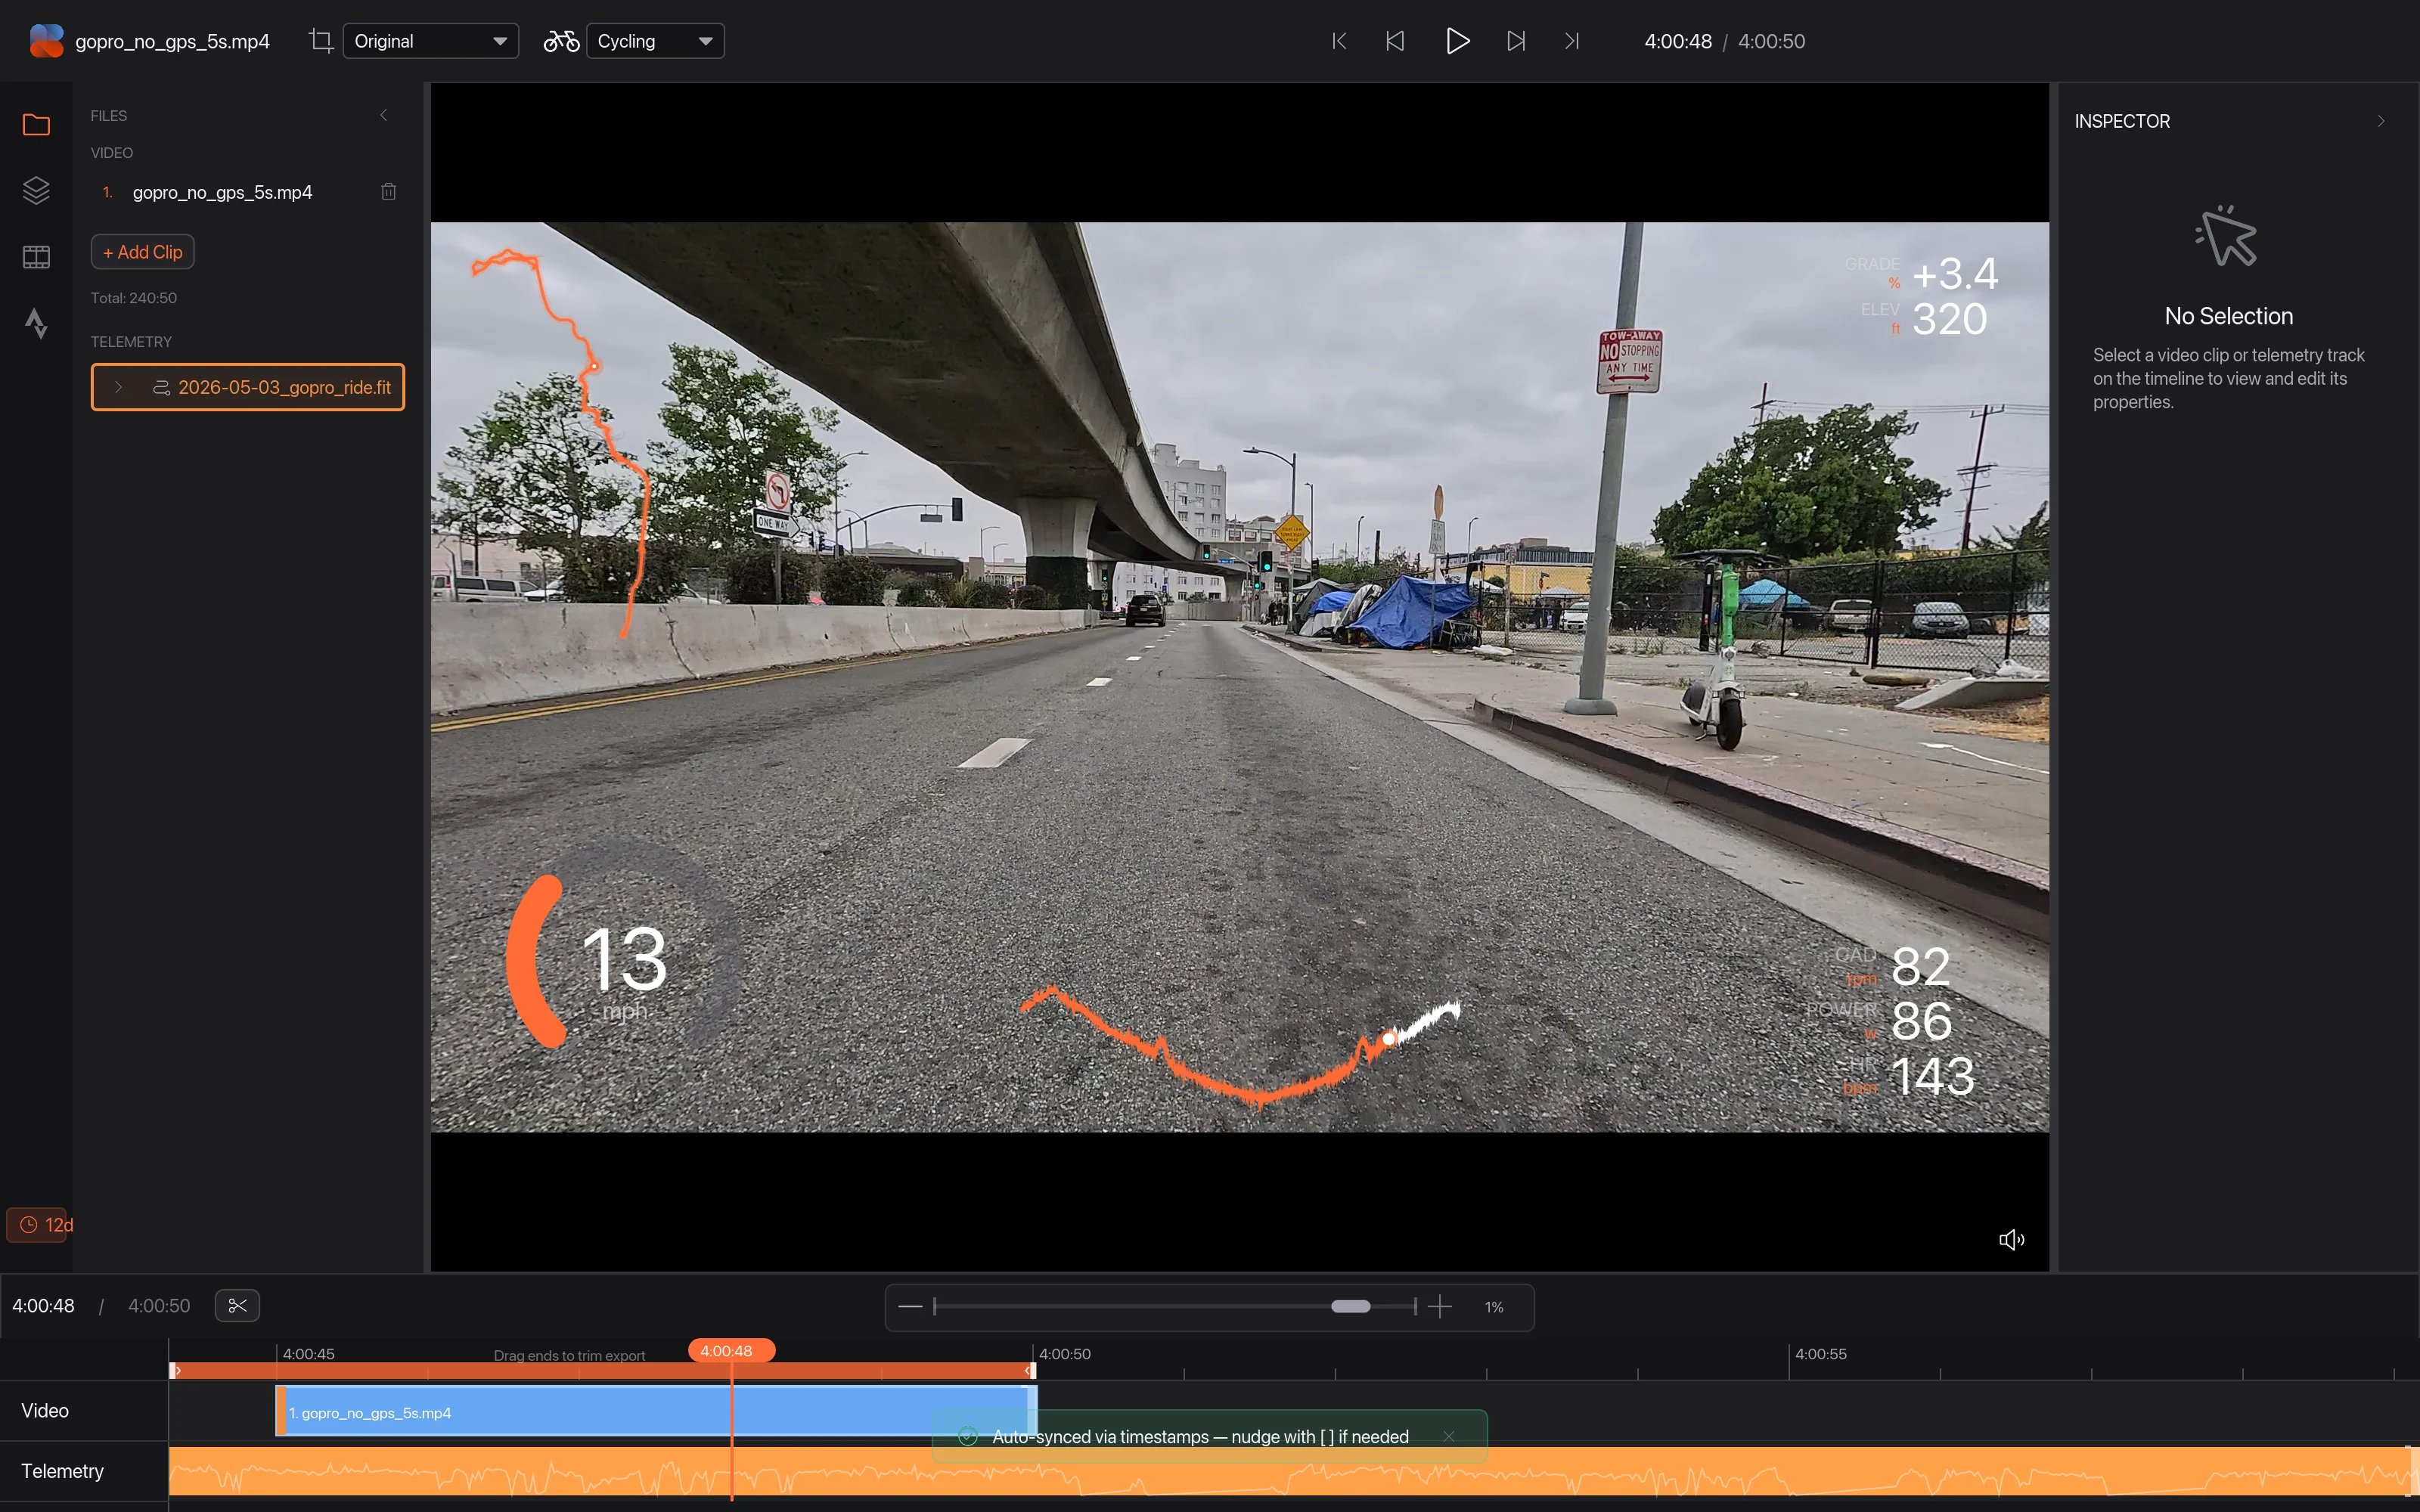
05Choose your overlays and theme
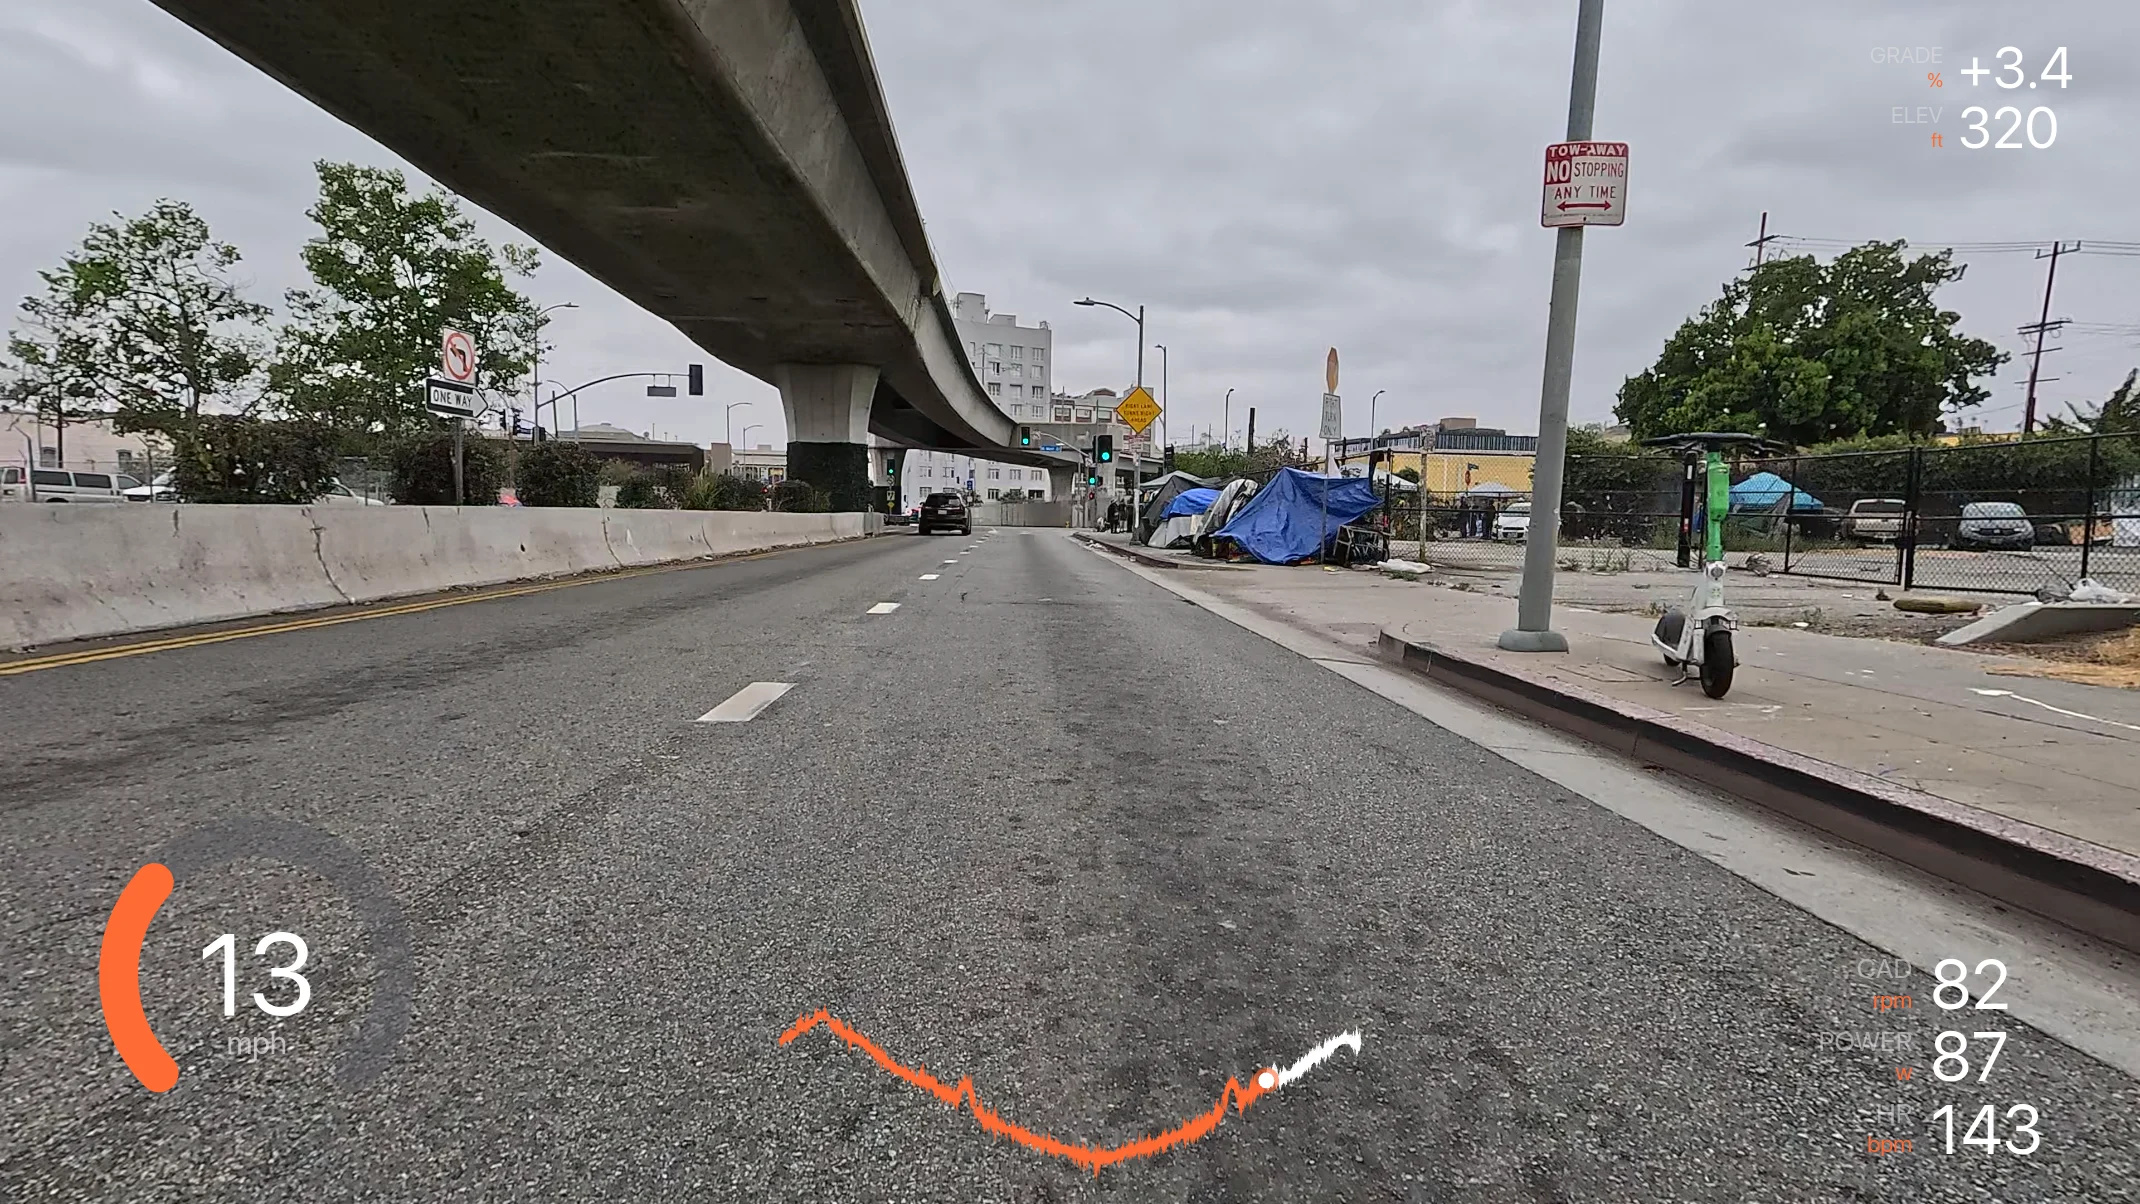
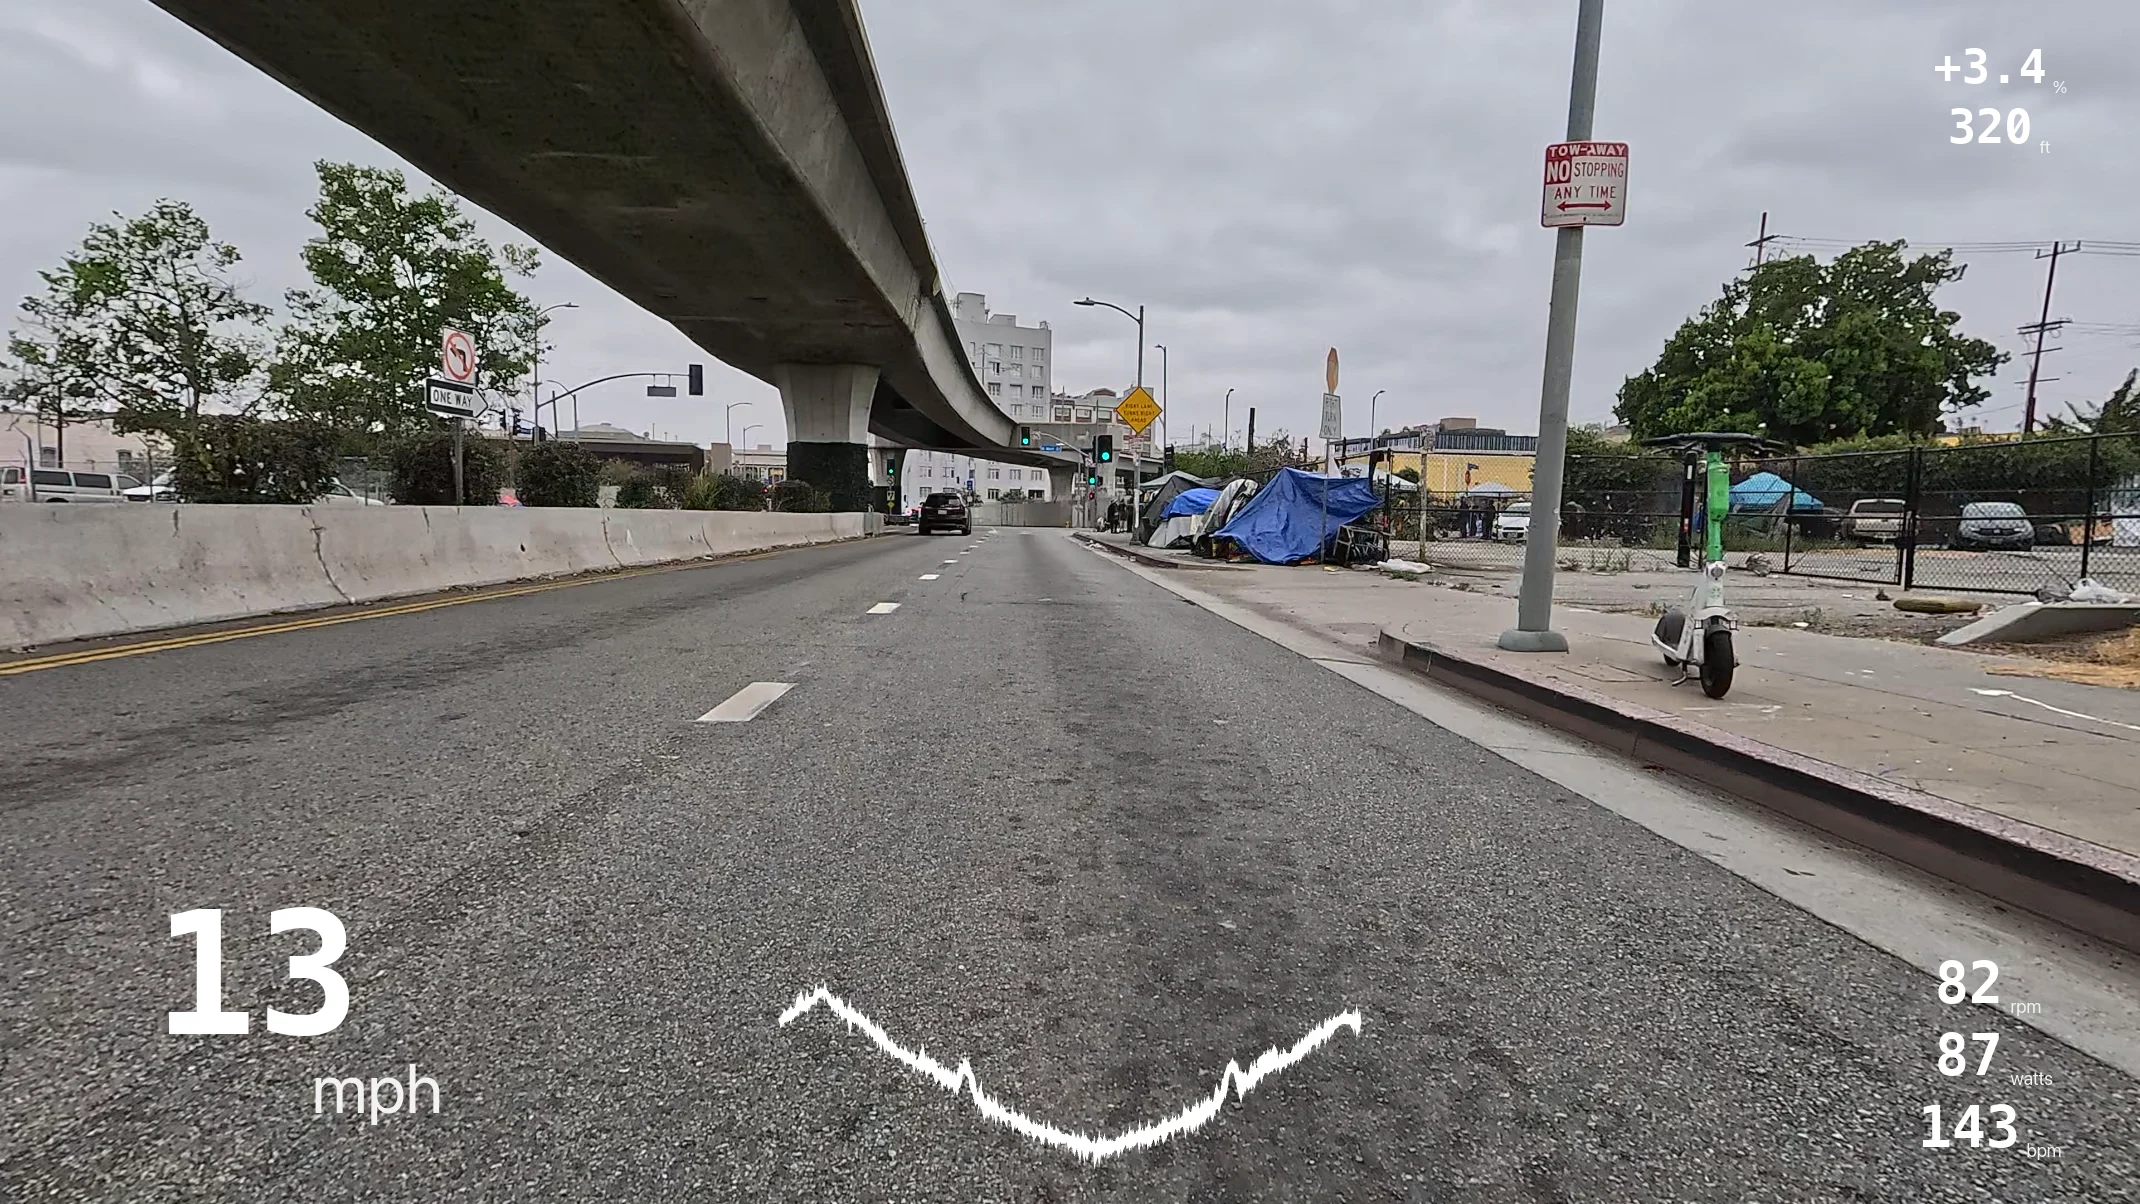
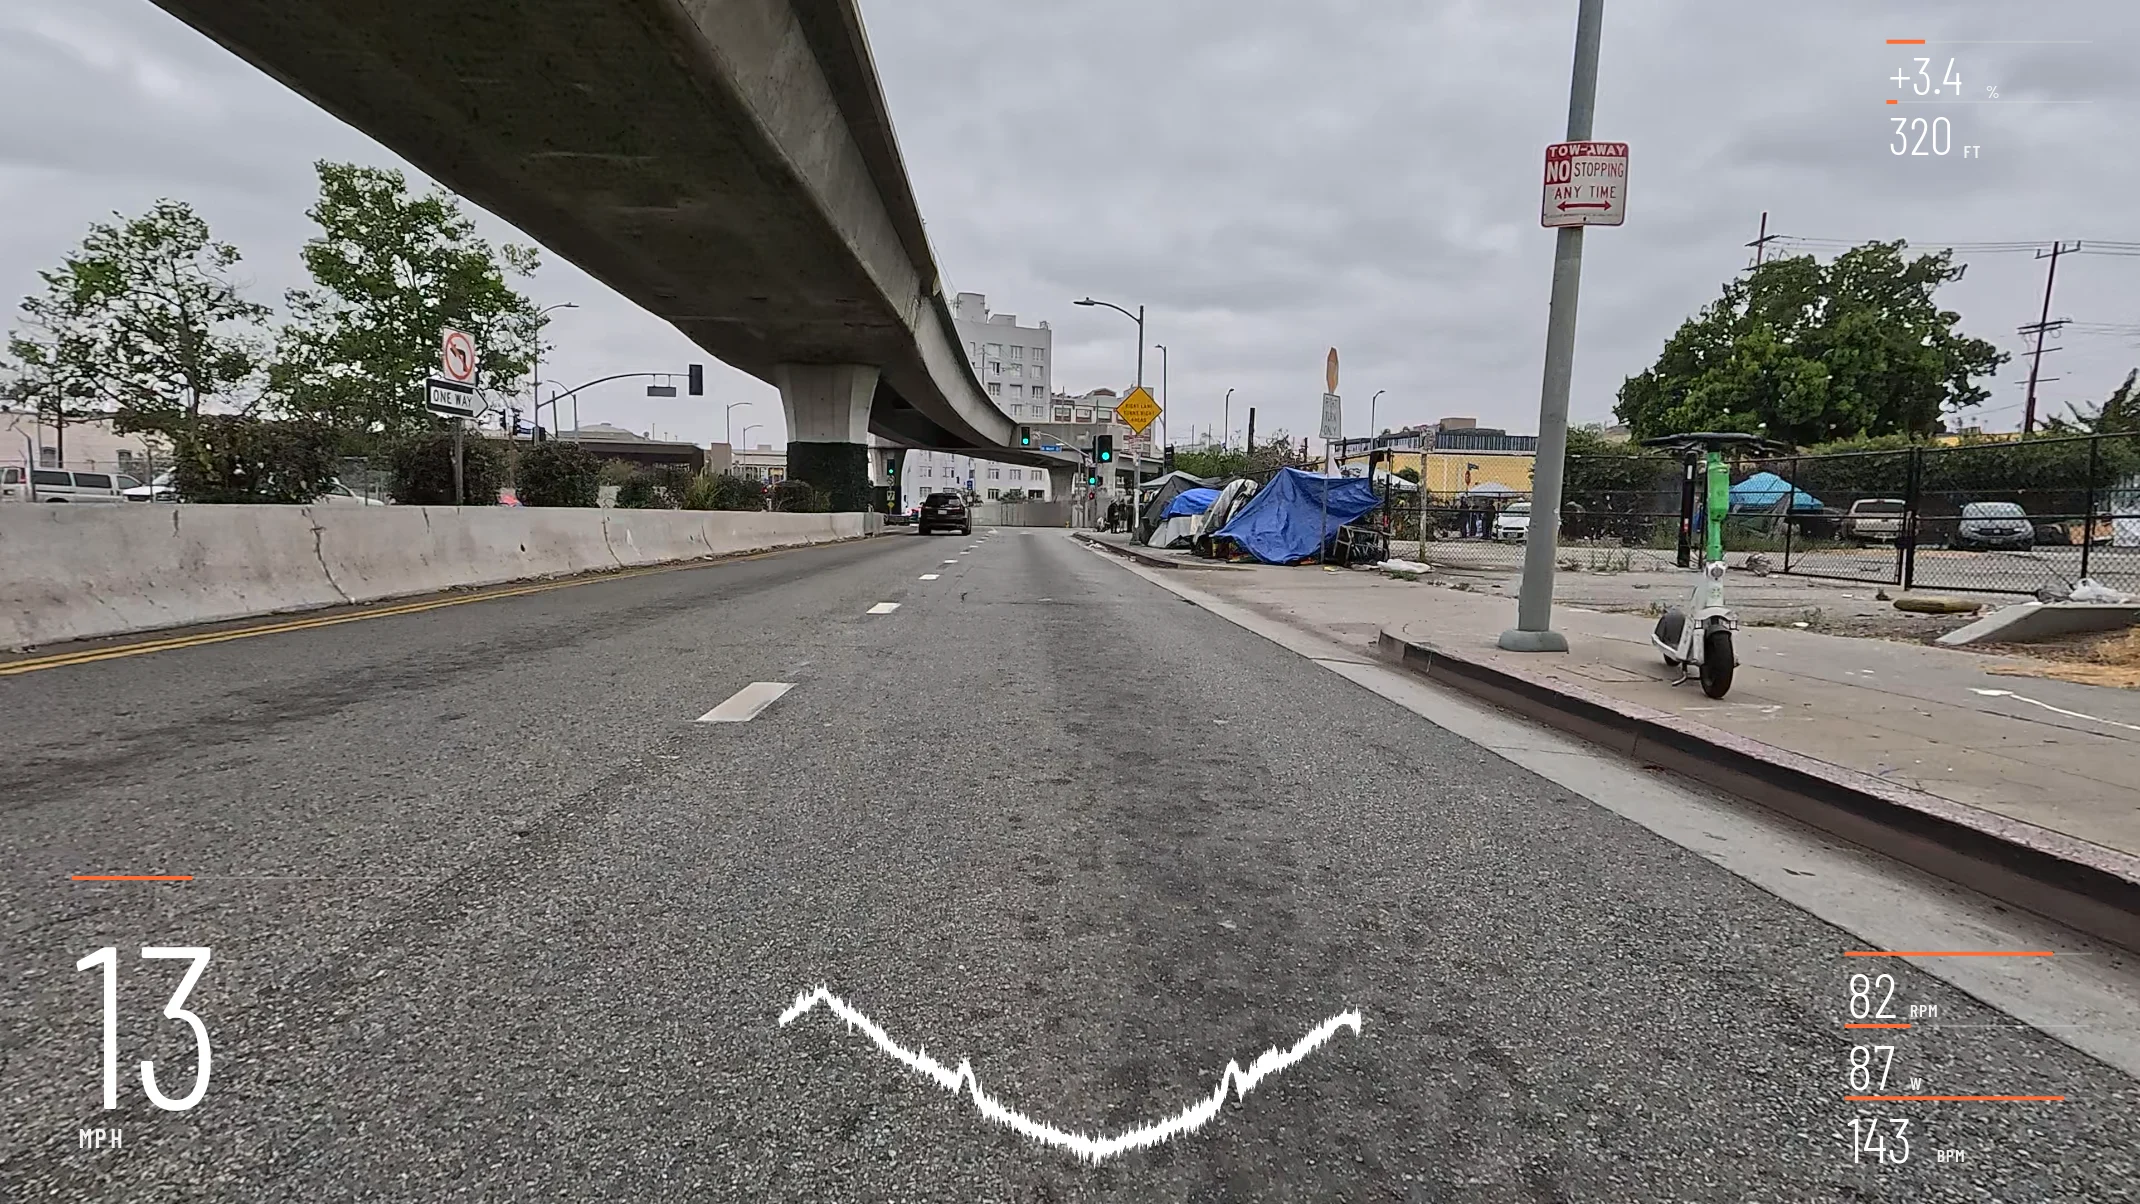
A starter set of overlays is already on the video. Add more from the Overlays tab (there are around 70, from W/kg and normalized power to gradient and elevation graphs), drag them into place with Edit layout, and pick a theme for all of them at once. The same frame in three themes:
The step-by-step version, with screenshots of each click, is in the quick start.
06Export the video
Choose File › Export Video… or press ⌘ E (Ctrl E on Windows). Pick a format 1 and quality 2, then click Export 3.
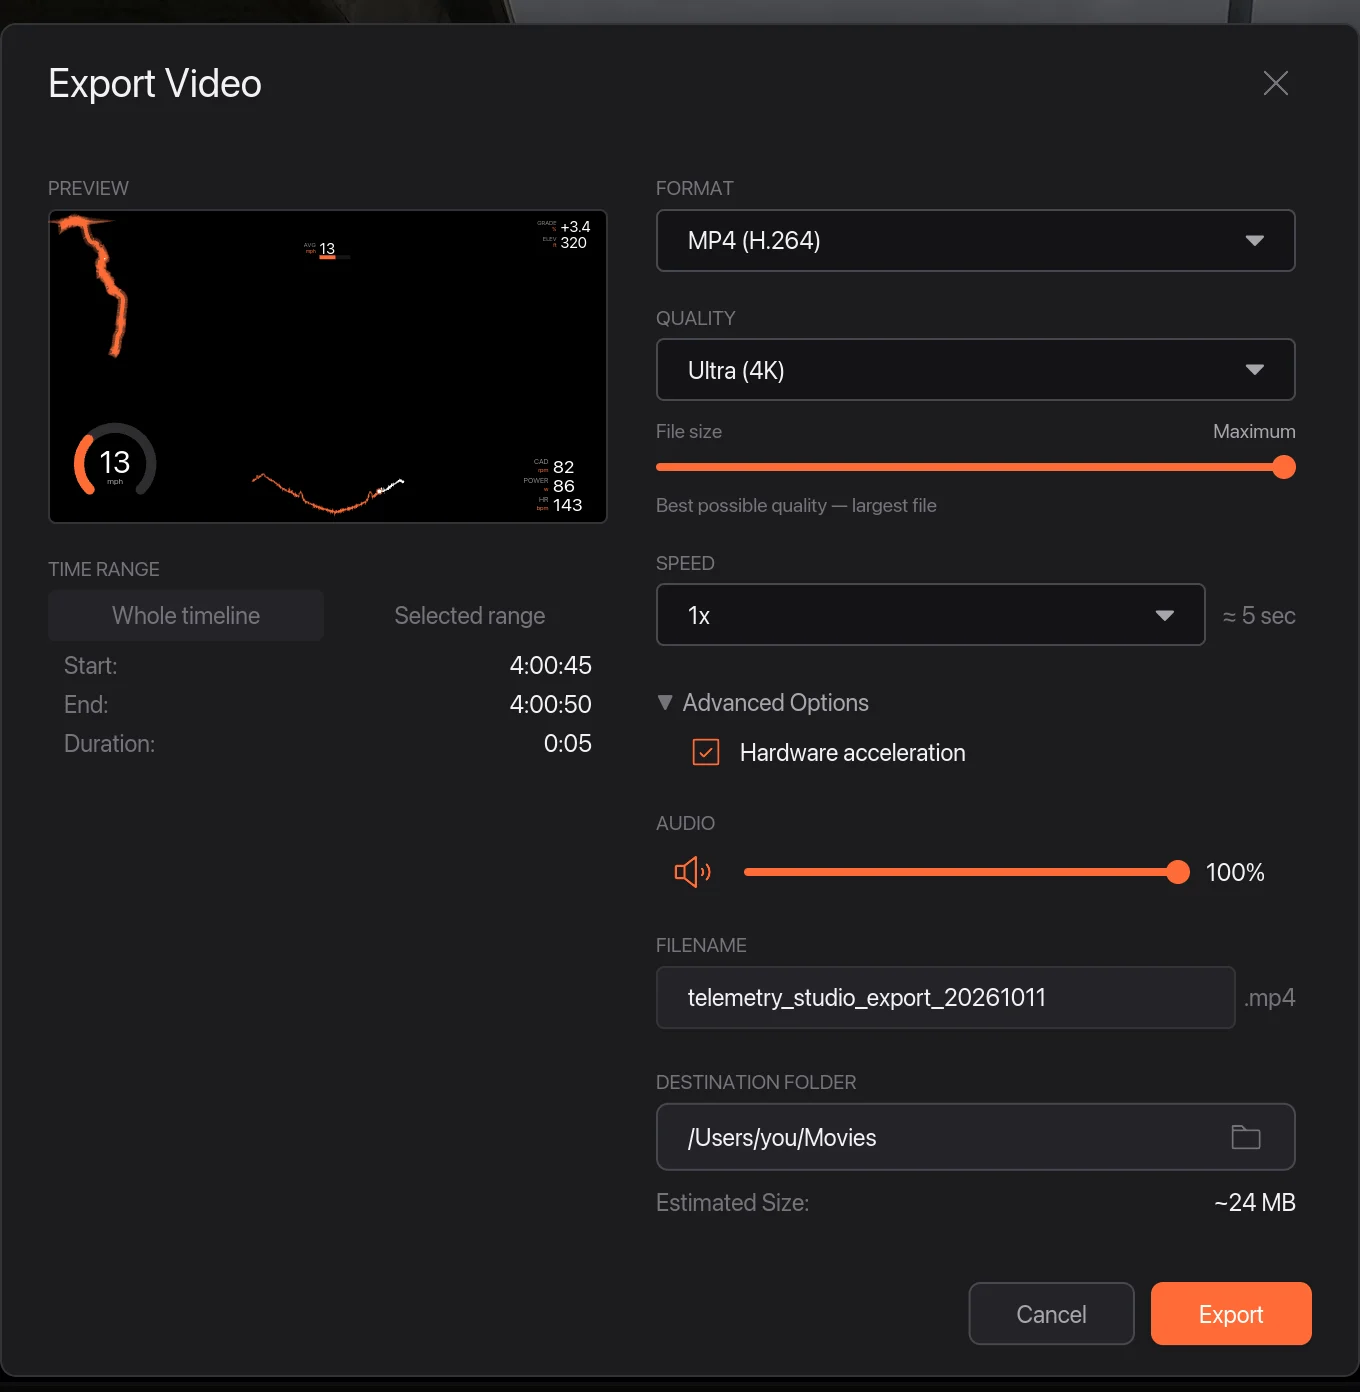
- MP4 (H.264) plays everywhere: Strava, Instagram, YouTube.
- Up to 4K. Choose 9:16 for Reels, Shorts and TikTok.
- Editing in Premiere Pro, Final Cut or DaVinci Resolve? Export only the overlay with a transparent background (ProRes 4444 or PNG frames) and put it on top of your edit.
If something looks wrong
- No power or heart rate overlay: the FIT file has no data for it. Check the sensor was paired during the ride, or that you didn't pick a GPX file.
- Data is off by a few seconds: the GoPro's clock was wrong. Use Sync to Map or nudge it by keyboard (see step 4).
- Can't open a .tcx file: TCX isn't supported. Export Original from Garmin Connect gives you the FIT file instead.
Other ways to do it
Garmin VIRB Edit did this for free, but it's no longer developed. See what to use instead of VIRB Edit. Telemetry Overlay is the other popular paid tool; here's how it compares. Filming in 360? Read the Insta360 guide.
More guides
- Garmin VIRB Edit alternative: what to use in 2026
- Telemetry Studio vs Telemetry Overlay: an honest comparison
- DashWare alternative: data overlays for your video in 2026
- How to add a telemetry overlay to Insta360 360 video
- How to add pace and heart rate to your running video
- How to add lap times, speed and g-force to track day video
- Telemetry Studio vs RaceRender: an honest comparison
- How to add DJI flight data (altitude, distance, route) to drone video
- How to add speed and altitude to ski and snowboard video
- All guides and comparisons
- Frequently asked questions