
Make your first overlay video
Open your ride video, add your ride data, put your speed on it, and export it. About five minutes.
You need:
- Telemetry Studio (download it here)
- Your ride video
- The FIT or GPX file of the same ride, from Garmin Connect, Wahoo, or whichever app you record with. FIT files carry the most: speed, location and elevation, plus heart rate, power and cadence if your sensors recorded them.
01Open your video
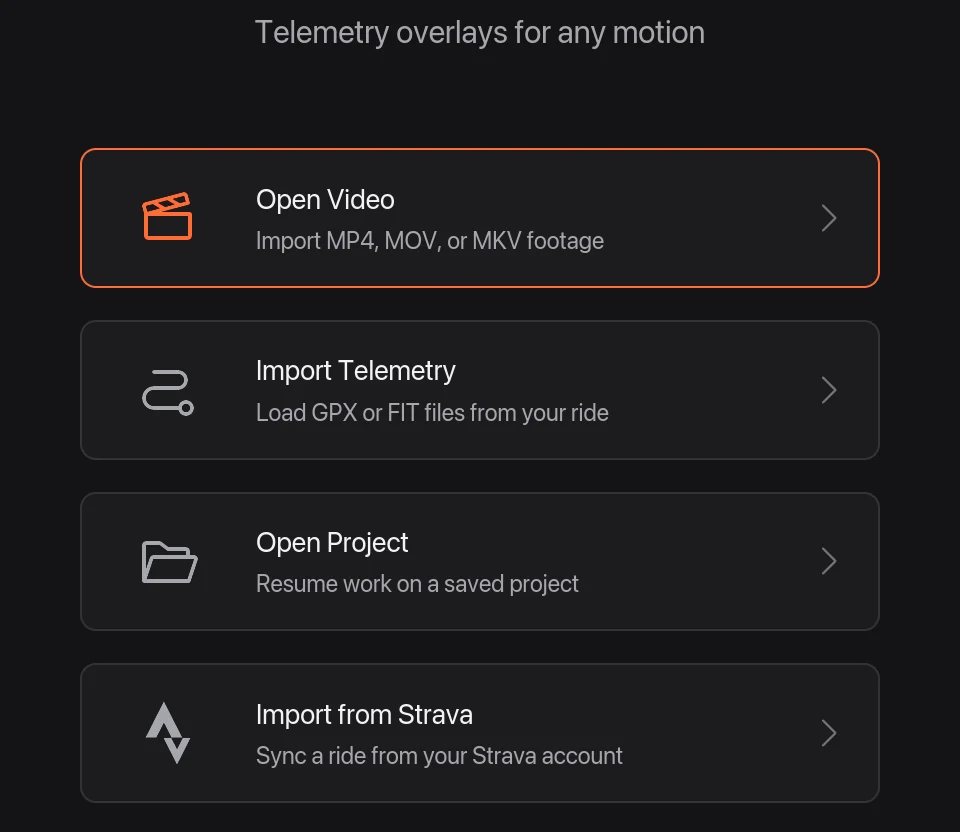
On the welcome screen, click Open Video 1 and choose your video. MP4, MOV and MKV files all work.
02Add your ride file
In the Files tab, click Add Telemetry 1 and choose your FIT or GPX file, or drag the file onto the Telemetry row of the timeline 2.
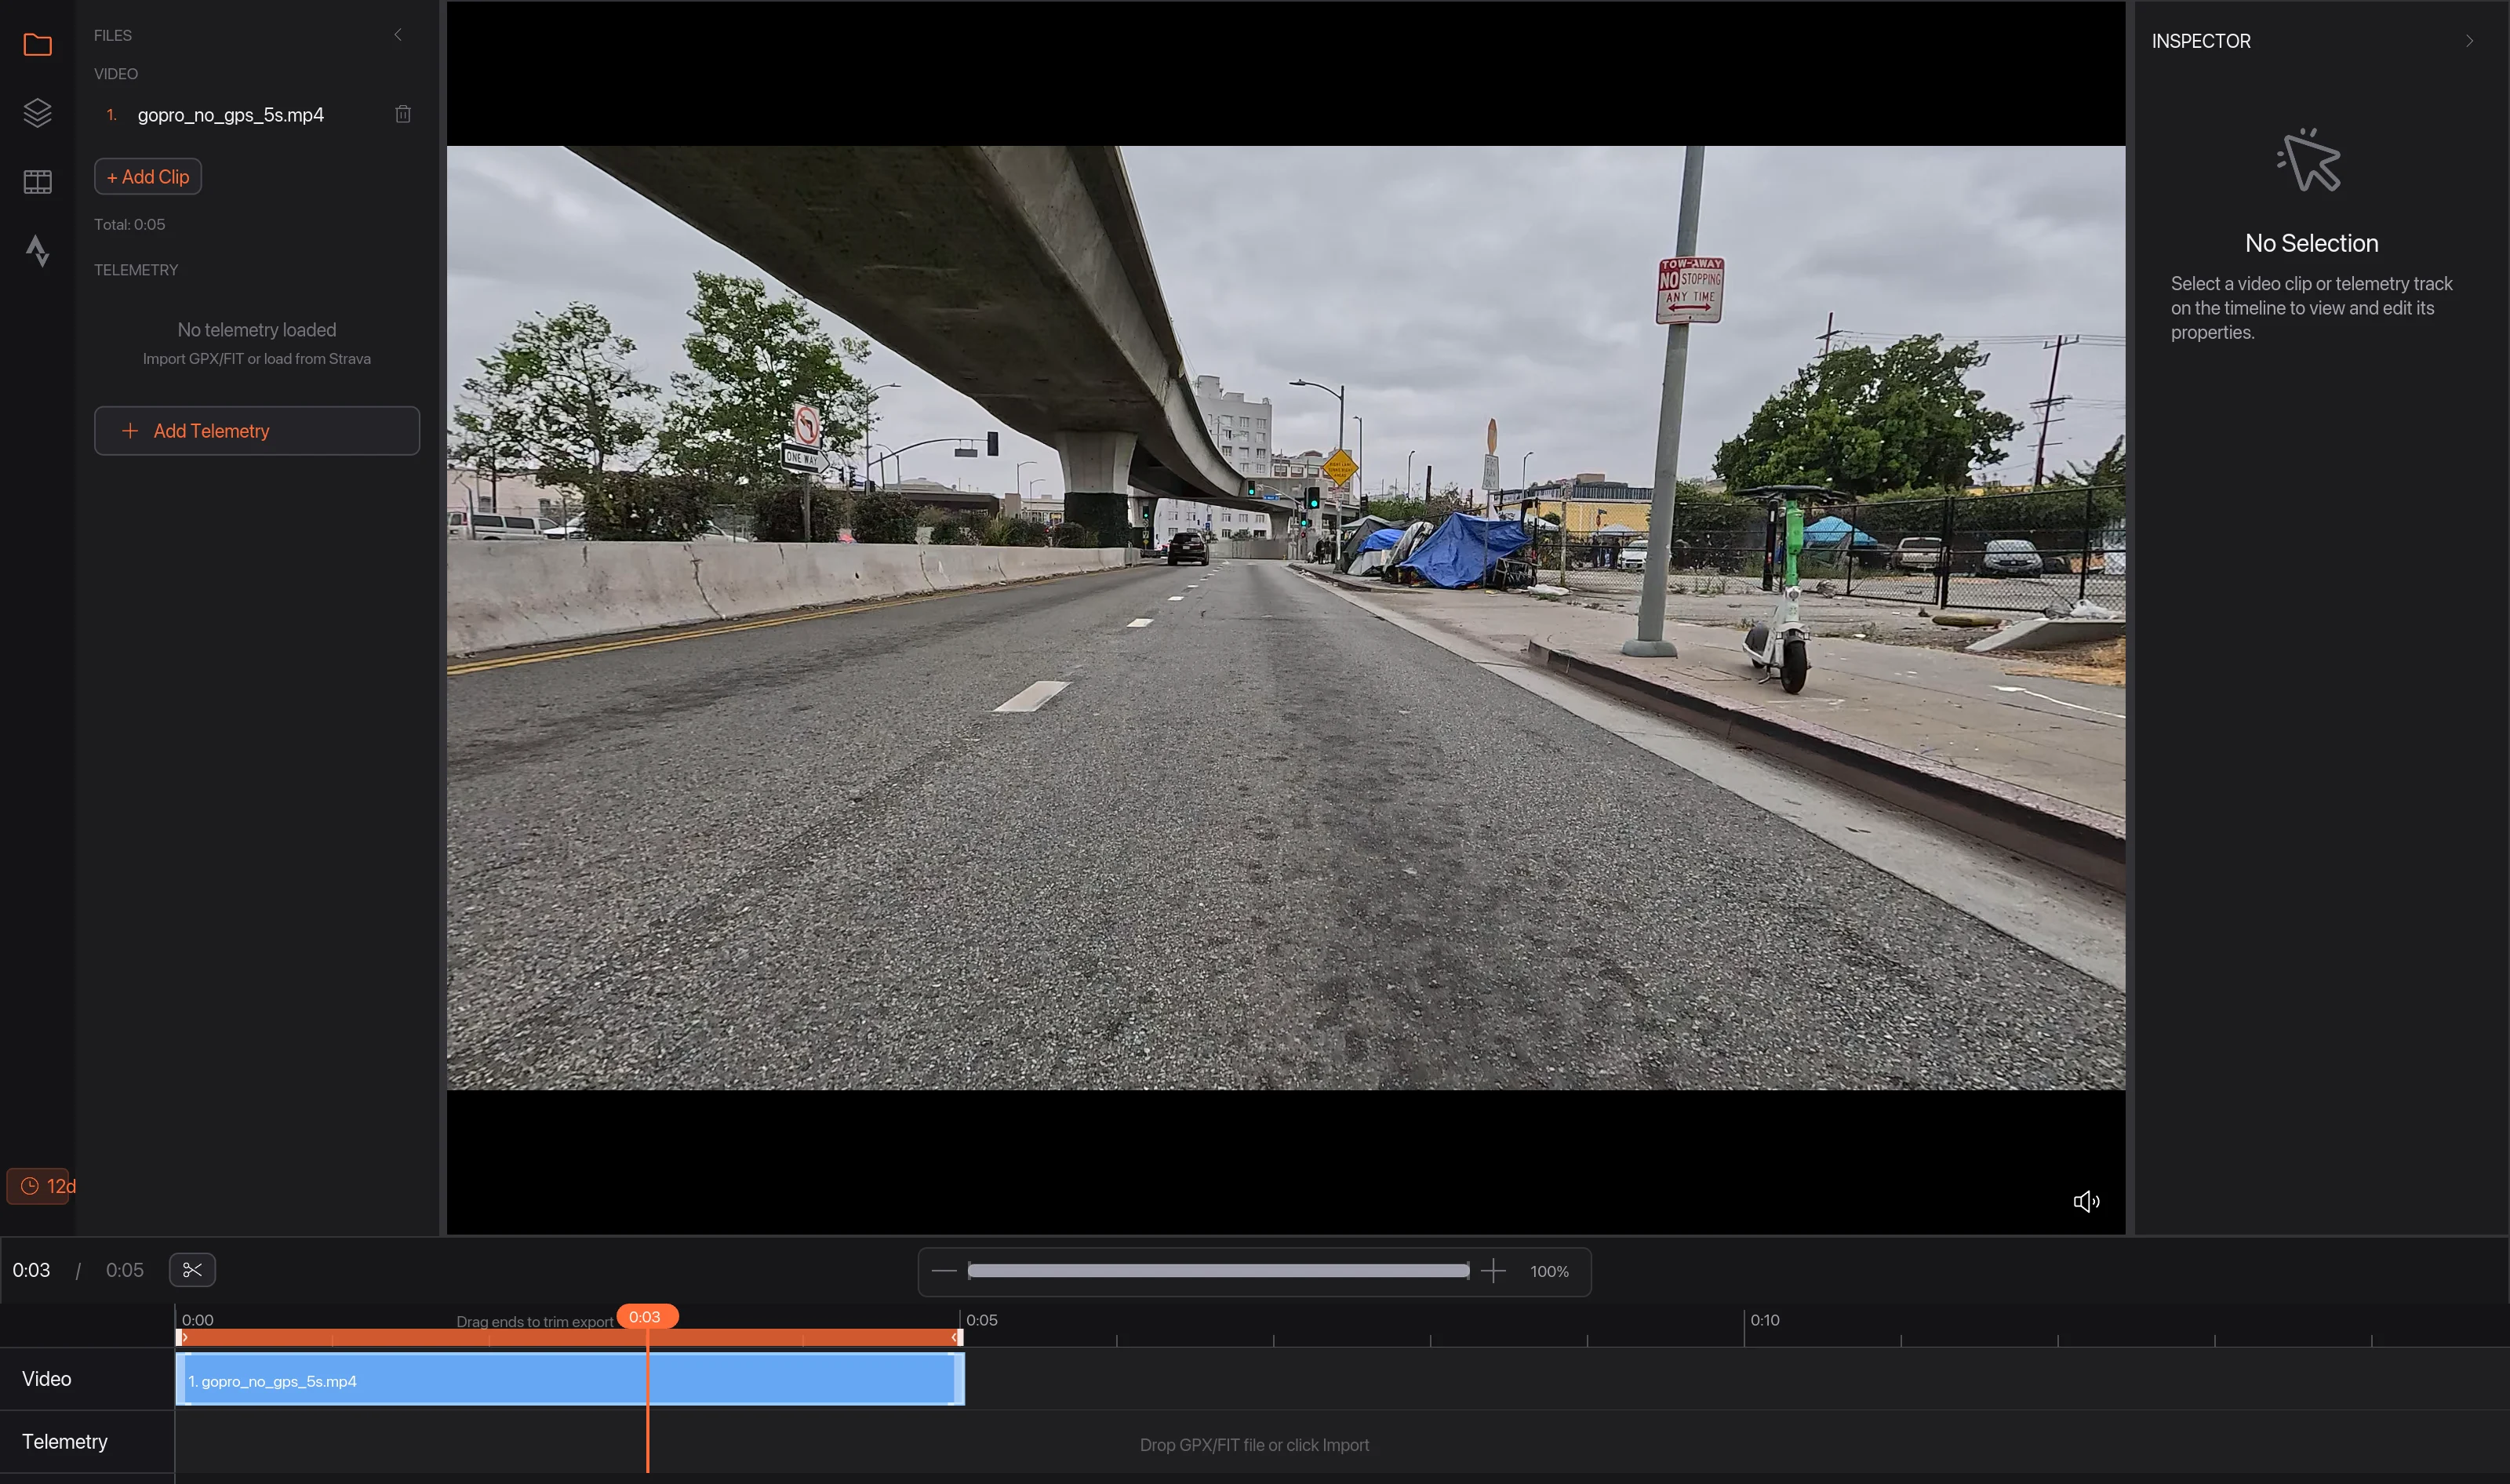
03Line it up with your video
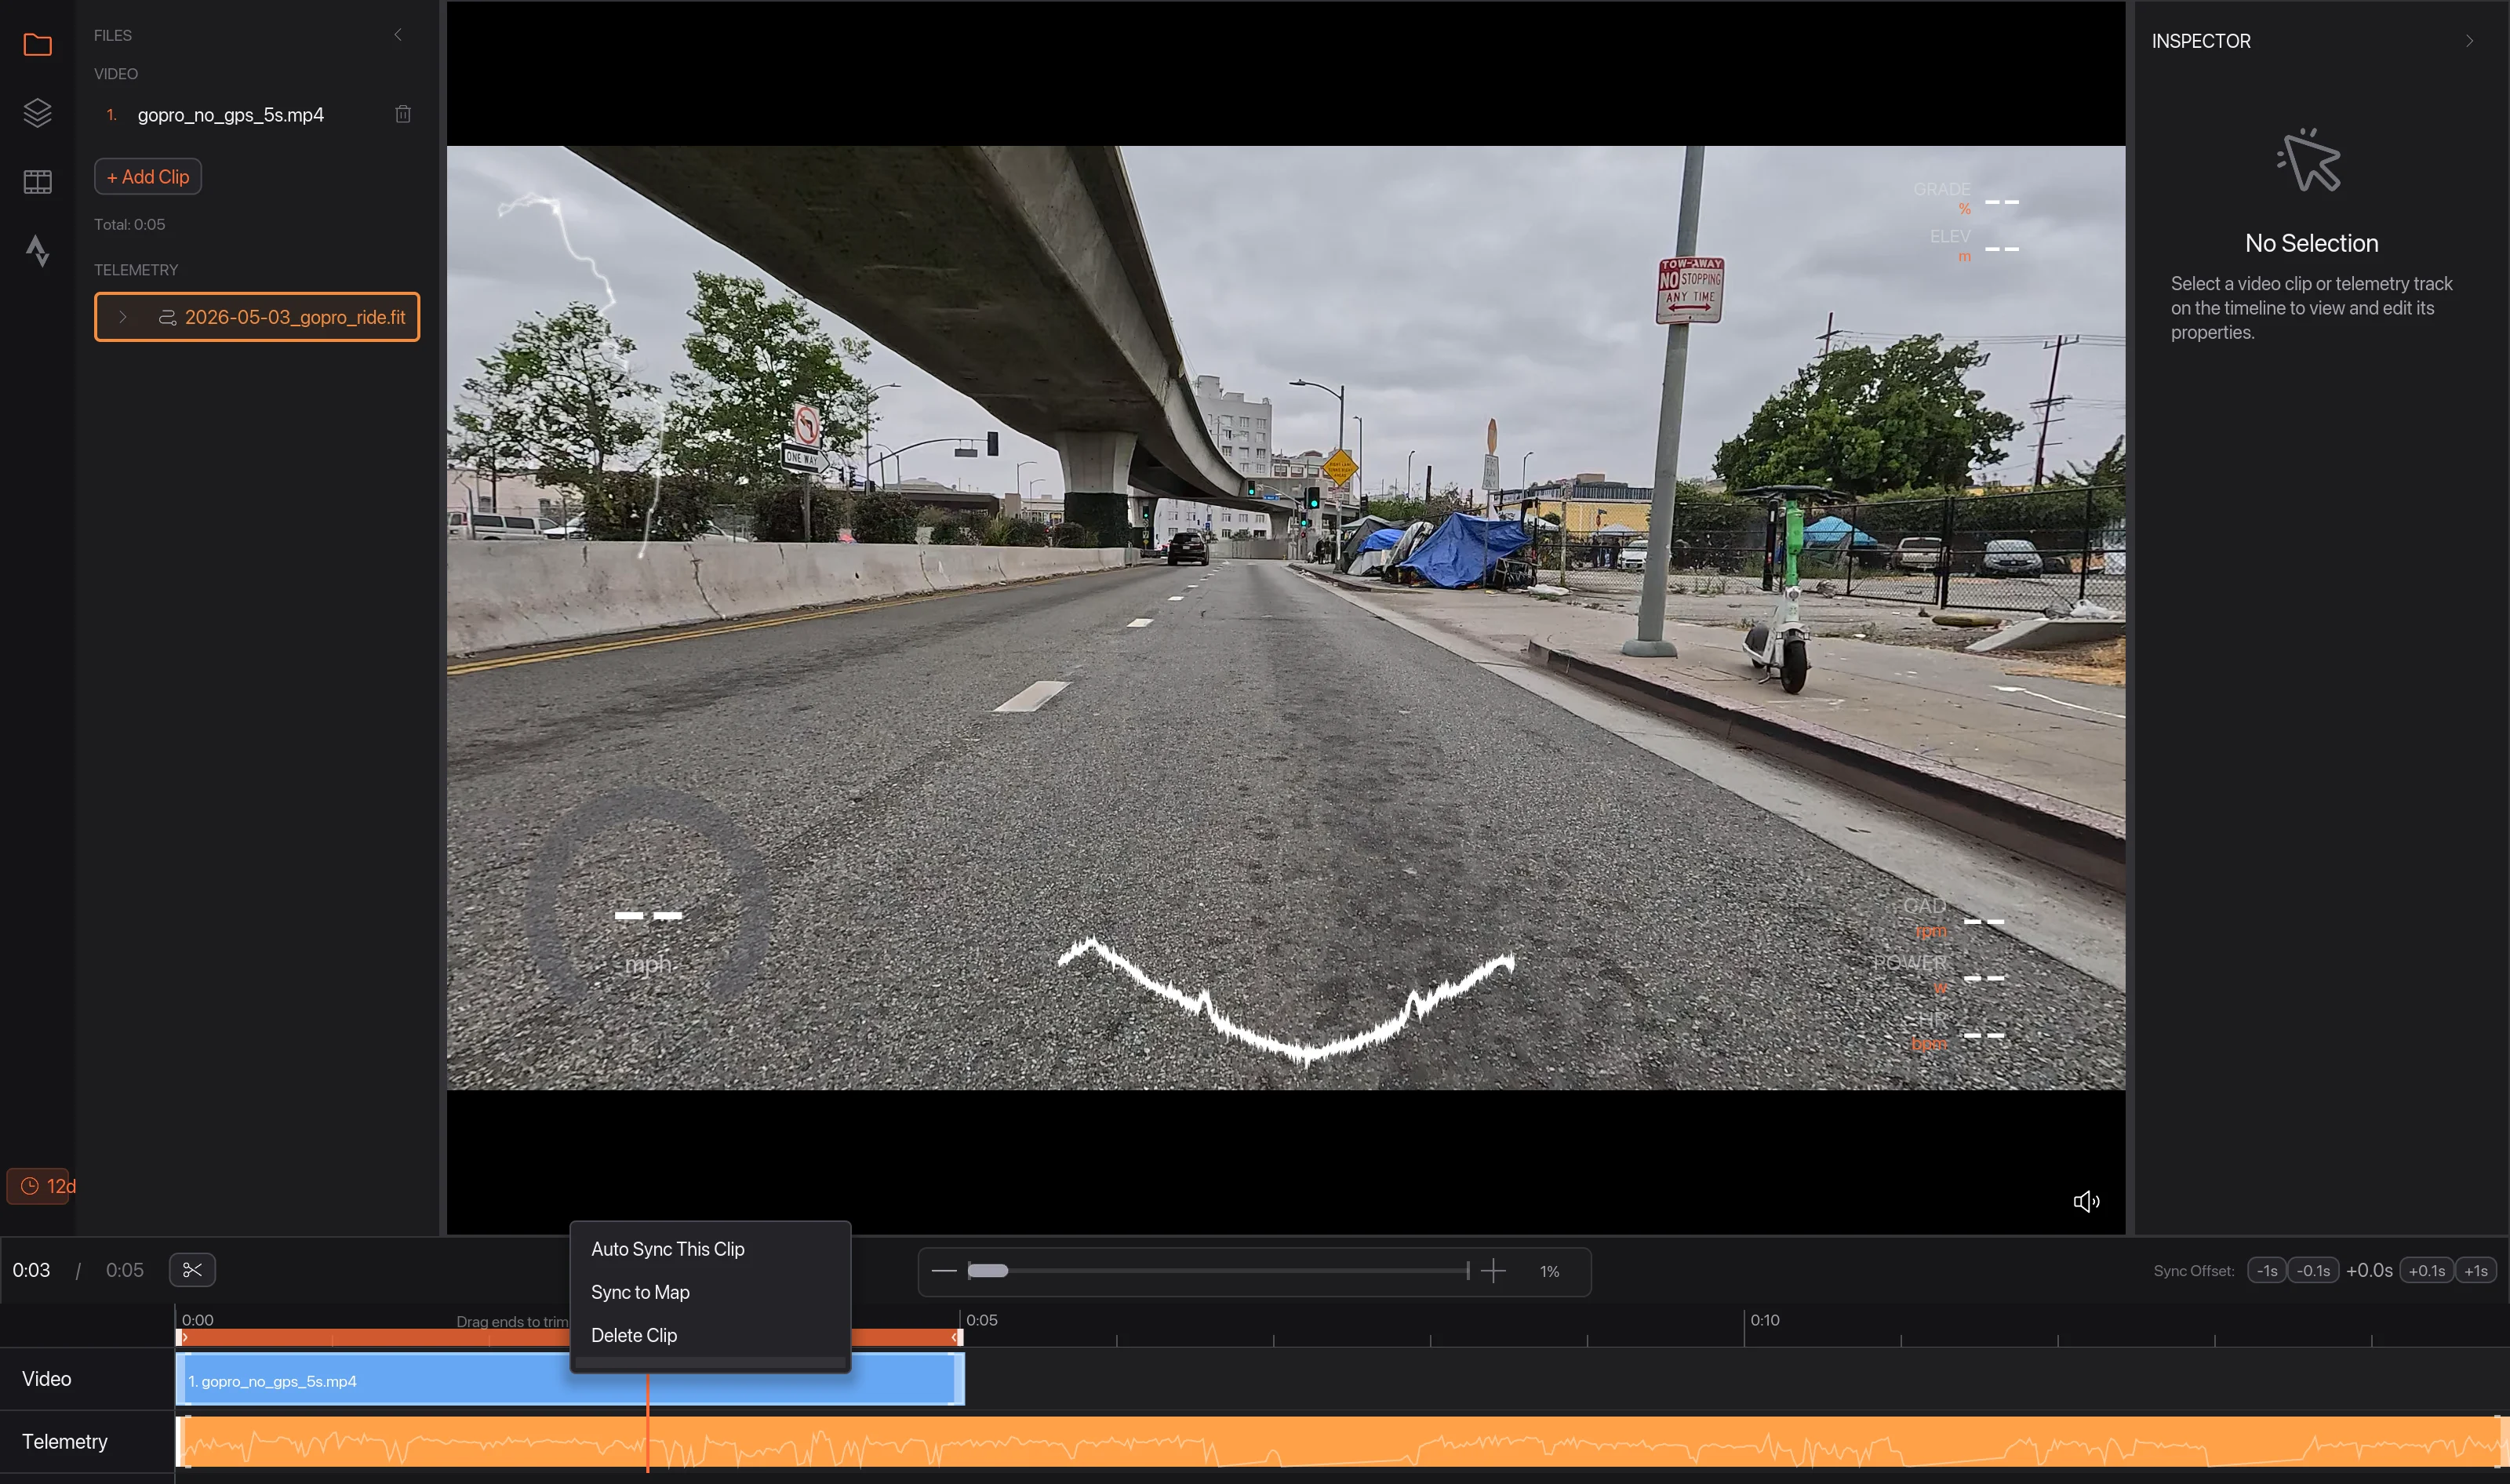
Your ride file appears under Telemetry 1, but its start is pinned to the start of your video, so the numbers aren't right yet. Right-click your clip on the timeline and choose Auto Sync This Clip 2.
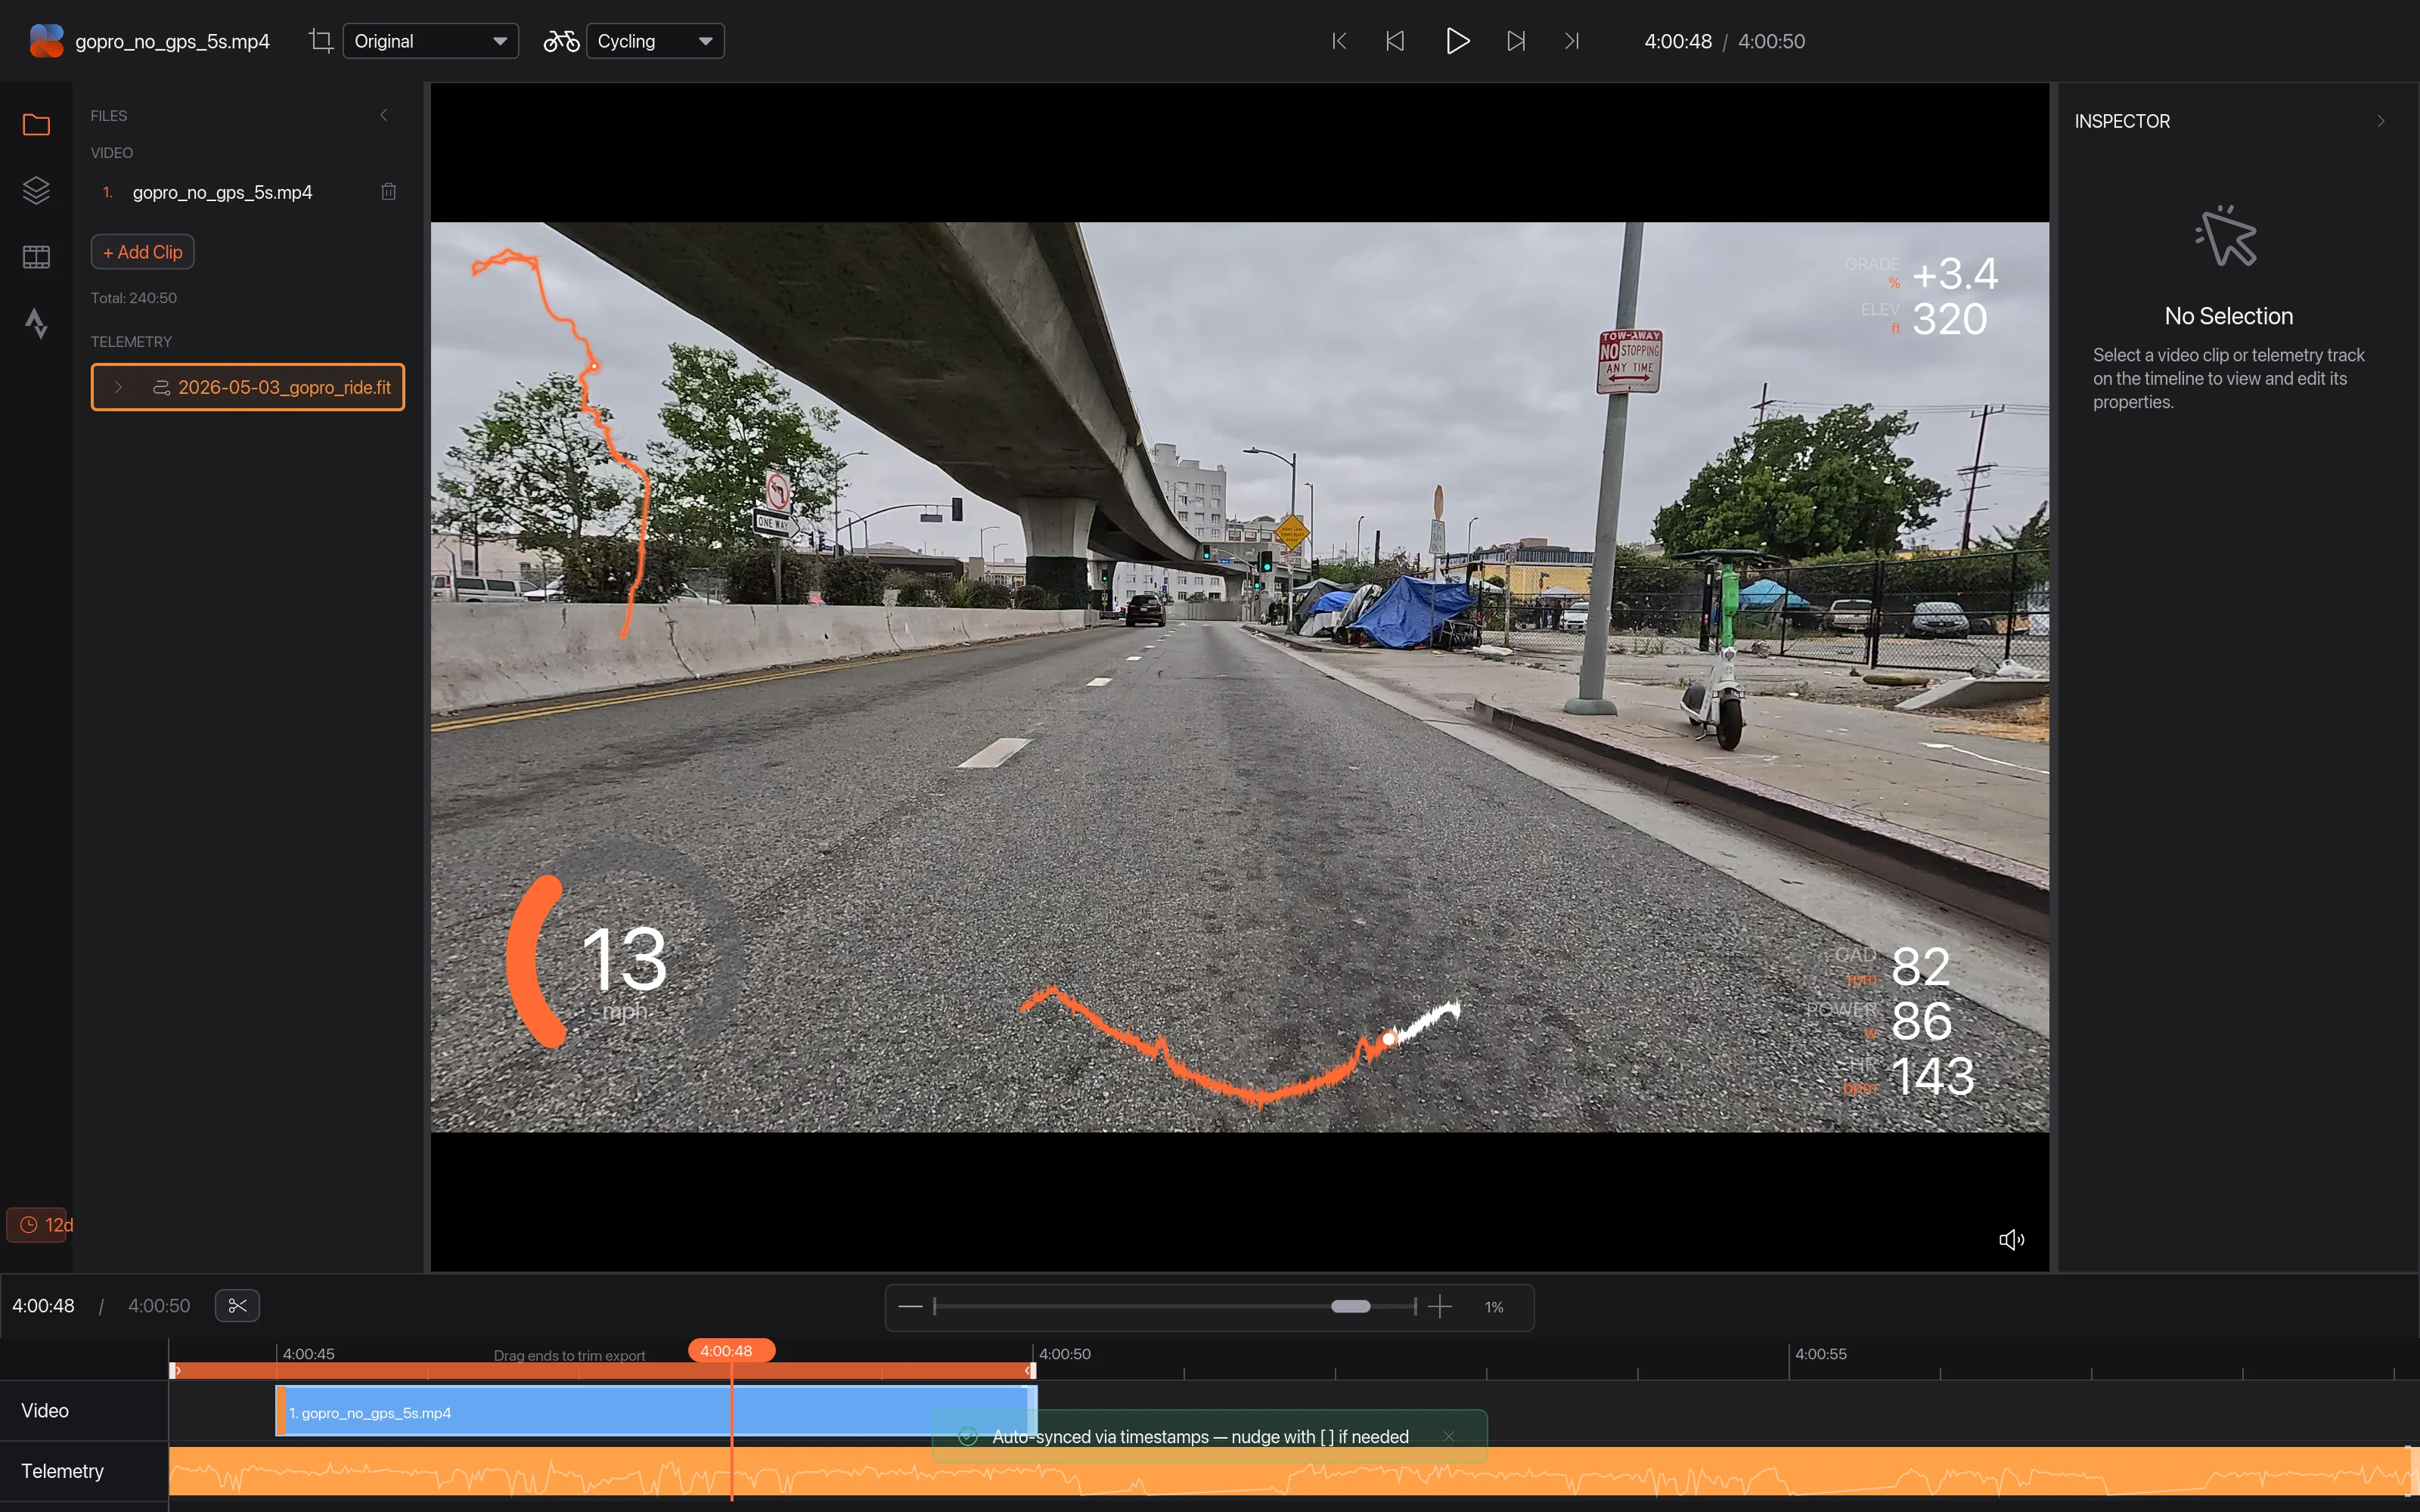
Telemetry Studio finds the moment you filmed using the time your camera recorded. A message confirms it 1, and your speed 2 and other data 3 now match the video.
04Add an overlay
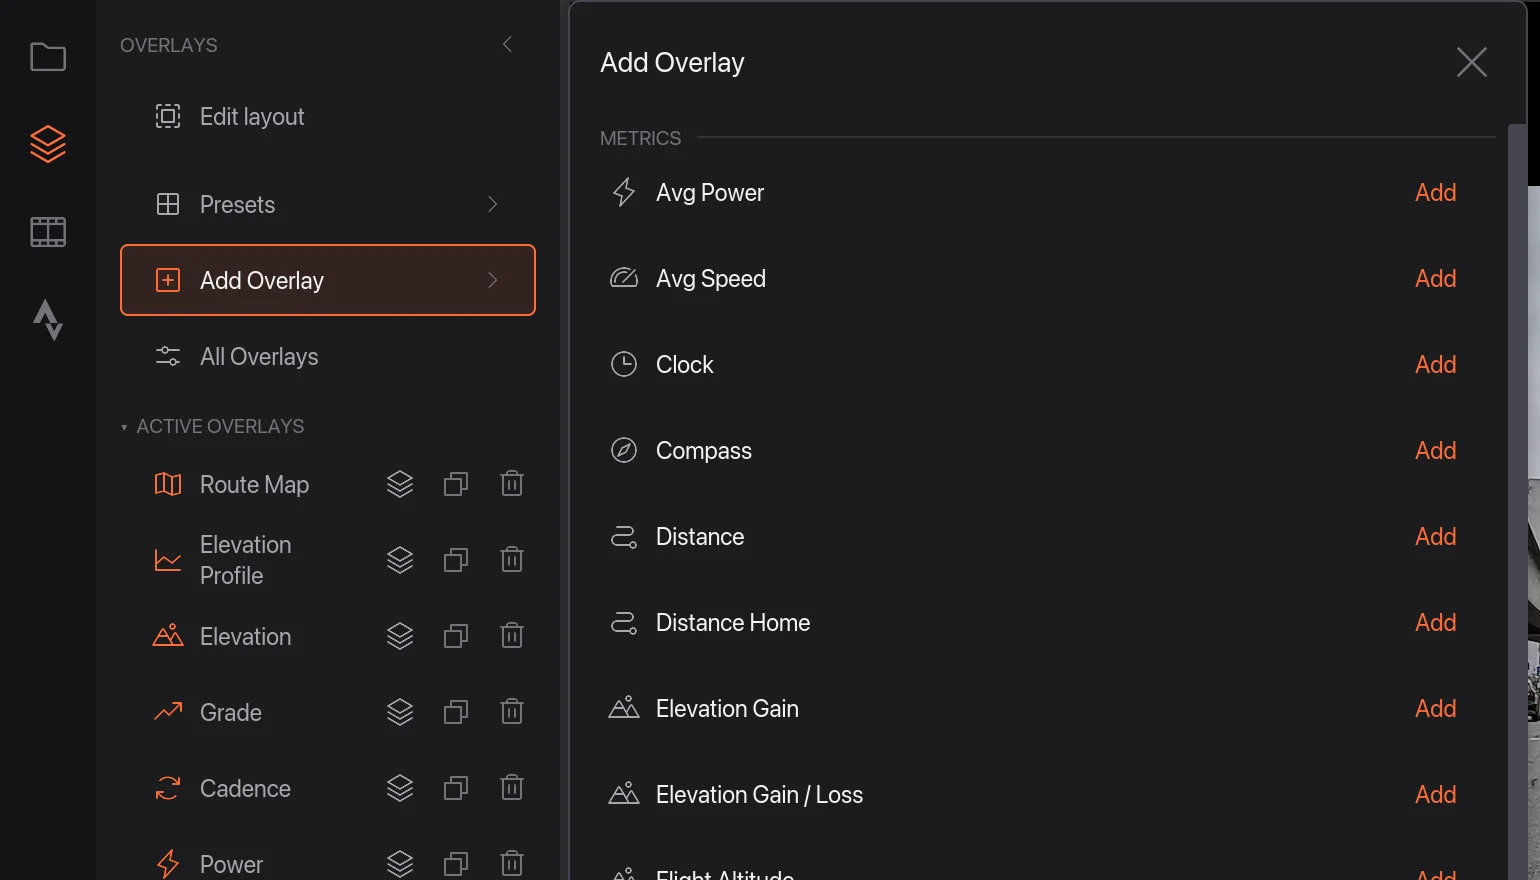
A starter set of overlays is already on your video. To add another, click the Overlays icon 1 in the strip on the left, then Add Overlay 2. Find the overlay you want and click Add on its row. Here we're adding Avg Speed 3.
05Check the new overlay
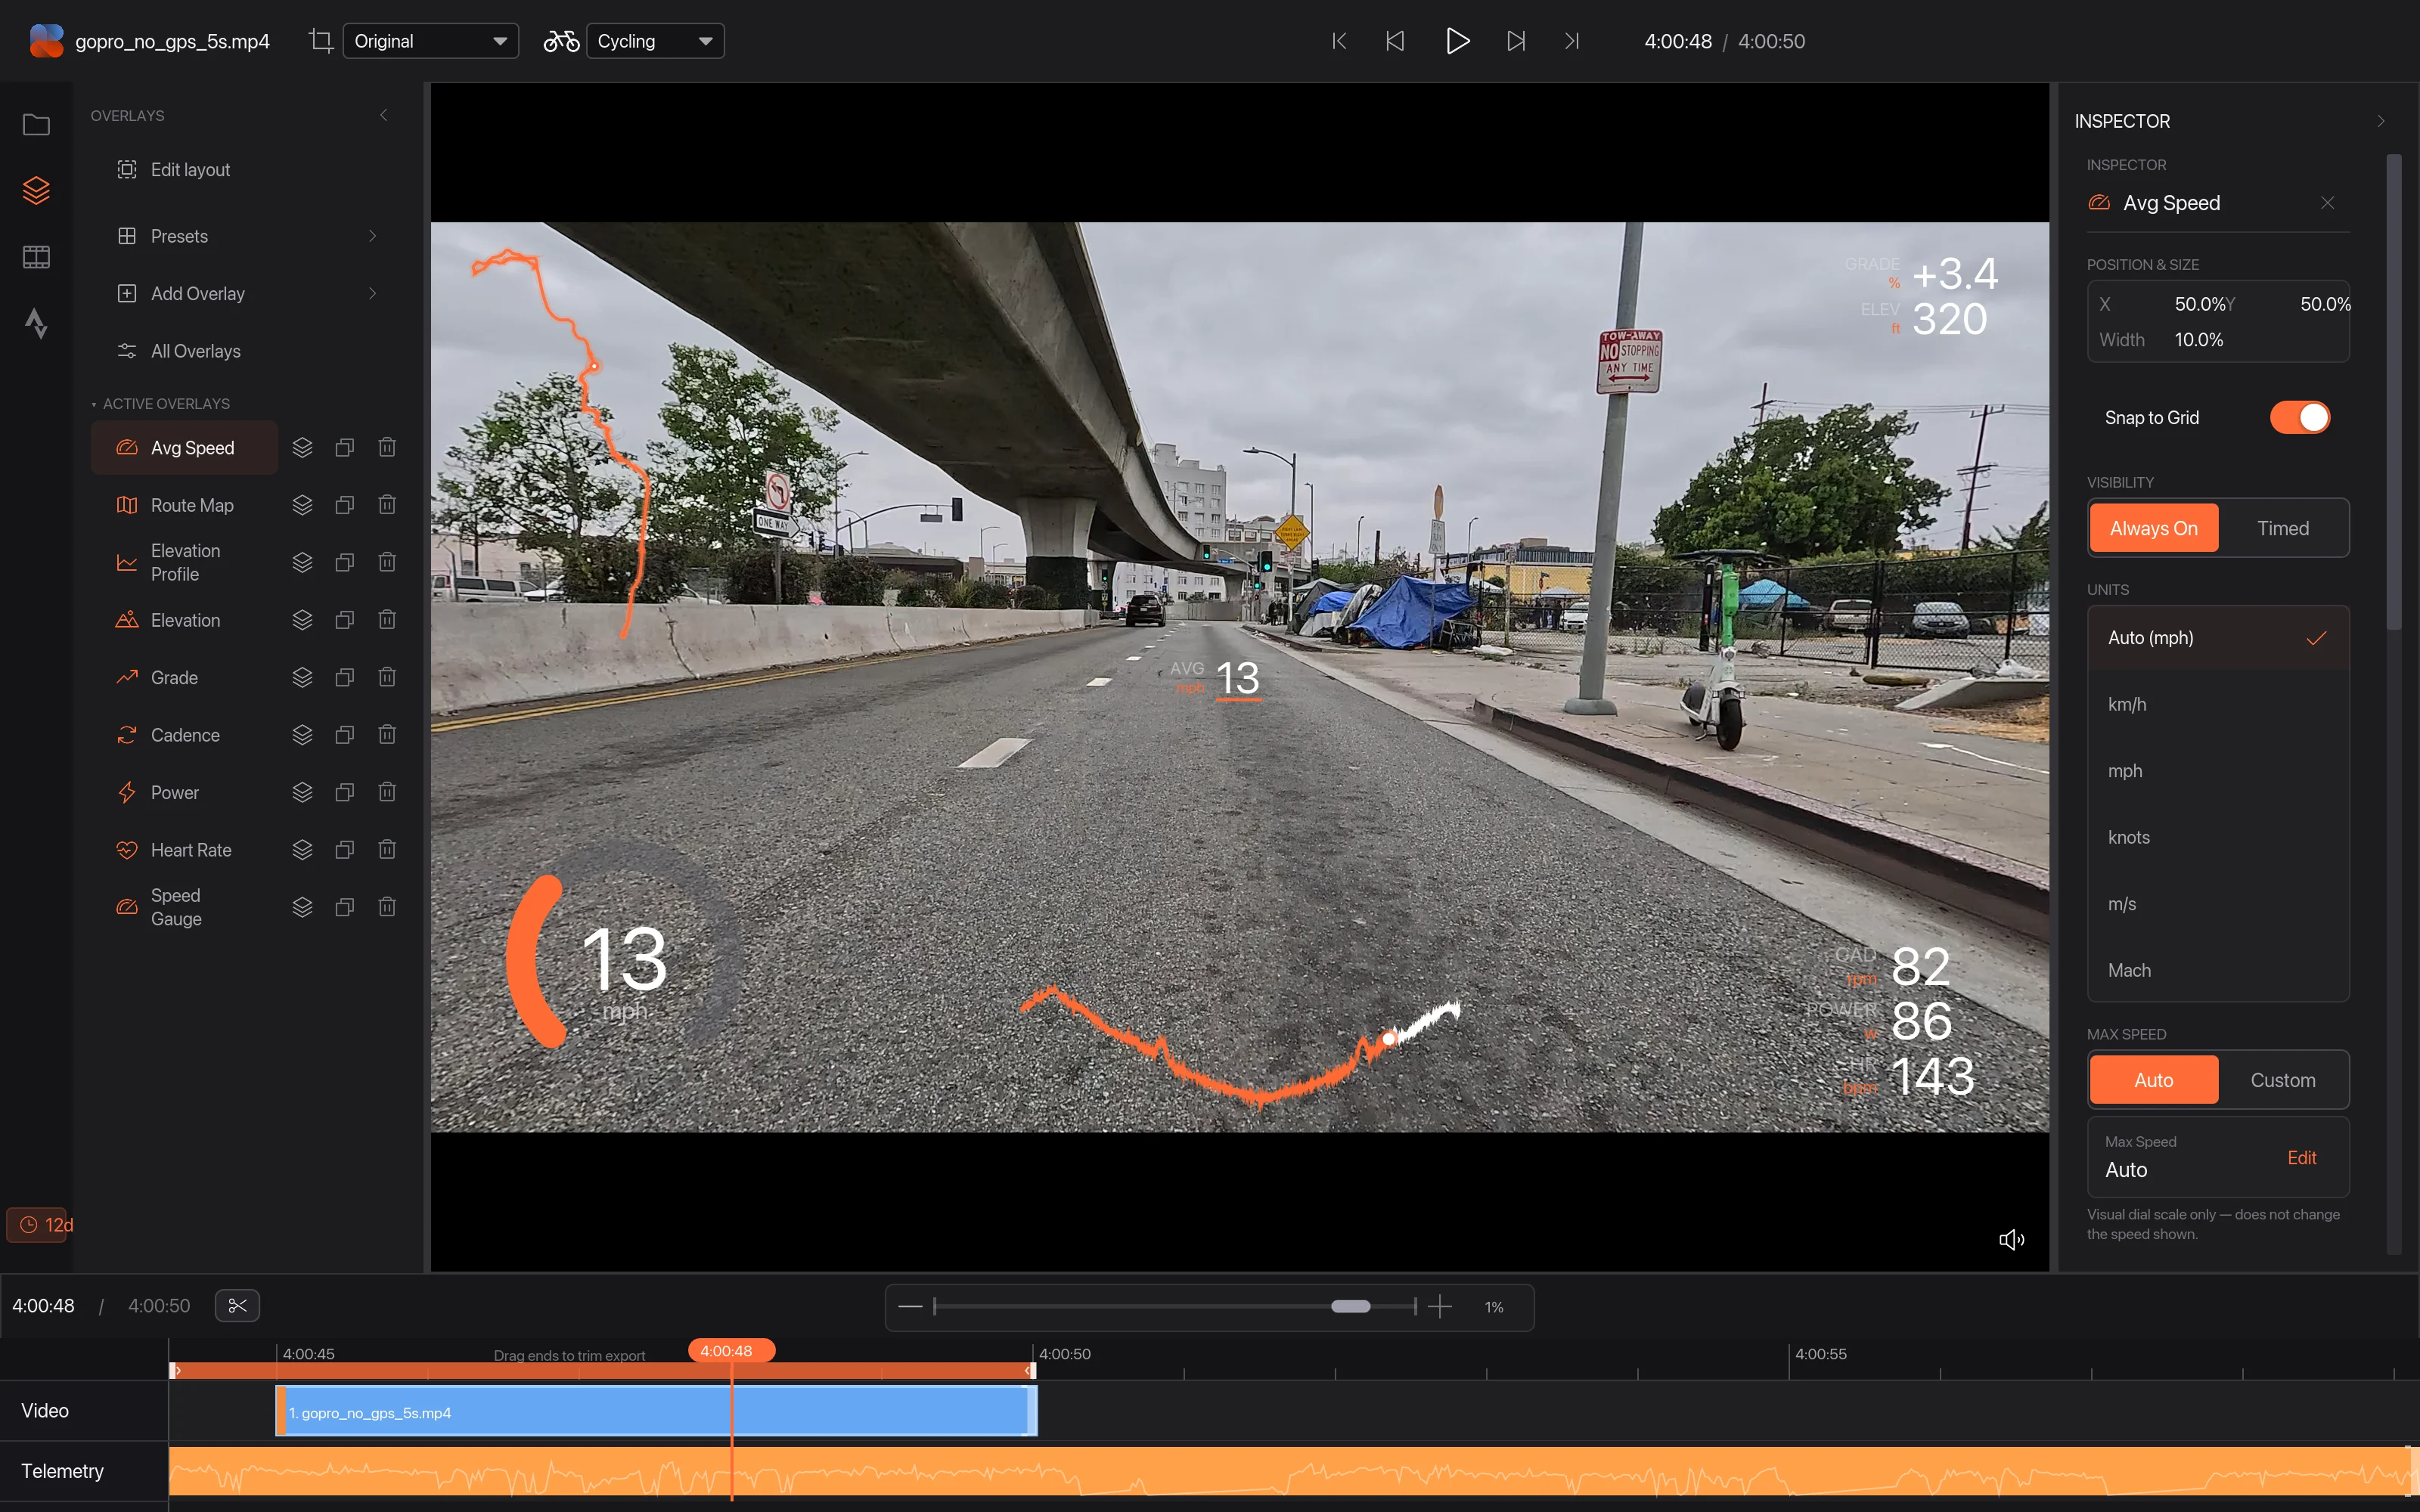
The new overlay is added to Active Overlays 1 and appears in the middle of the picture 2. The Inspector on the right 3 shows its settings: position, size, units and style.
06Move it into place
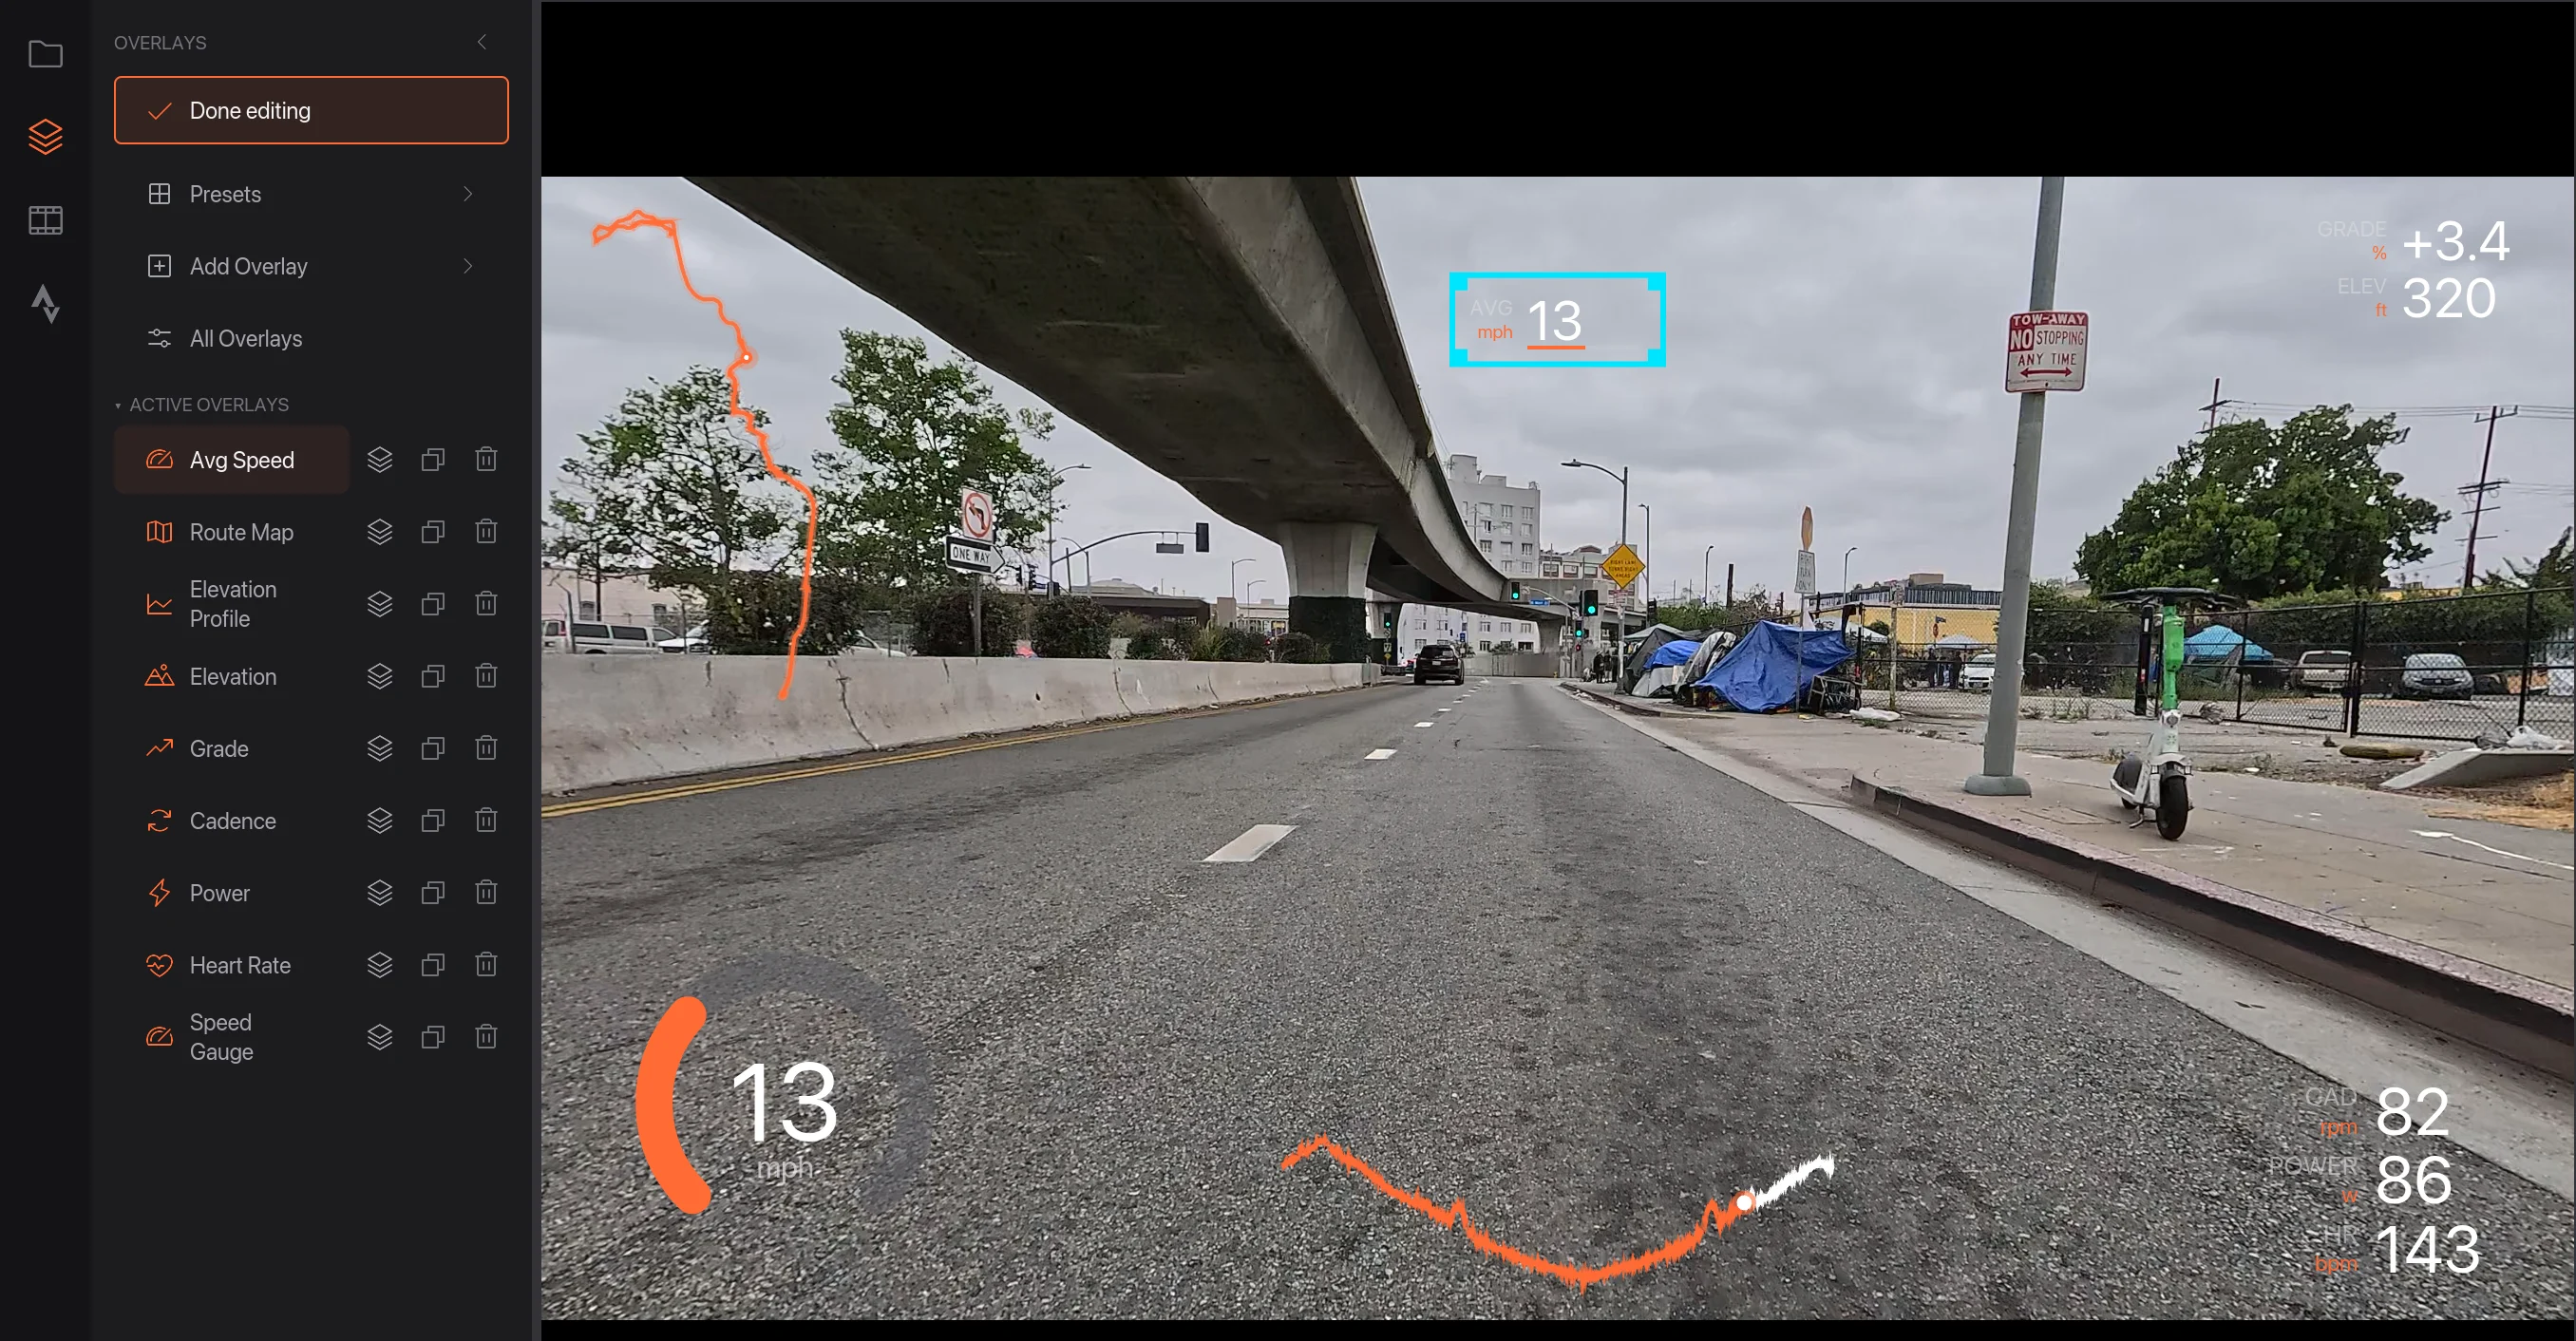
Click Edit layout at the top of the Overlays tab. While it reads Done editing 1, you can drag any overlay on the picture to move it, or drag its corners to resize it 2. Click Done editing when you're happy with the layout.
07Export your video
Choose File › Export Video… from the menu bar, or press ⌘ E on a Mac (Ctrl E on Windows). Pick a Format 1 and Quality 2, check the file name and folder, then click Export 3.
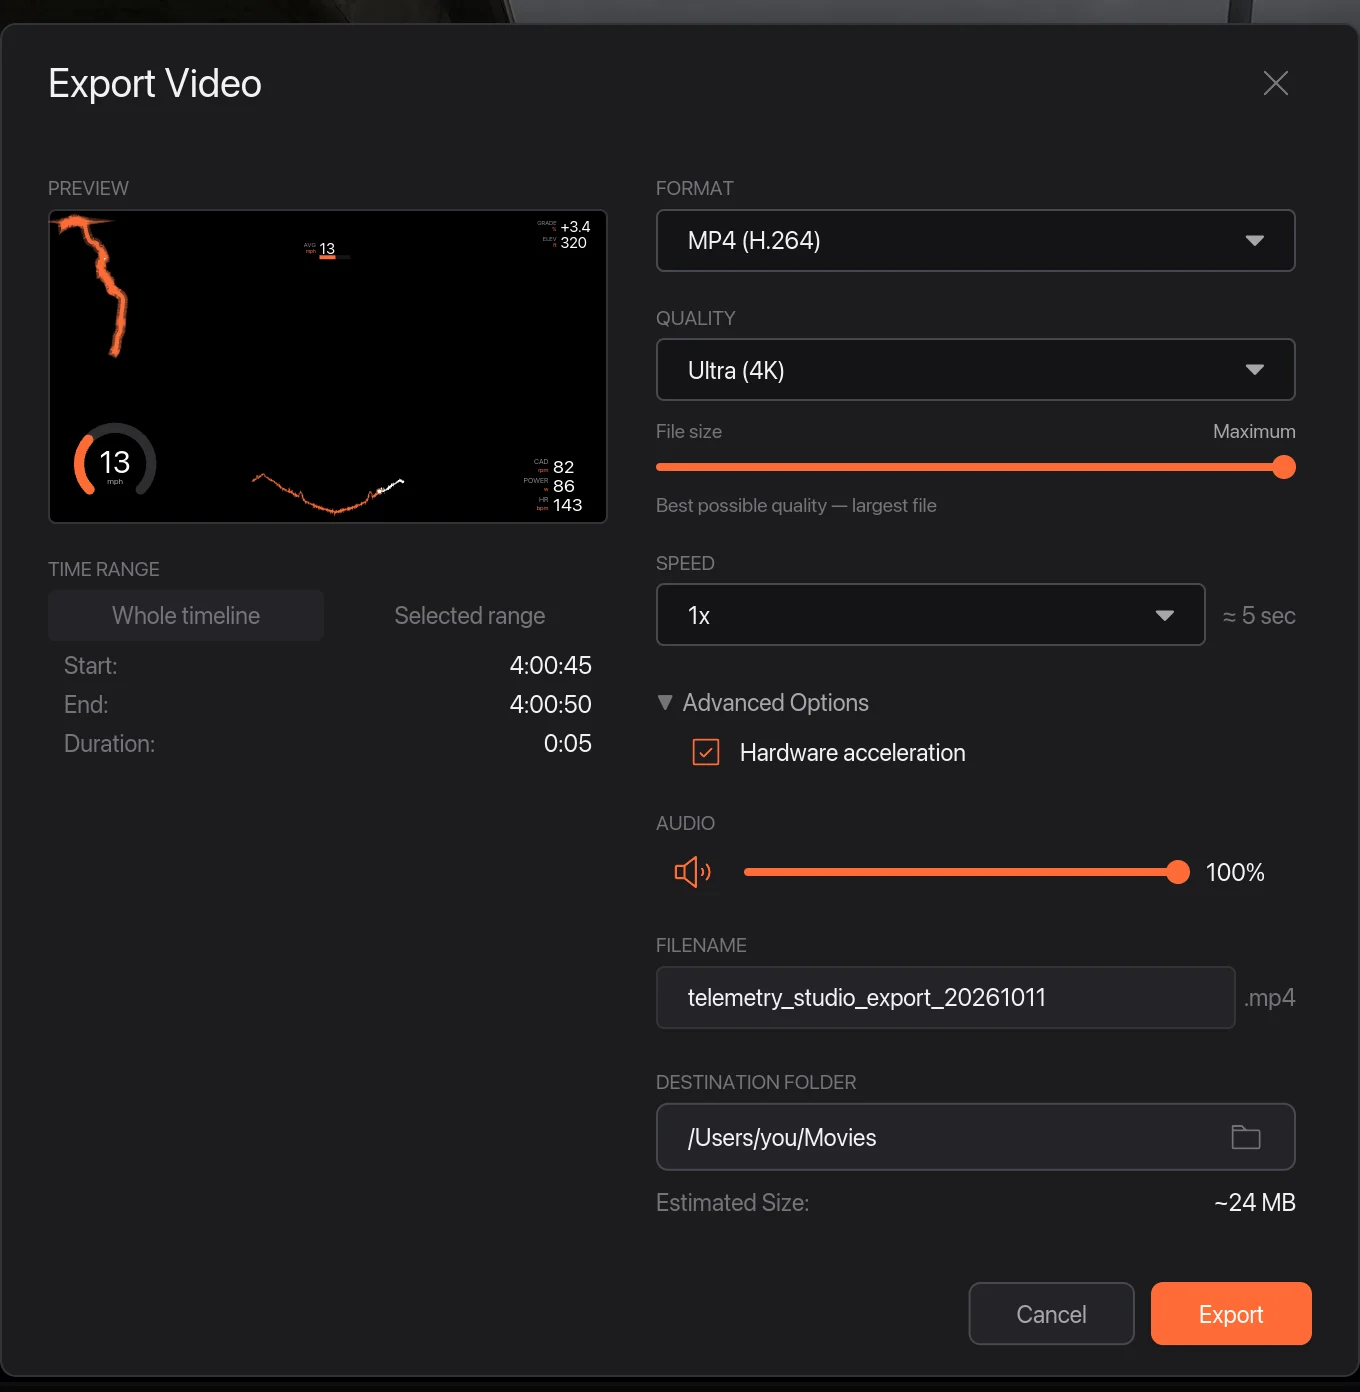
MP4 (H.264) plays everywhere and is the right choice for Strava, Instagram and YouTube. Only your video is exported, not the parts of the ride before or after it. When the export finishes, the app shows you where the file is.