Edit 360 video from your Insta360
Open your Insta360 recordings, aim the camera wherever you like after the ride, and add your ride data.
01Open your recording
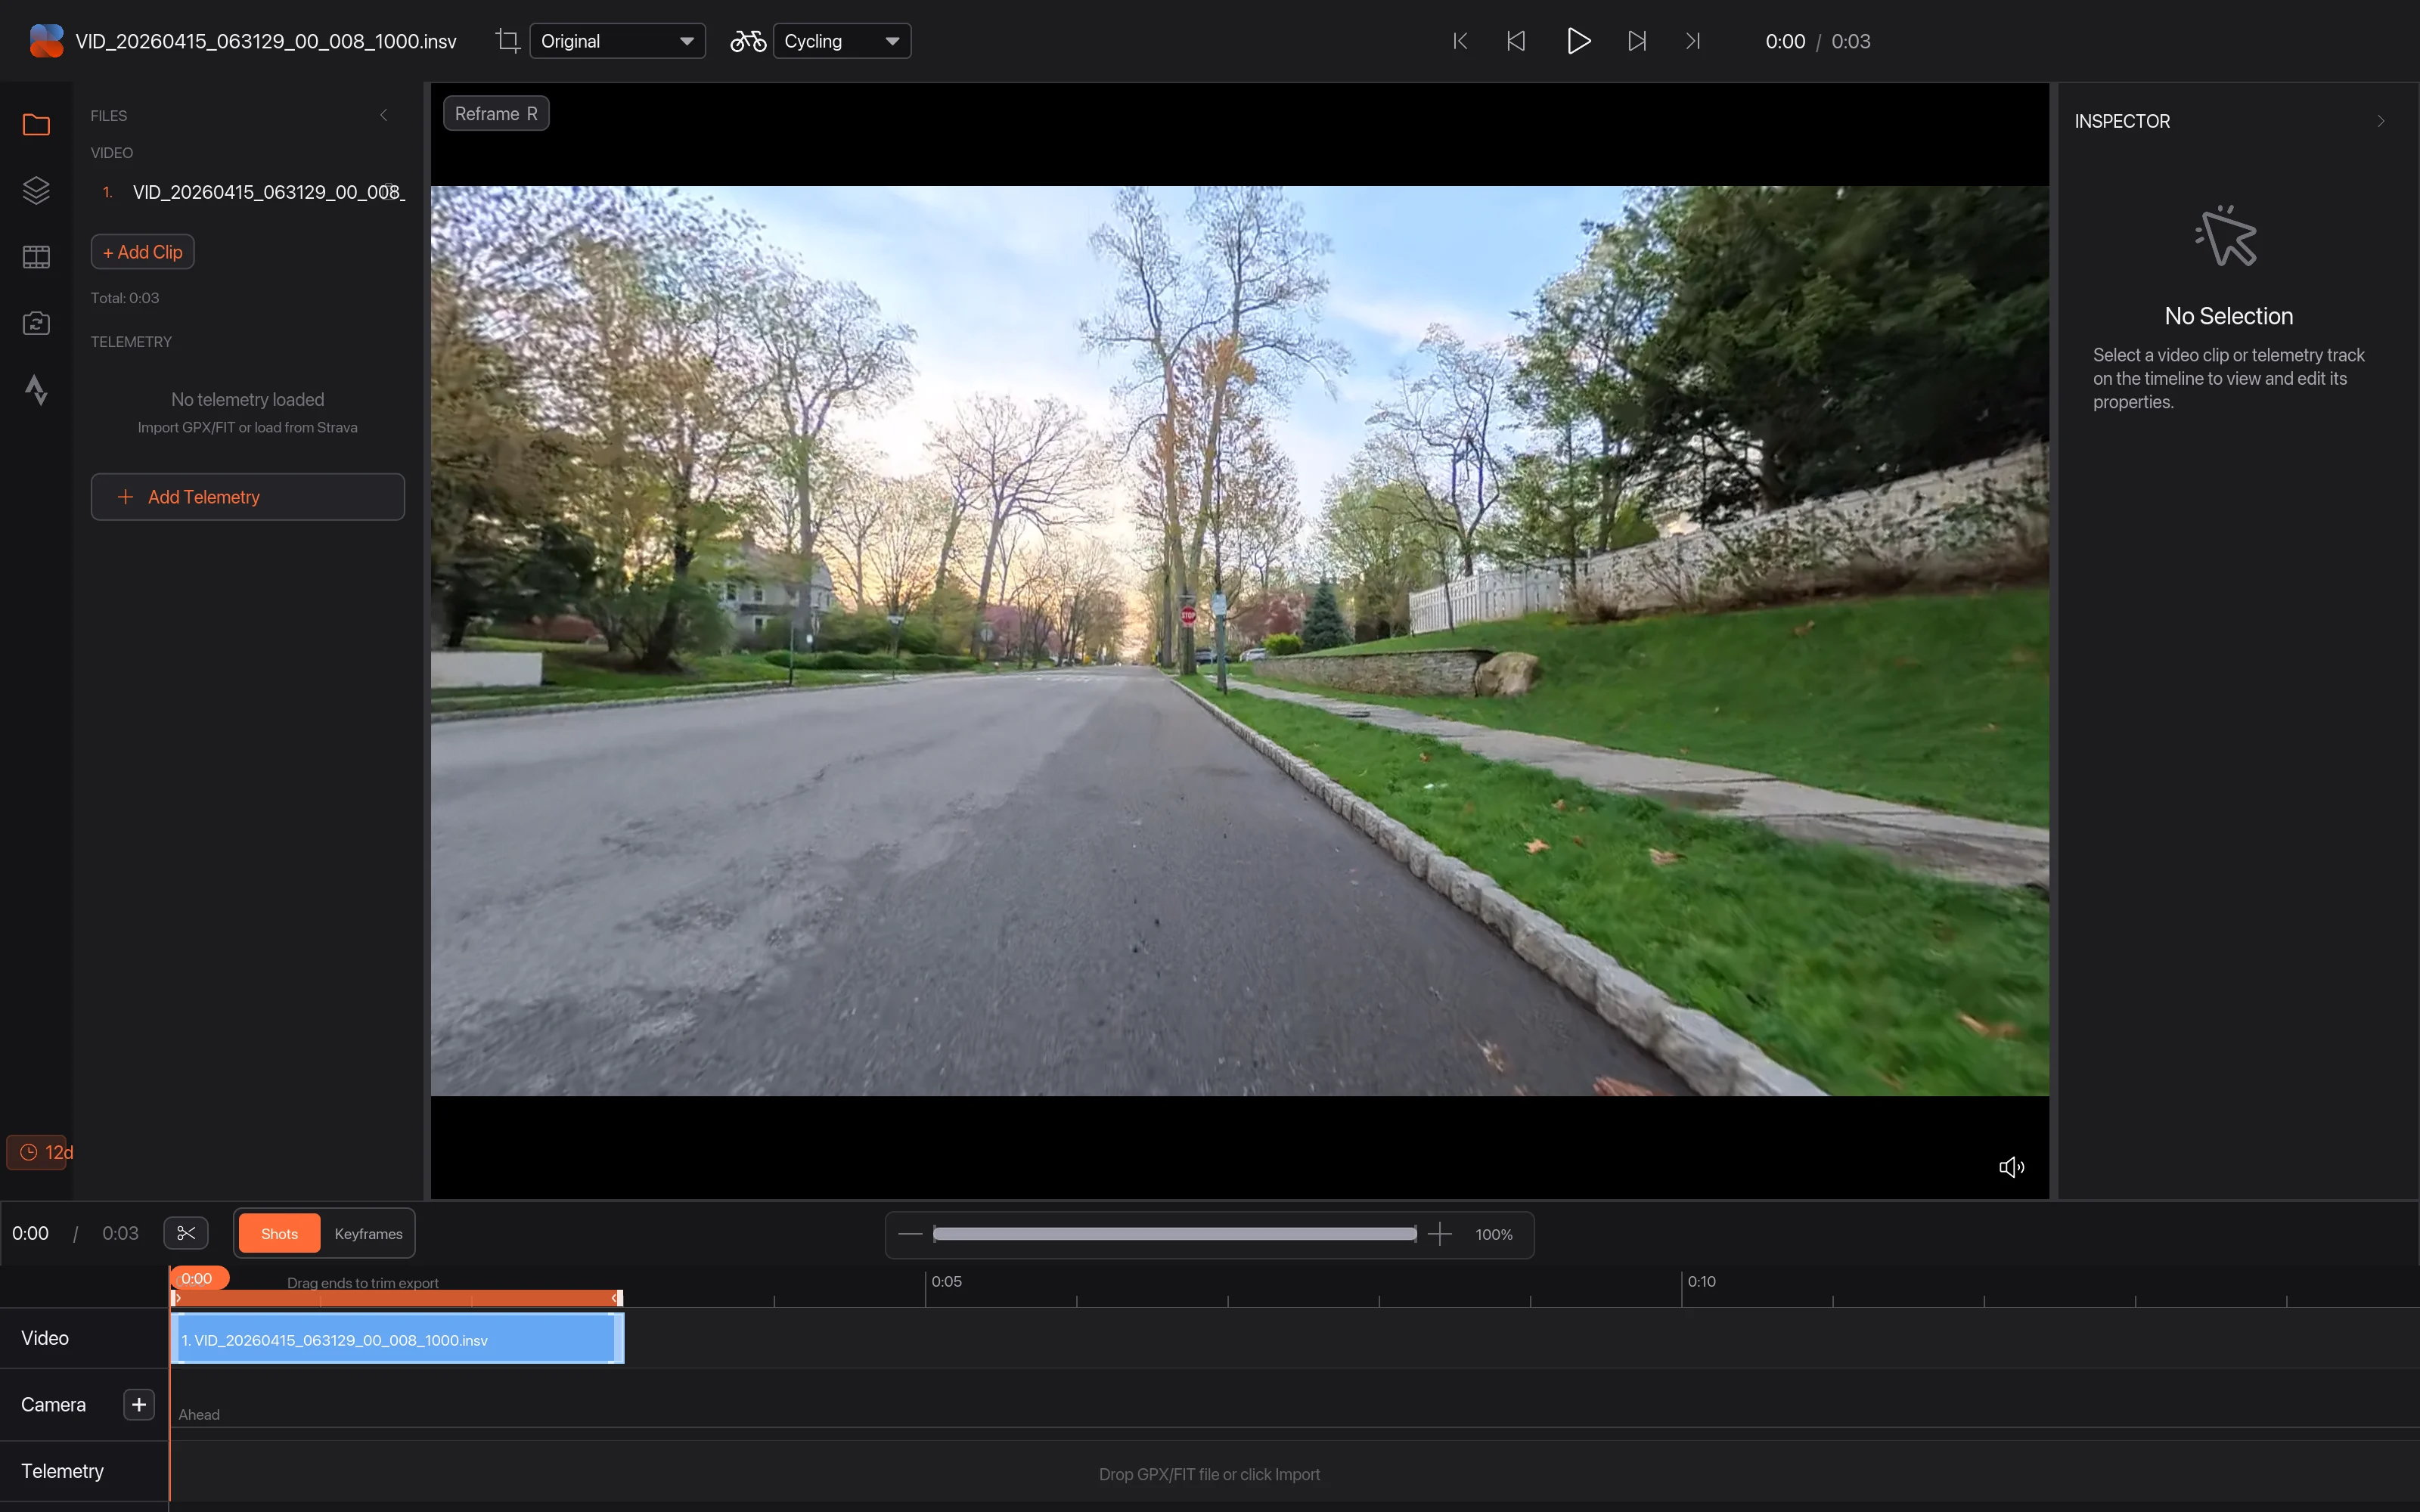
Click Open Video and choose the .insv file from your camera. It plays stitched and level straight away, with no conversion. If a long ride was recorded in several files, open them together and they play as one.
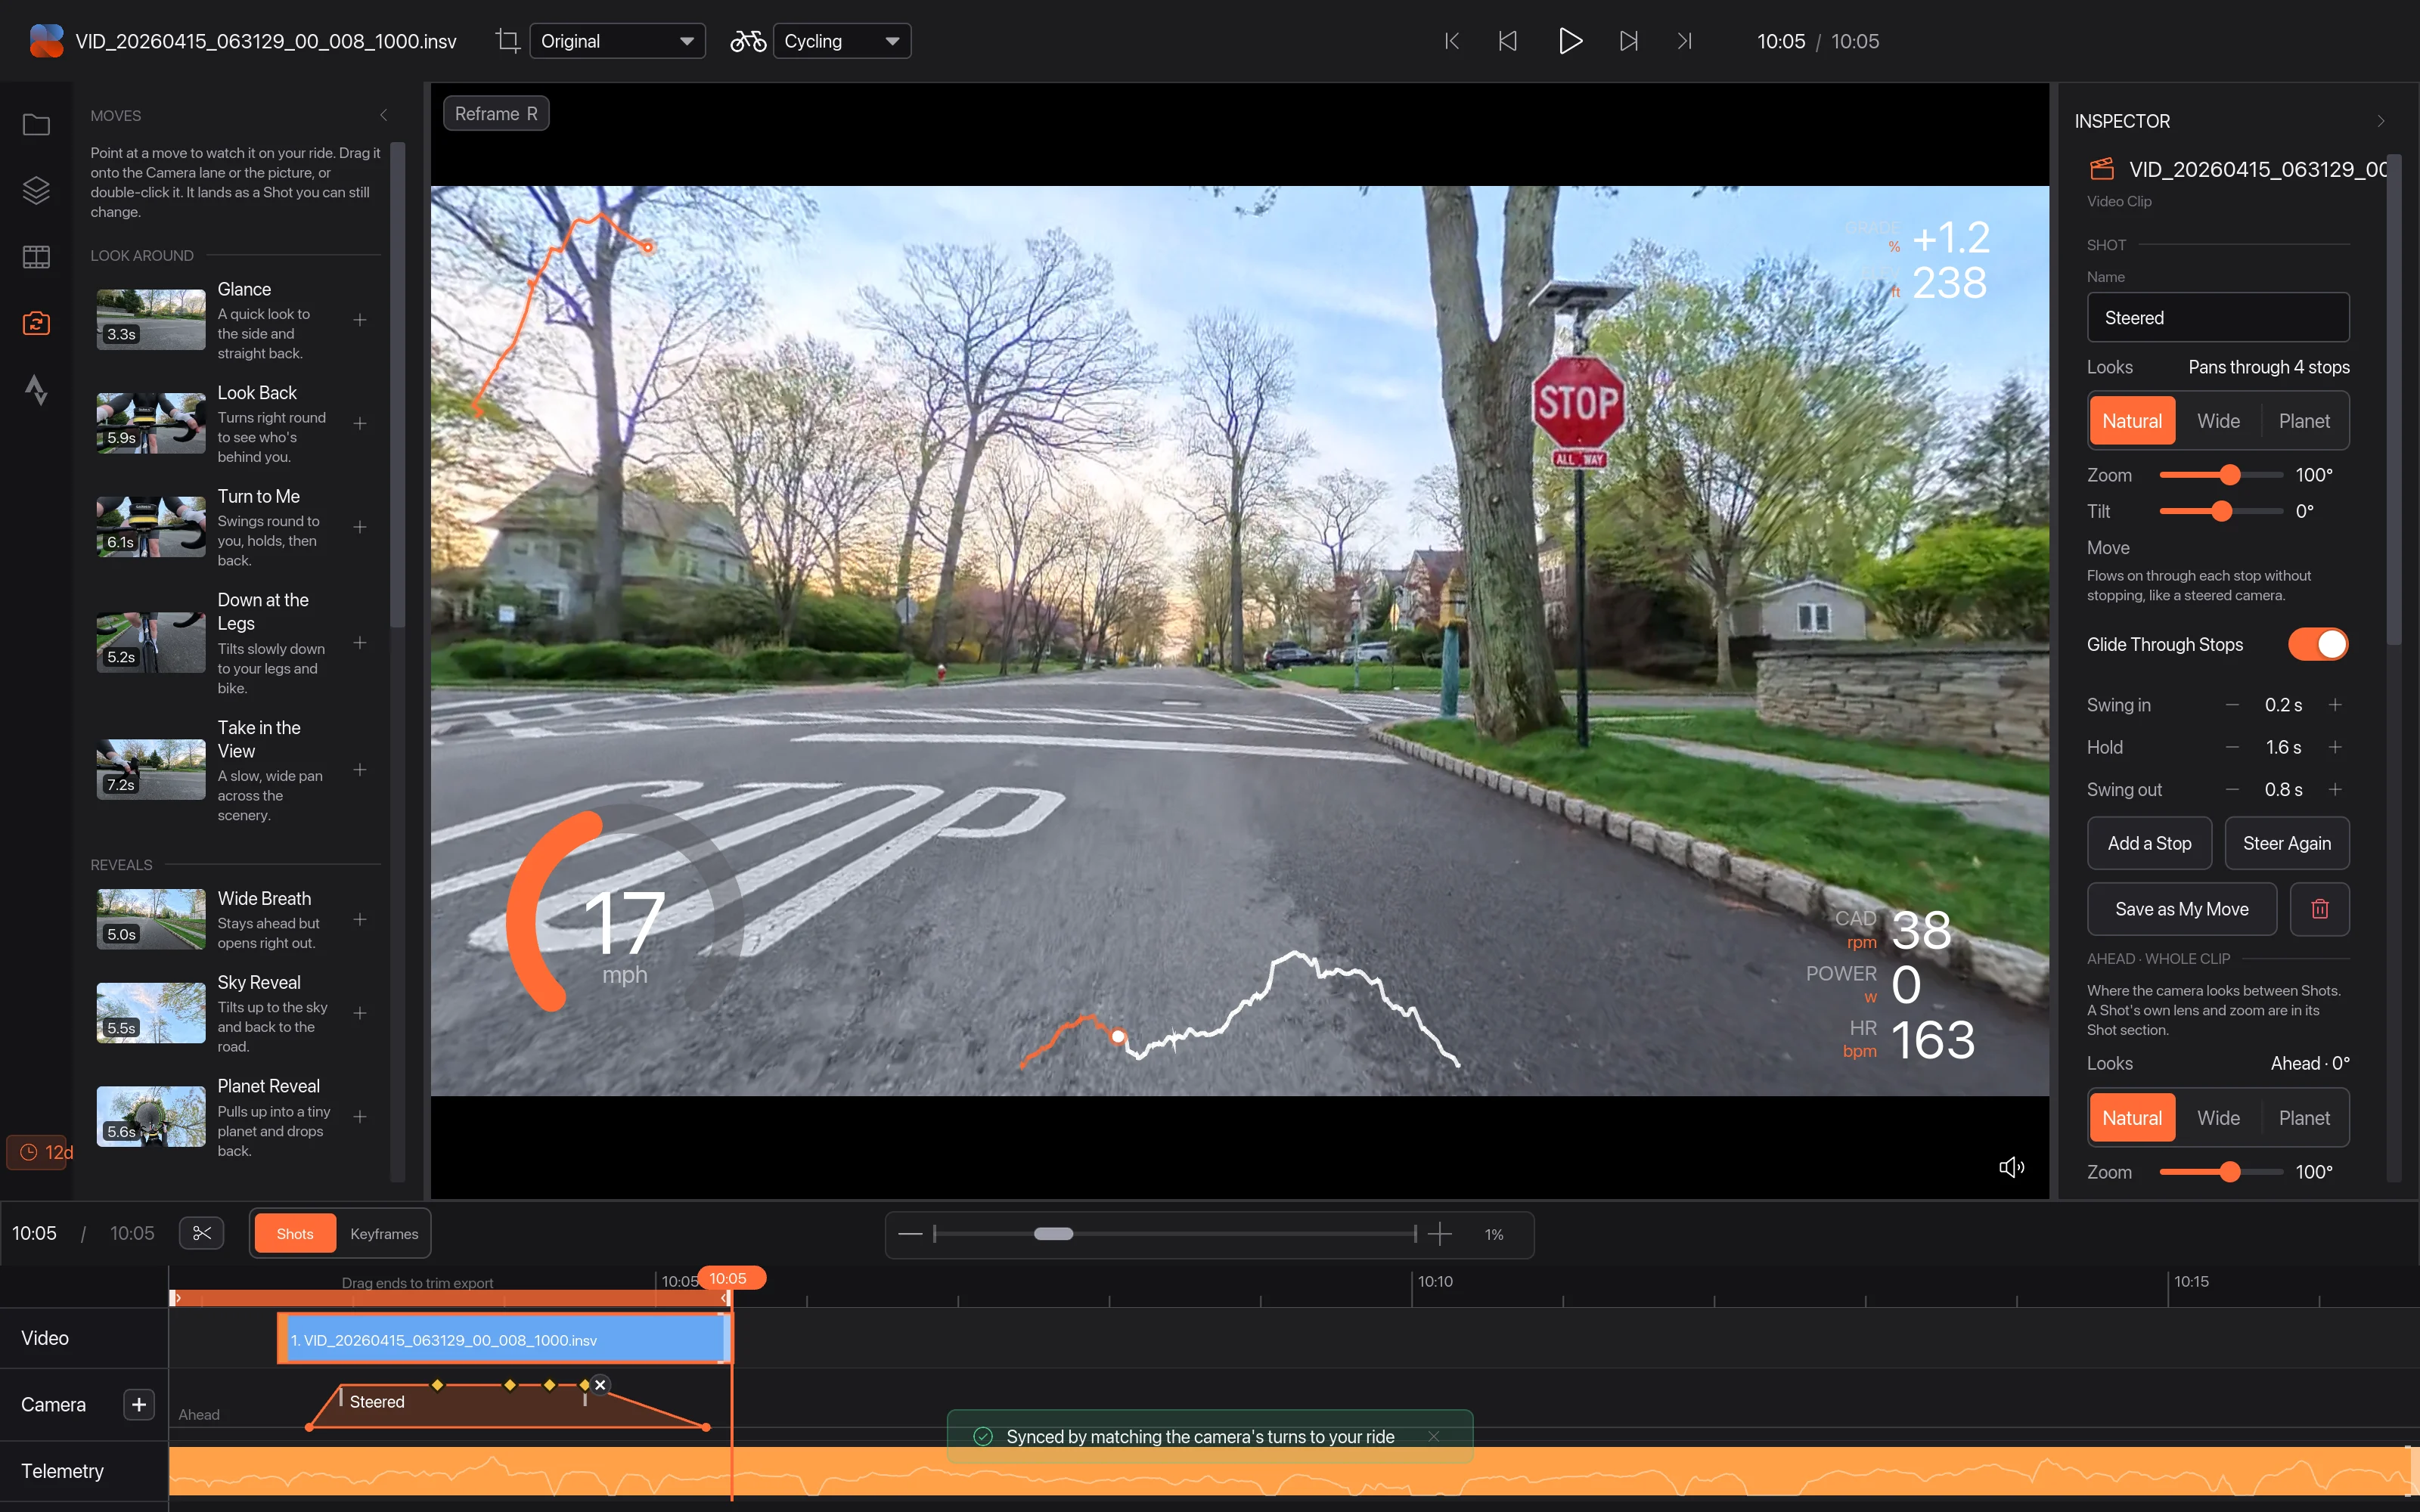
A 360 clip gets three extra things: the Reframe button 1, the Moves tab 2 and a Camera lane on the timeline 3, where your camera moves appear.
02Aim the camera
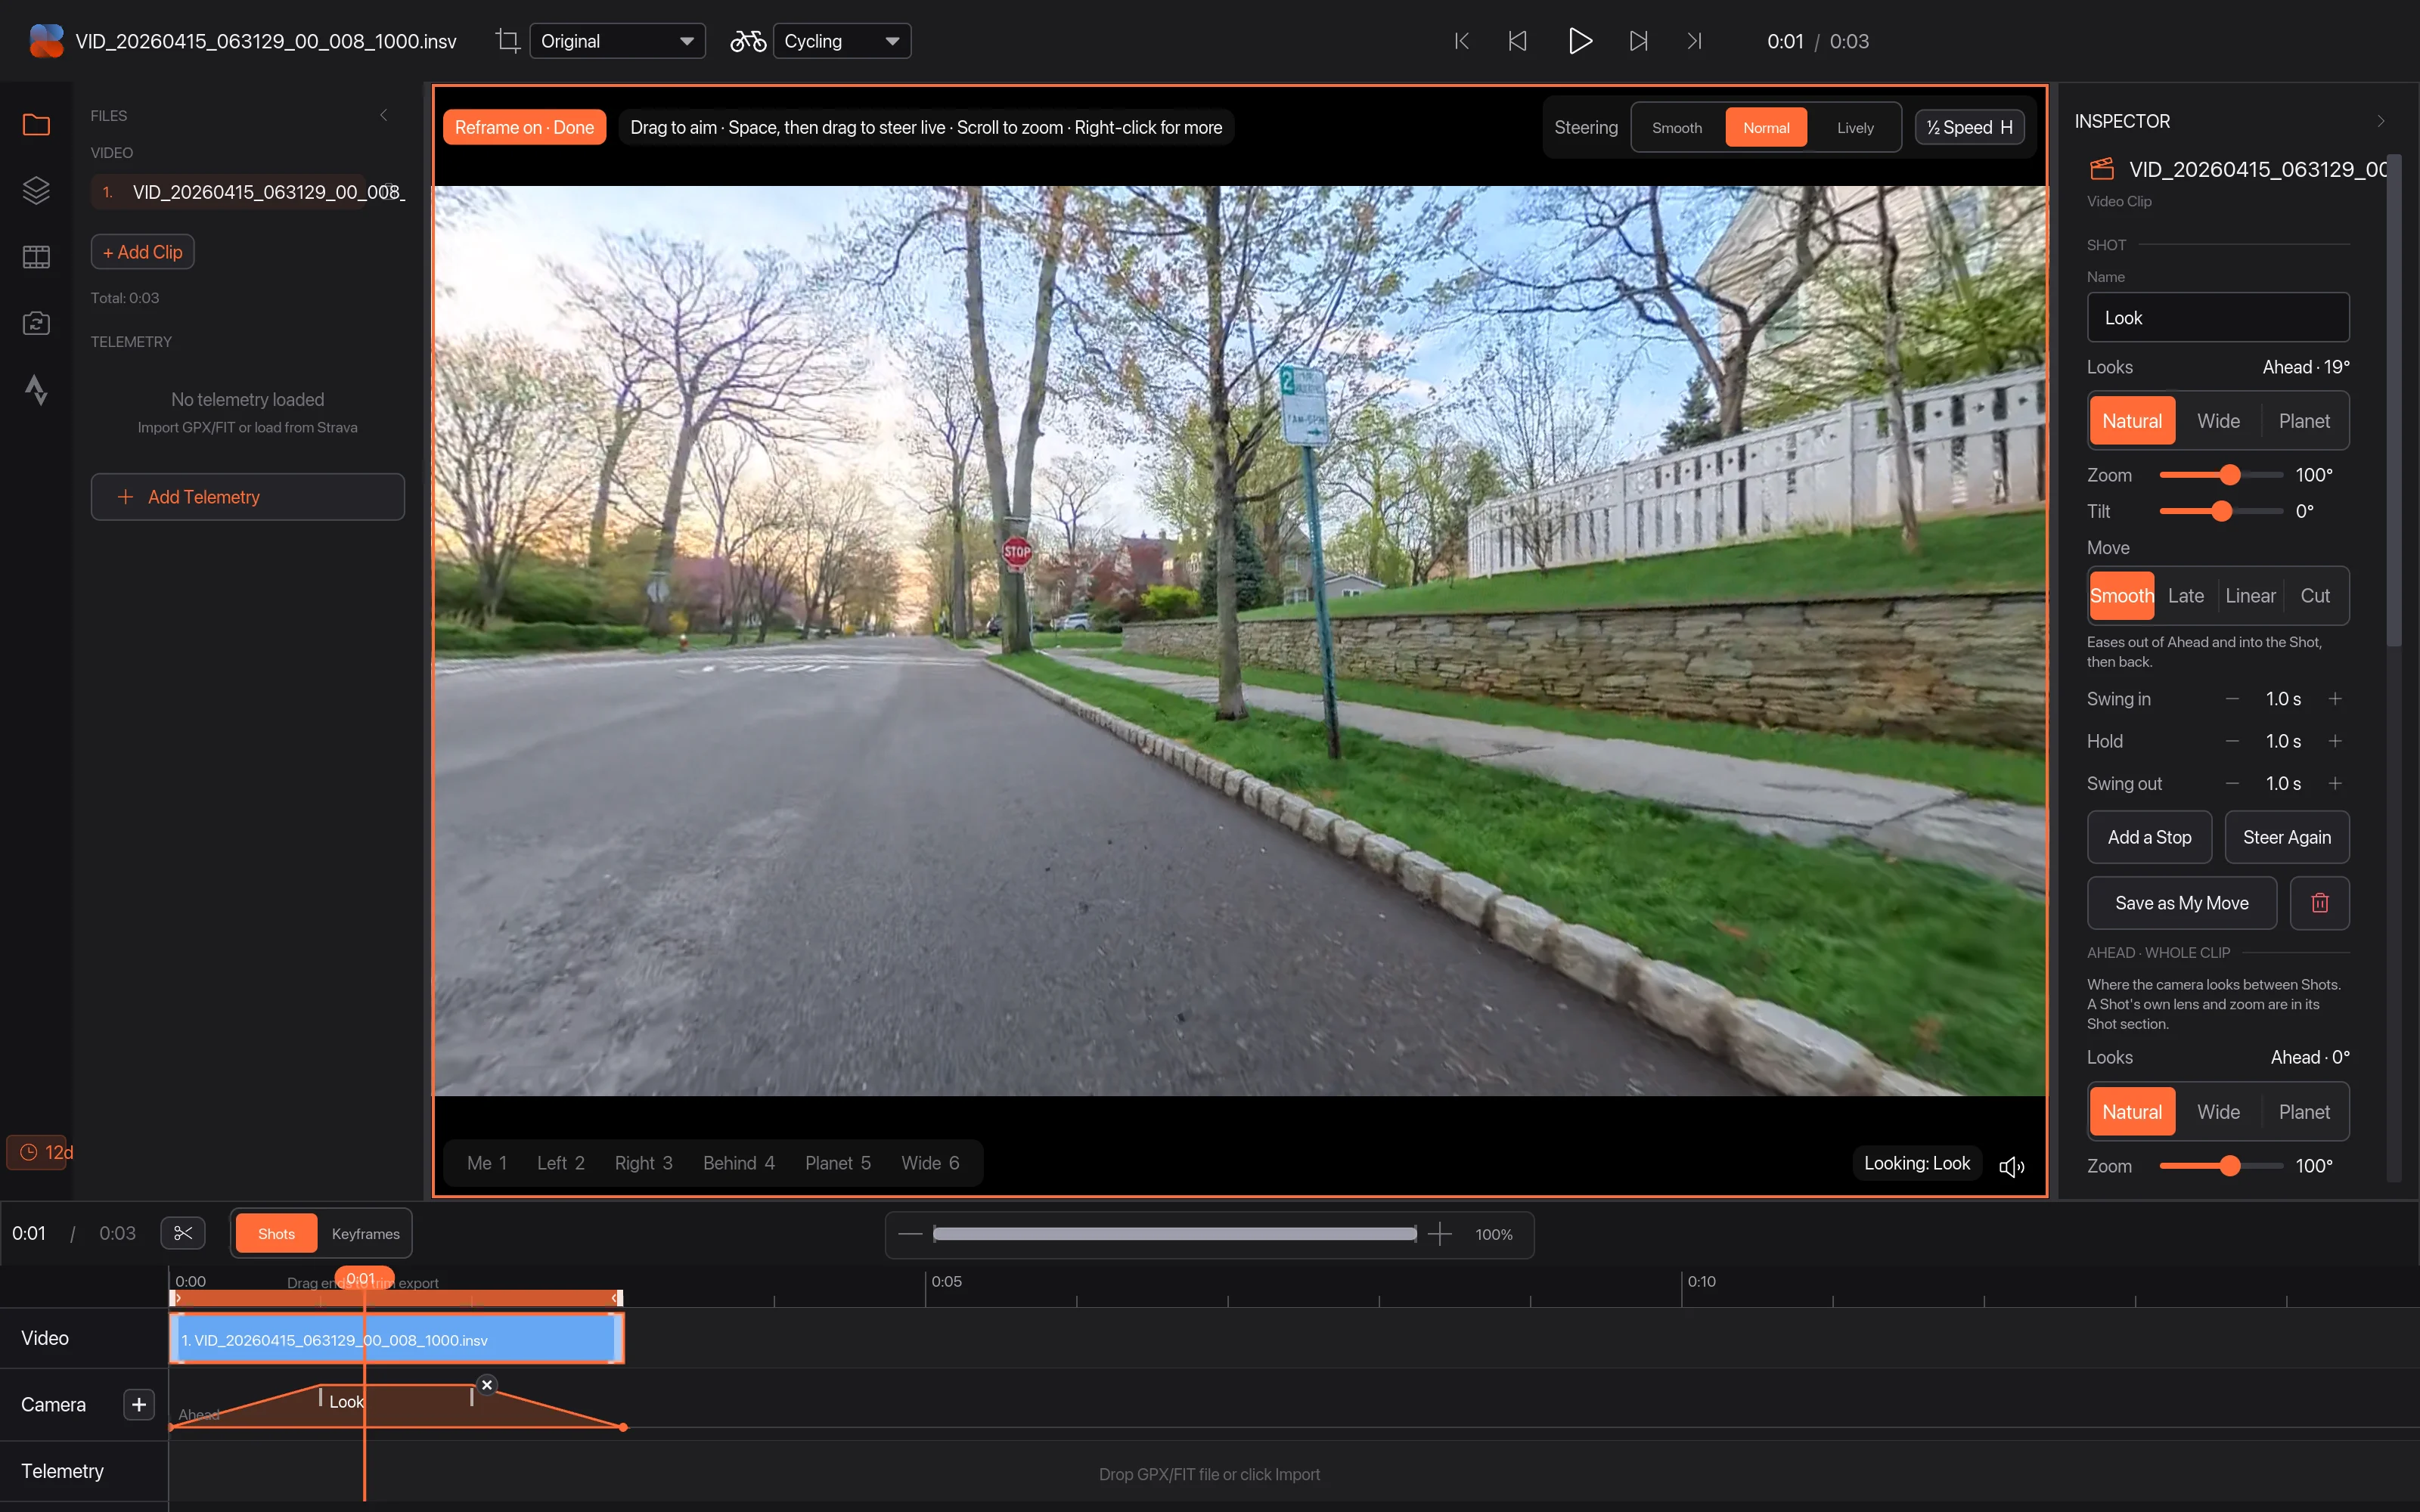
Press R or click Reframe. While it reads Reframe on · Done 1, drag the picture to look around and scroll to zoom. Each change you make becomes a Shot on the Camera lane 3: the camera swings to it, holds, and swings back.
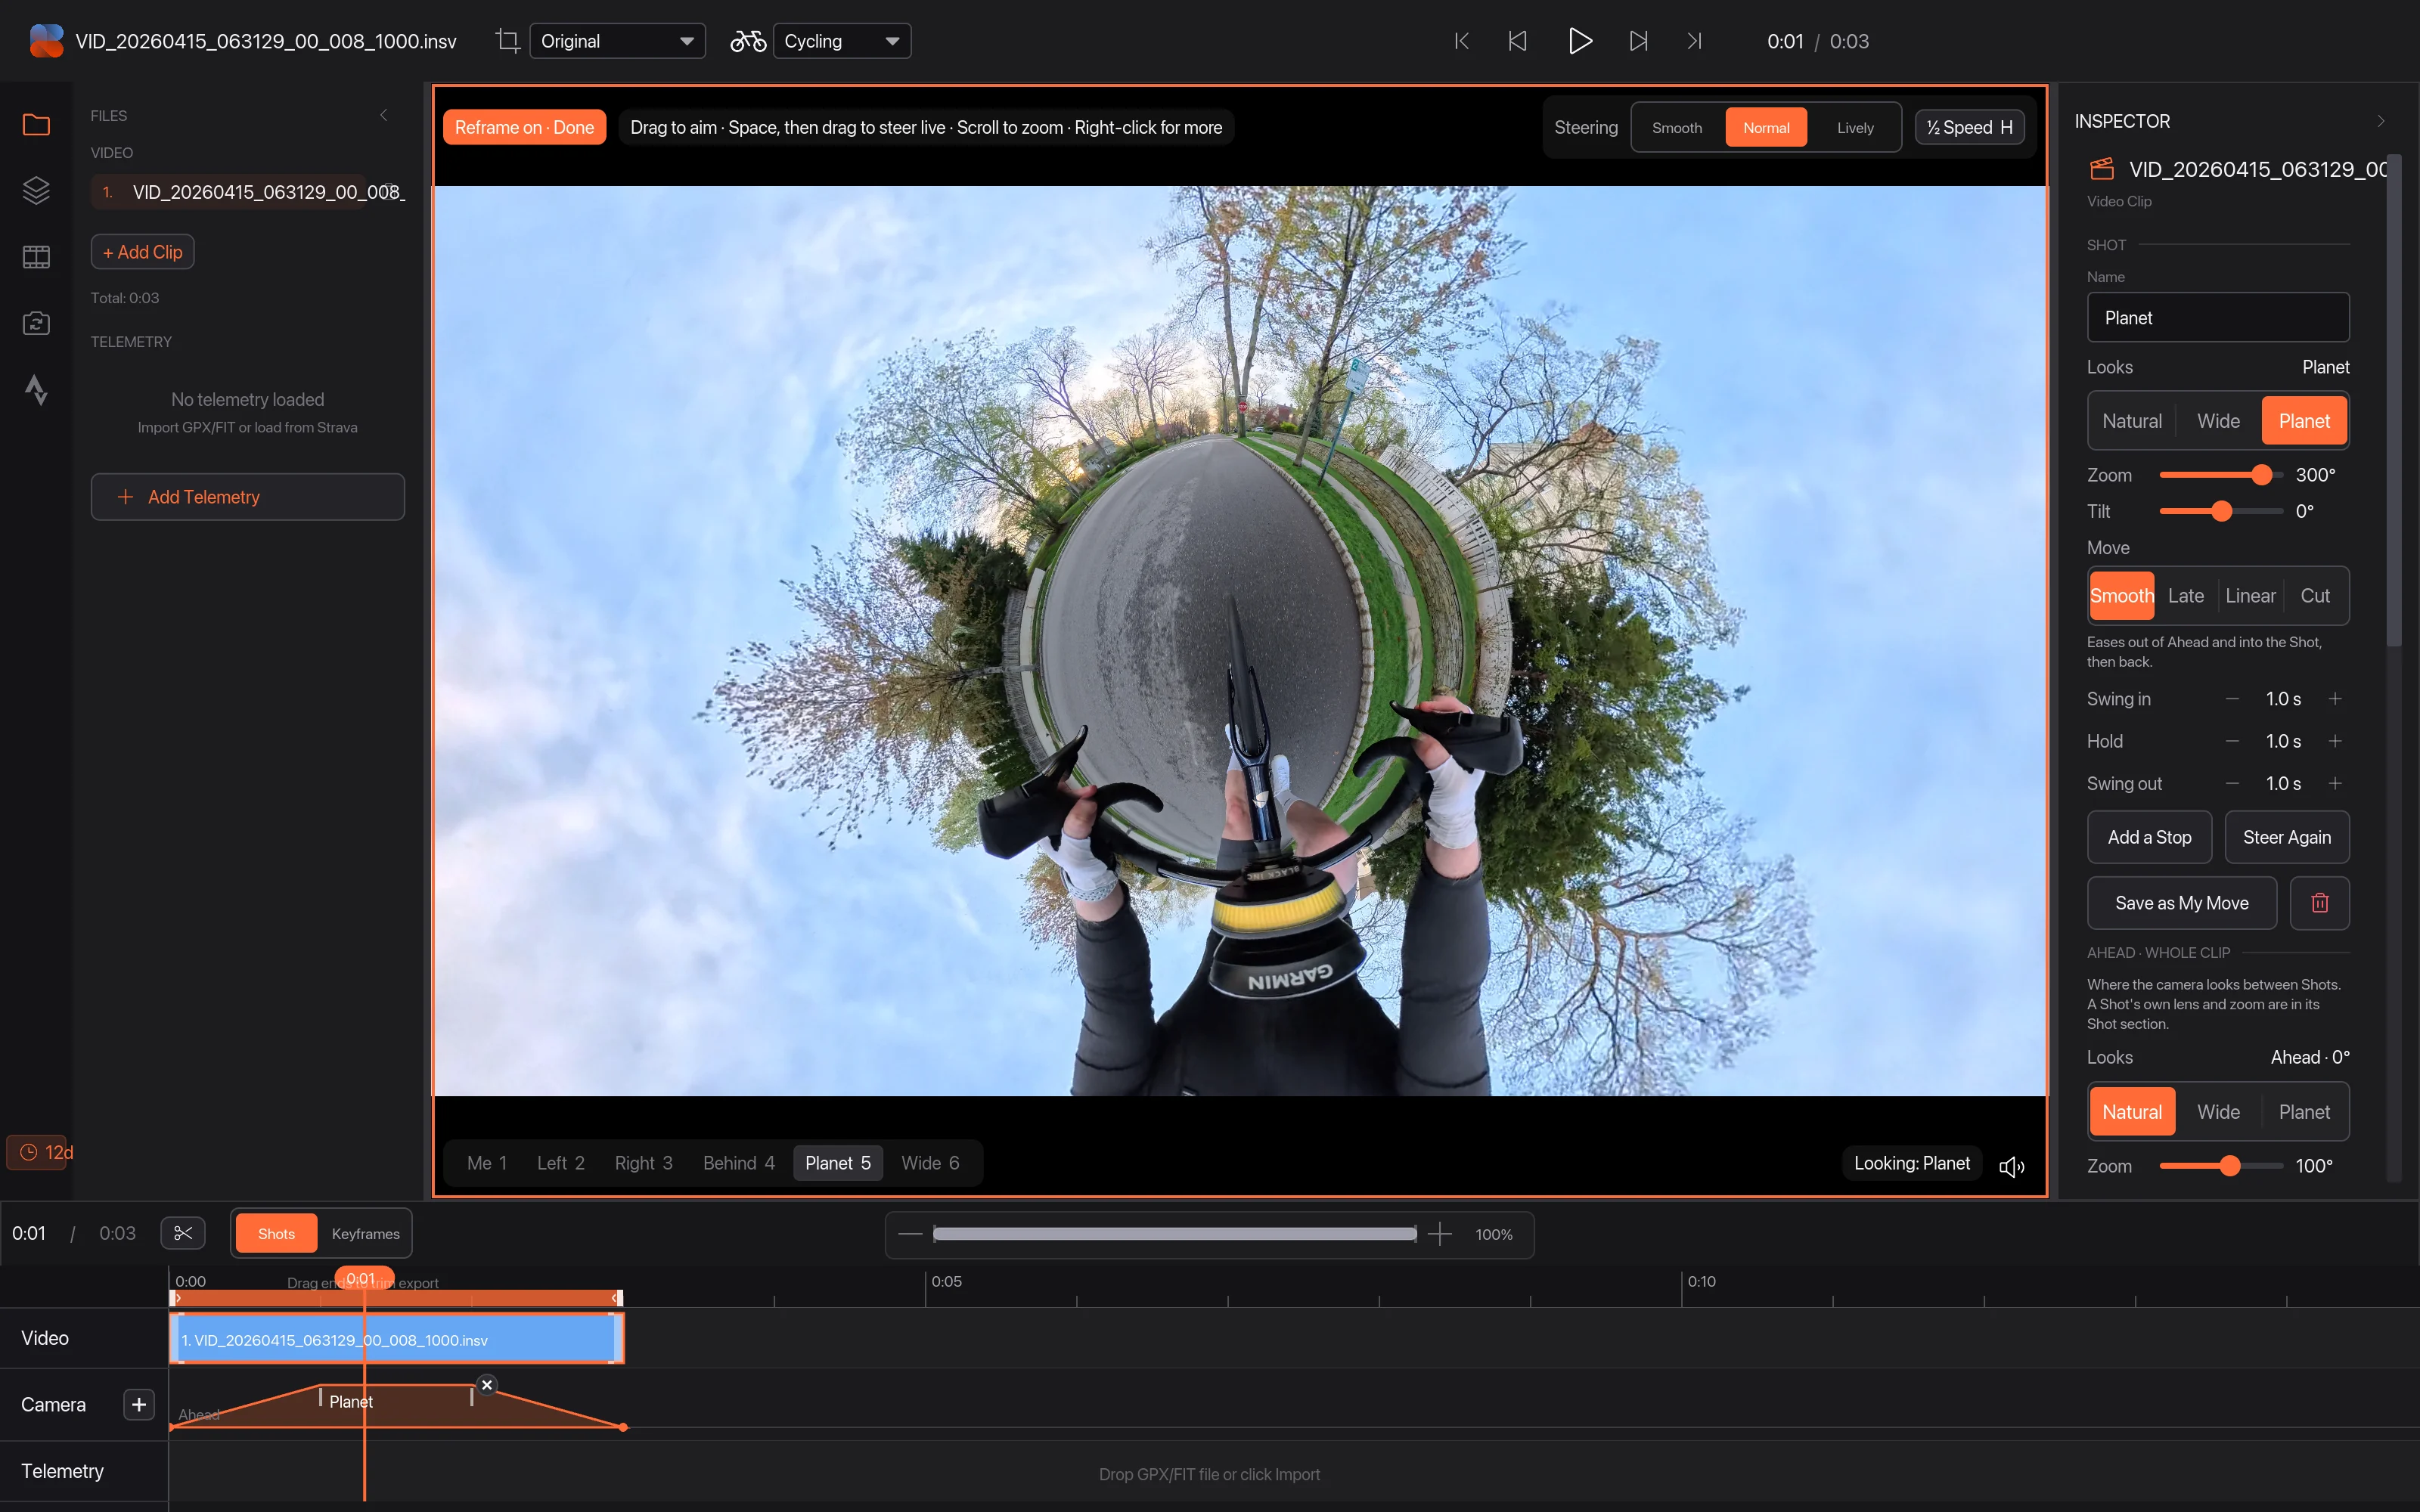
The buttons along the bottom 2 jump to a ready-made view. Each has a number key:
| Key | View |
|---|---|
| 1 | Me: looks back at you |
| 2 | Left |
| 3 | Right |
| 4 | Behind |
| 5 | Planet: the tiny-planet view from above |
| 6 | Wide |
03Tell it which way is ahead
Between Shots the camera looks Ahead. If ahead isn't quite straight down the road, or the Me view misses you, right-click the picture where they should be and choose This Is Ahead or This Is Me 1. The same menu adds a Shot of any view at the playhead 2.
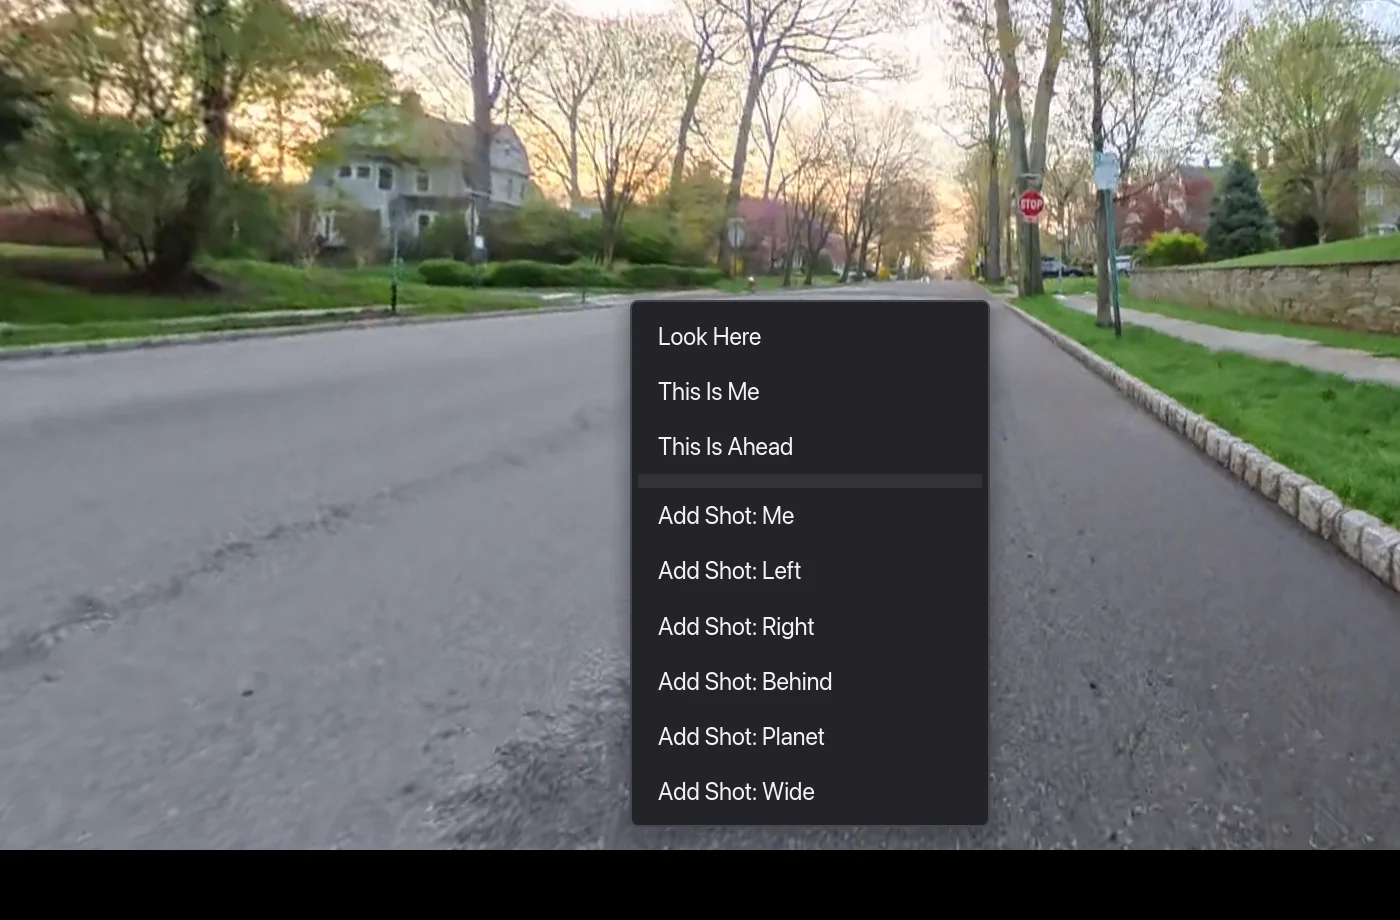
To change how Ahead looks for the whole clip, like a wider lens, or to turn Level the Horizon off, select the clip and use the Ahead section in the Inspector.
04Adjust a Shot
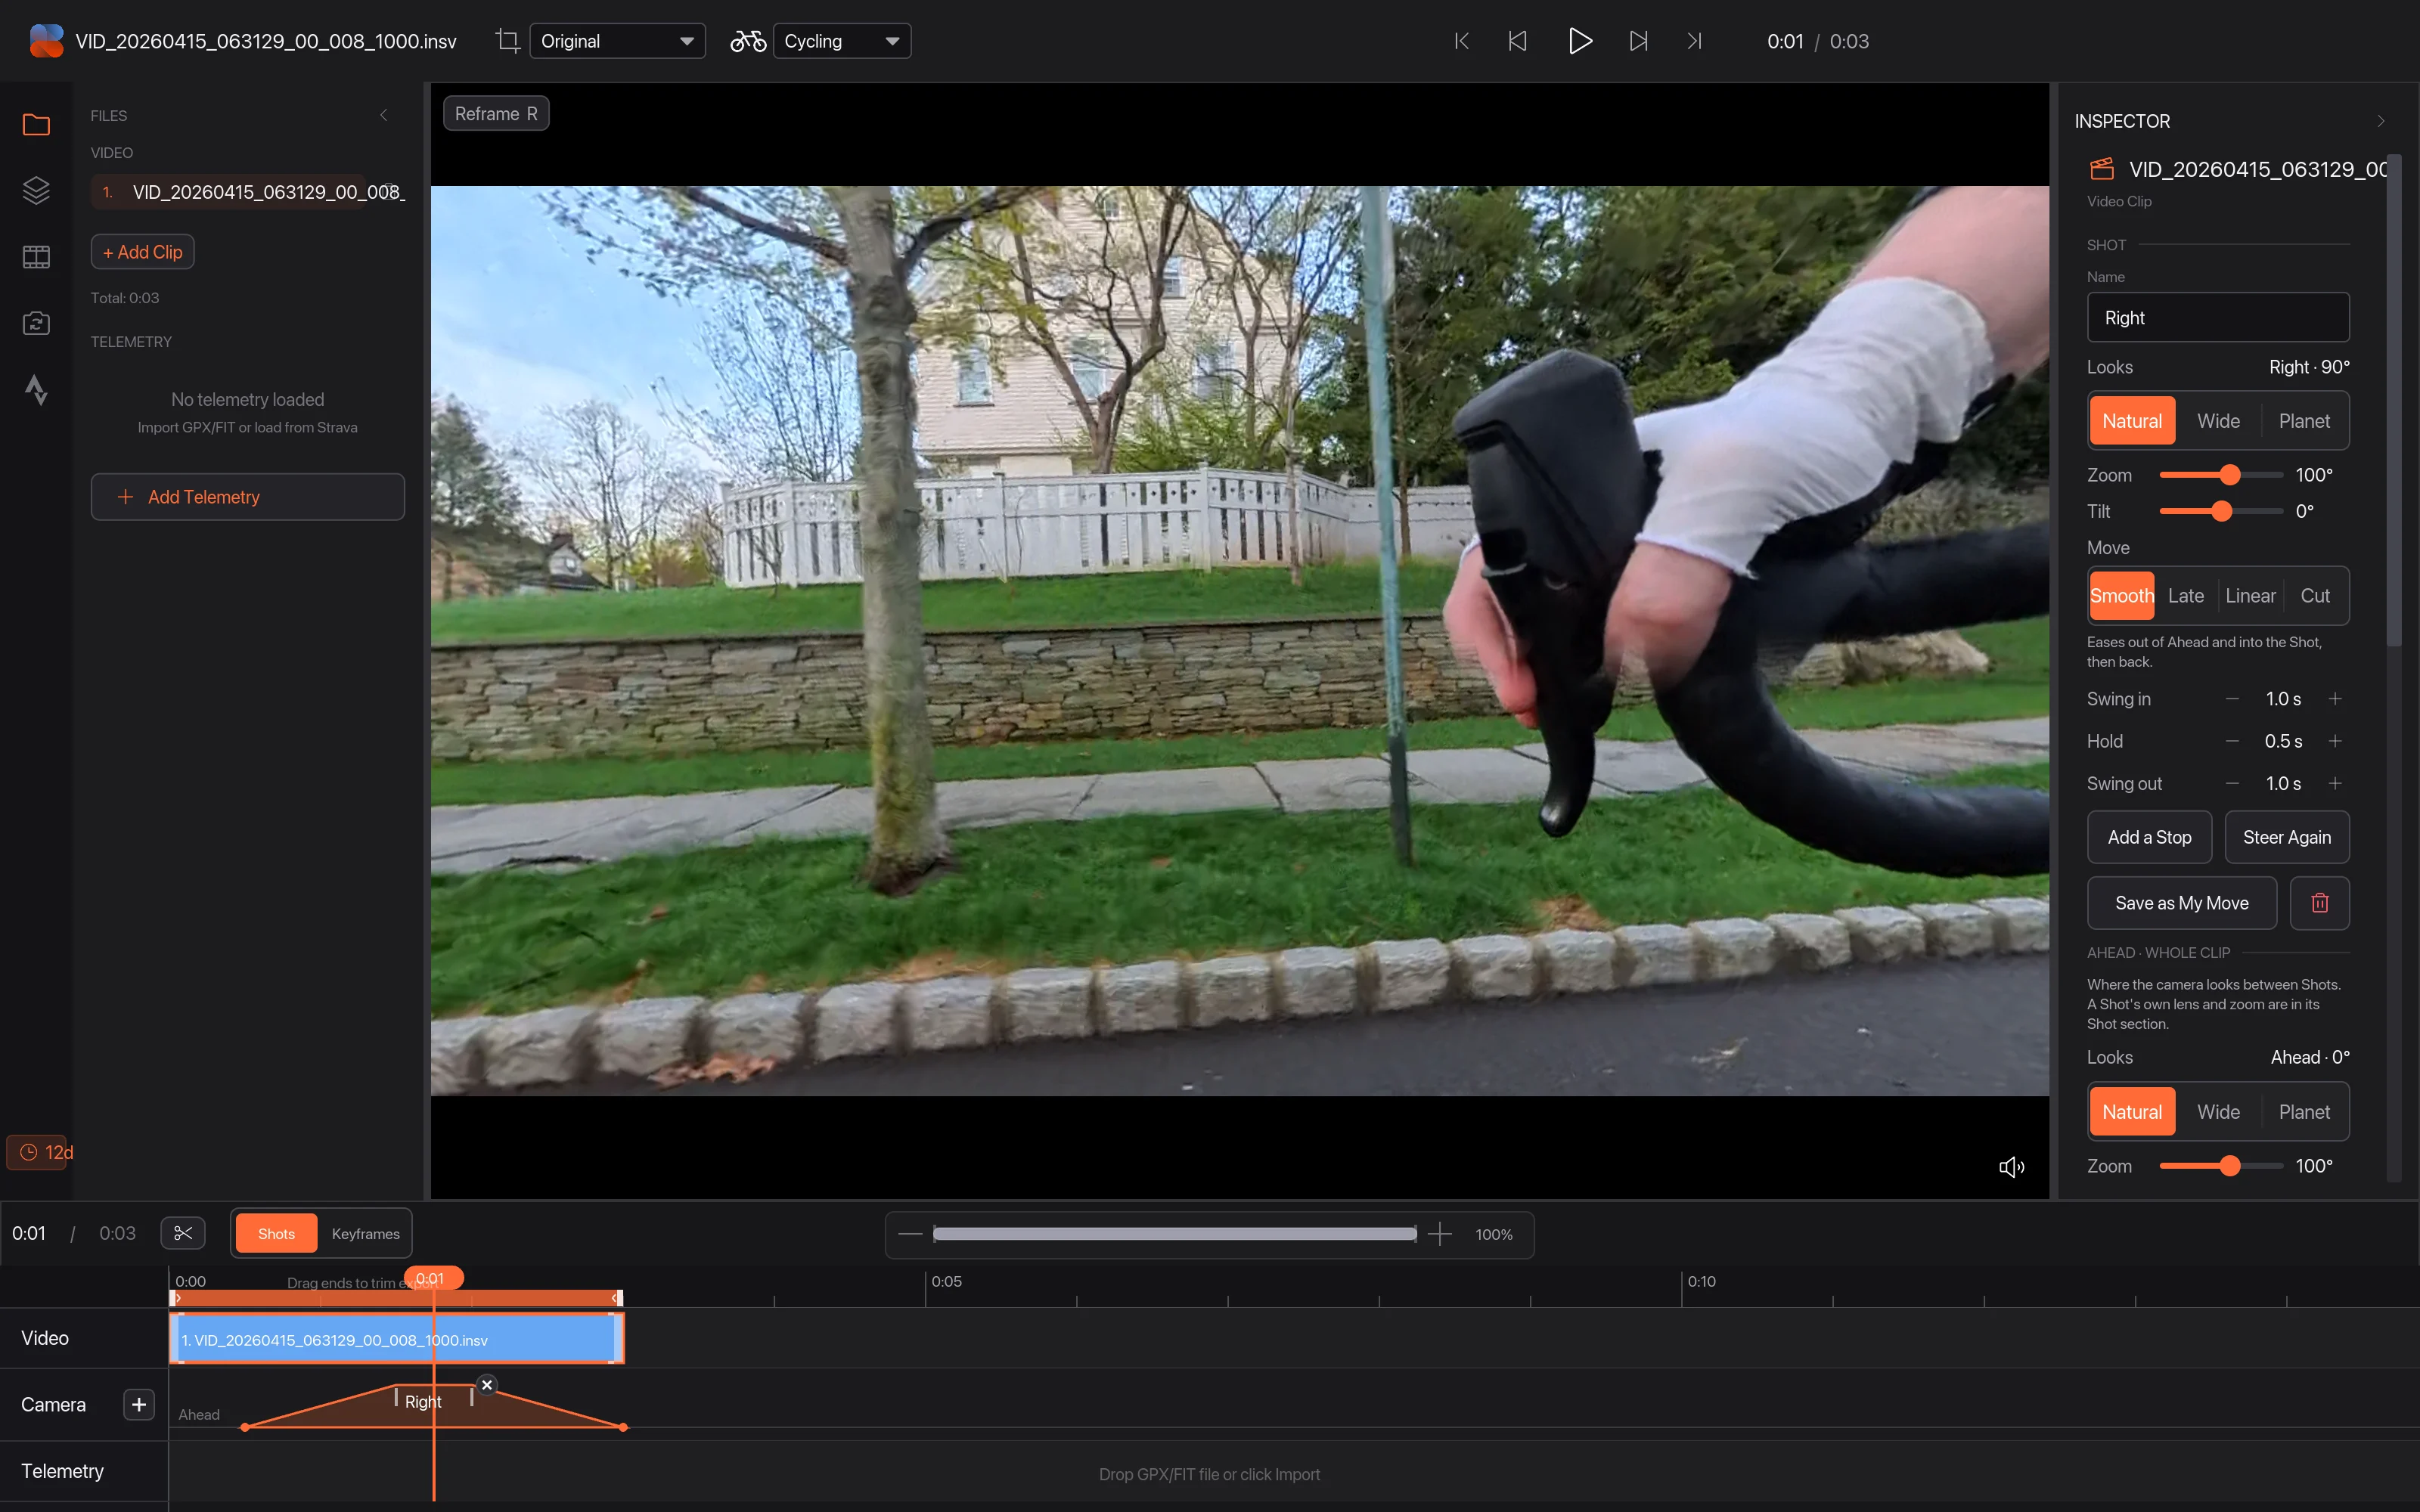
Click a Shot on the Camera lane 1 to edit it in the Inspector 2: its lens (Natural, Wide, Planet), zoom and tilt, and how it moves (Smooth, Late, Linear or Cut). Below that you set how long it takes to swing in, hold and swing out. Drag a Shot's edges on the lane to change its timing. Save as My Move keeps it for later.
05Steer it live
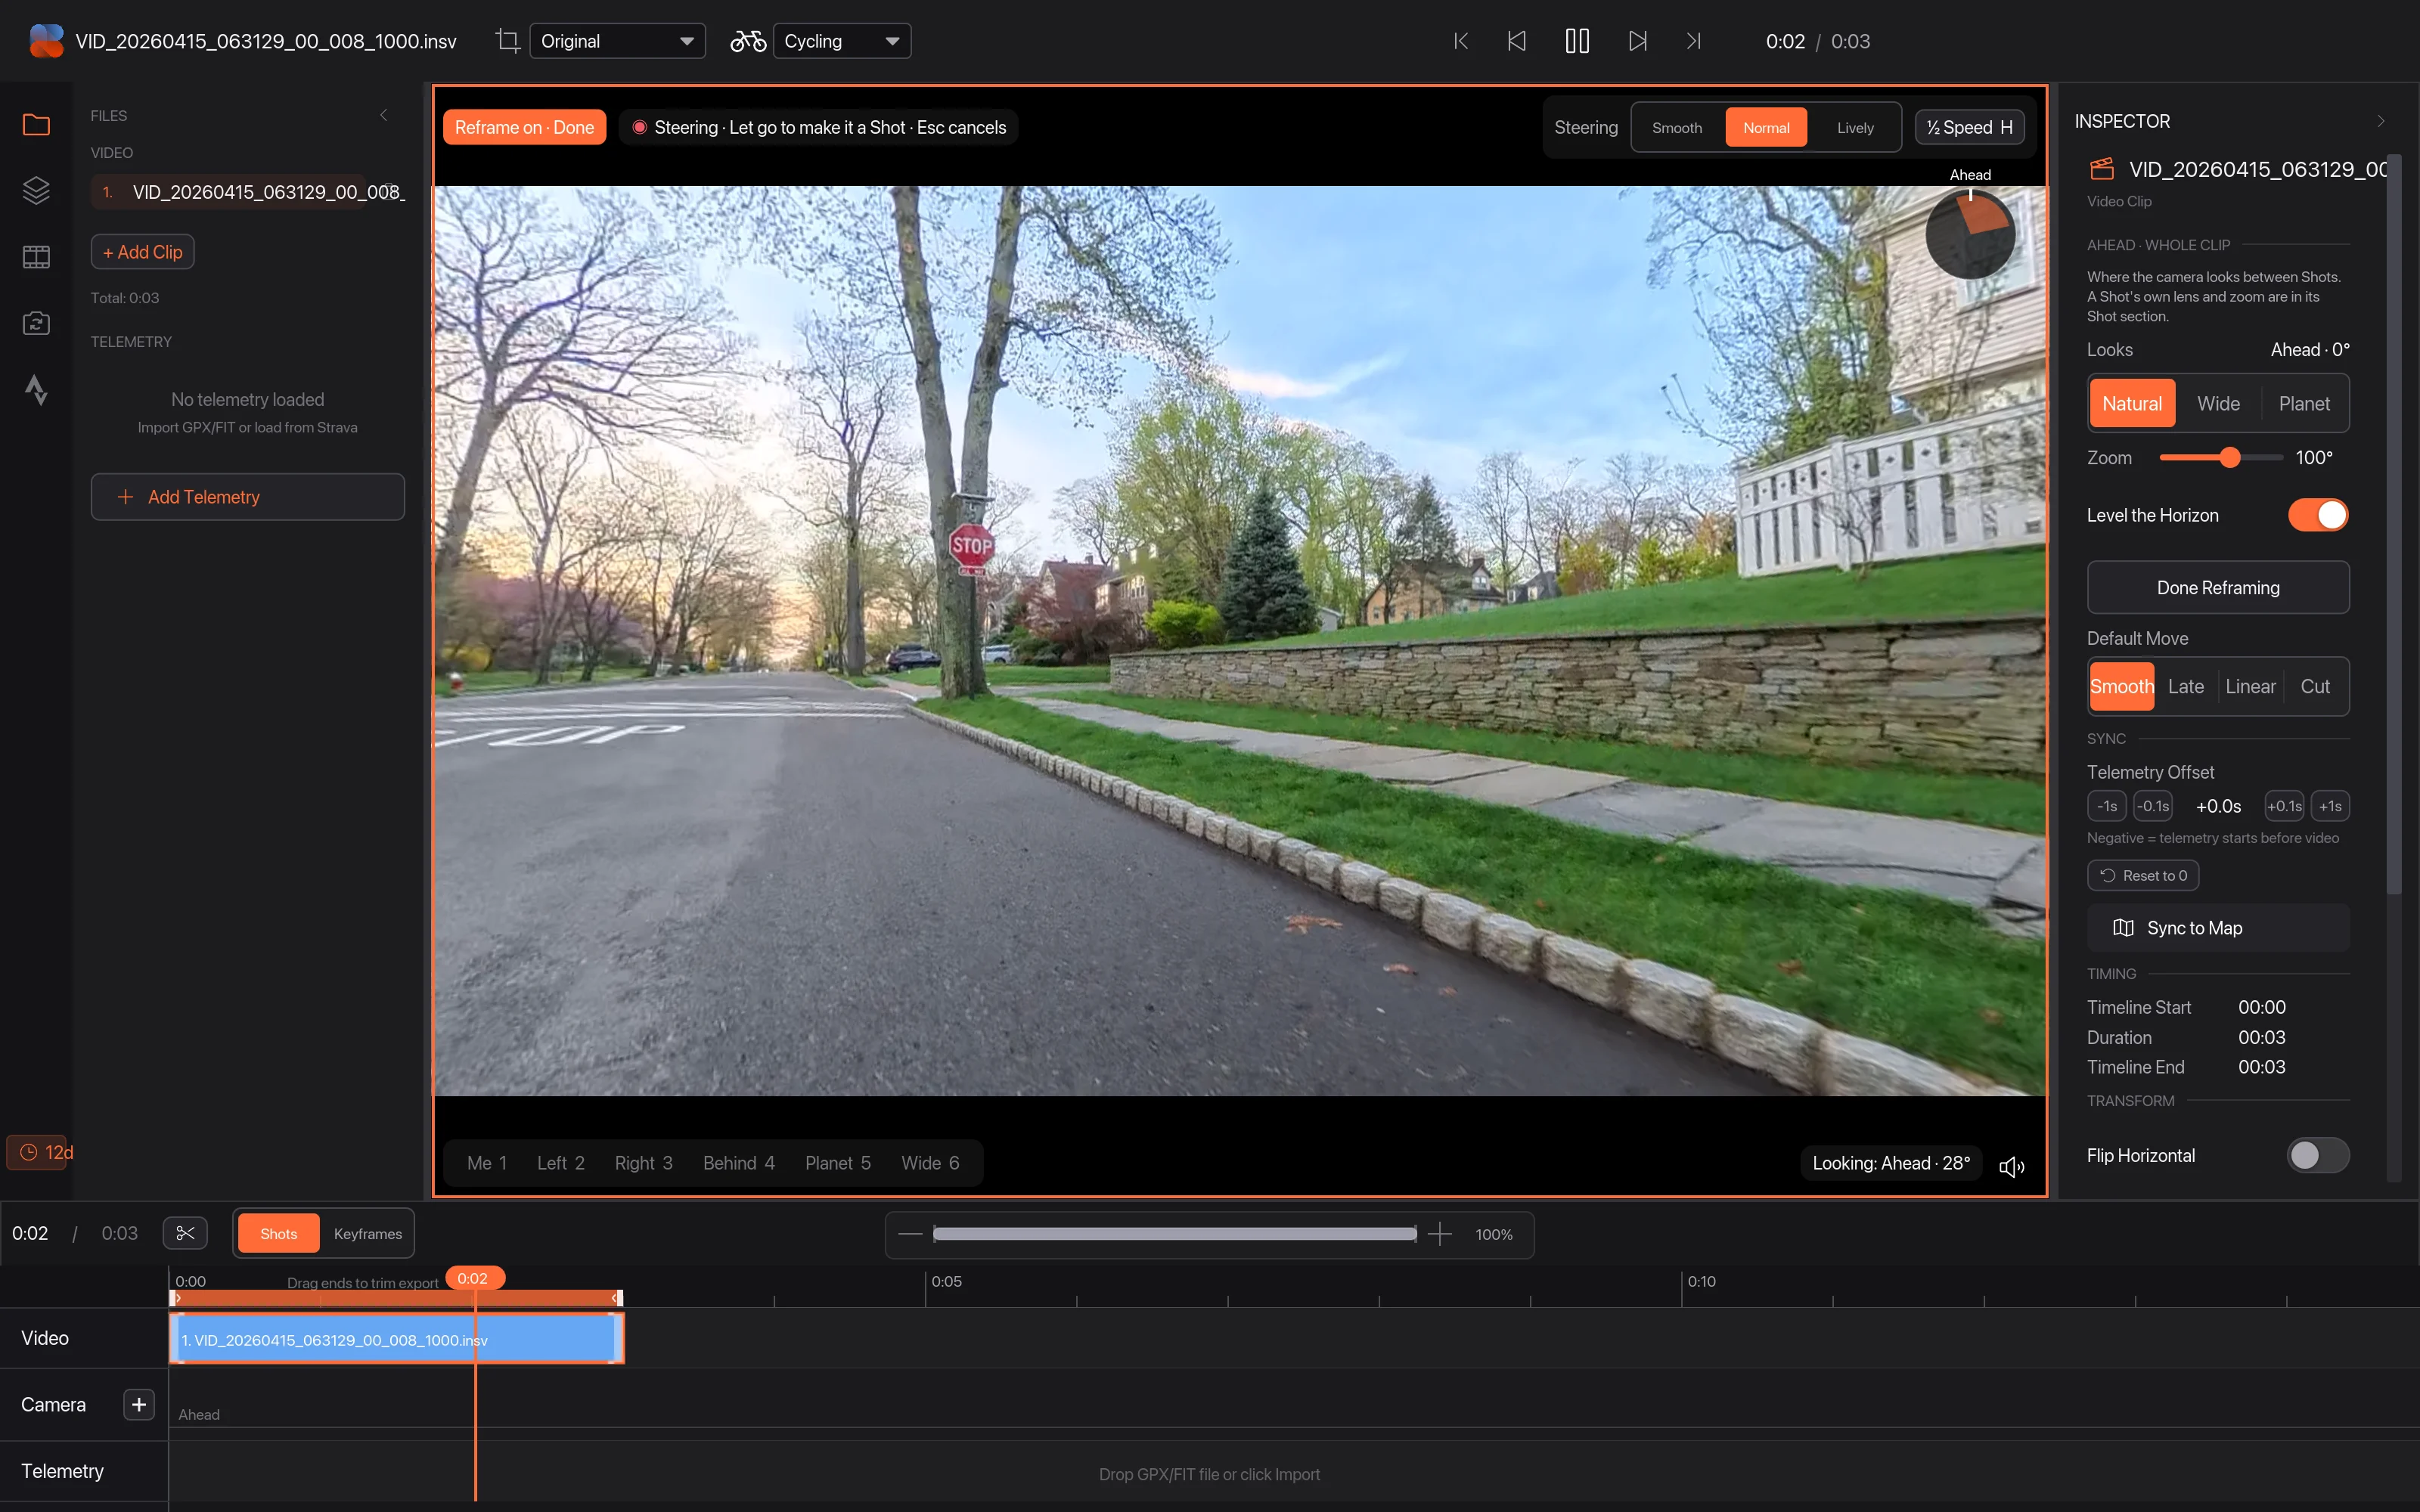
In Reframe mode, press Space to play, then press on the picture and drag to steer the camera as the video plays 1. Let go and your steering becomes a Shot; Esc cancels it. The Steering options 2 set how smoothly it follows your hand, and ½ Speed (H) slows the video down while you steer.
06Use a ready-made move
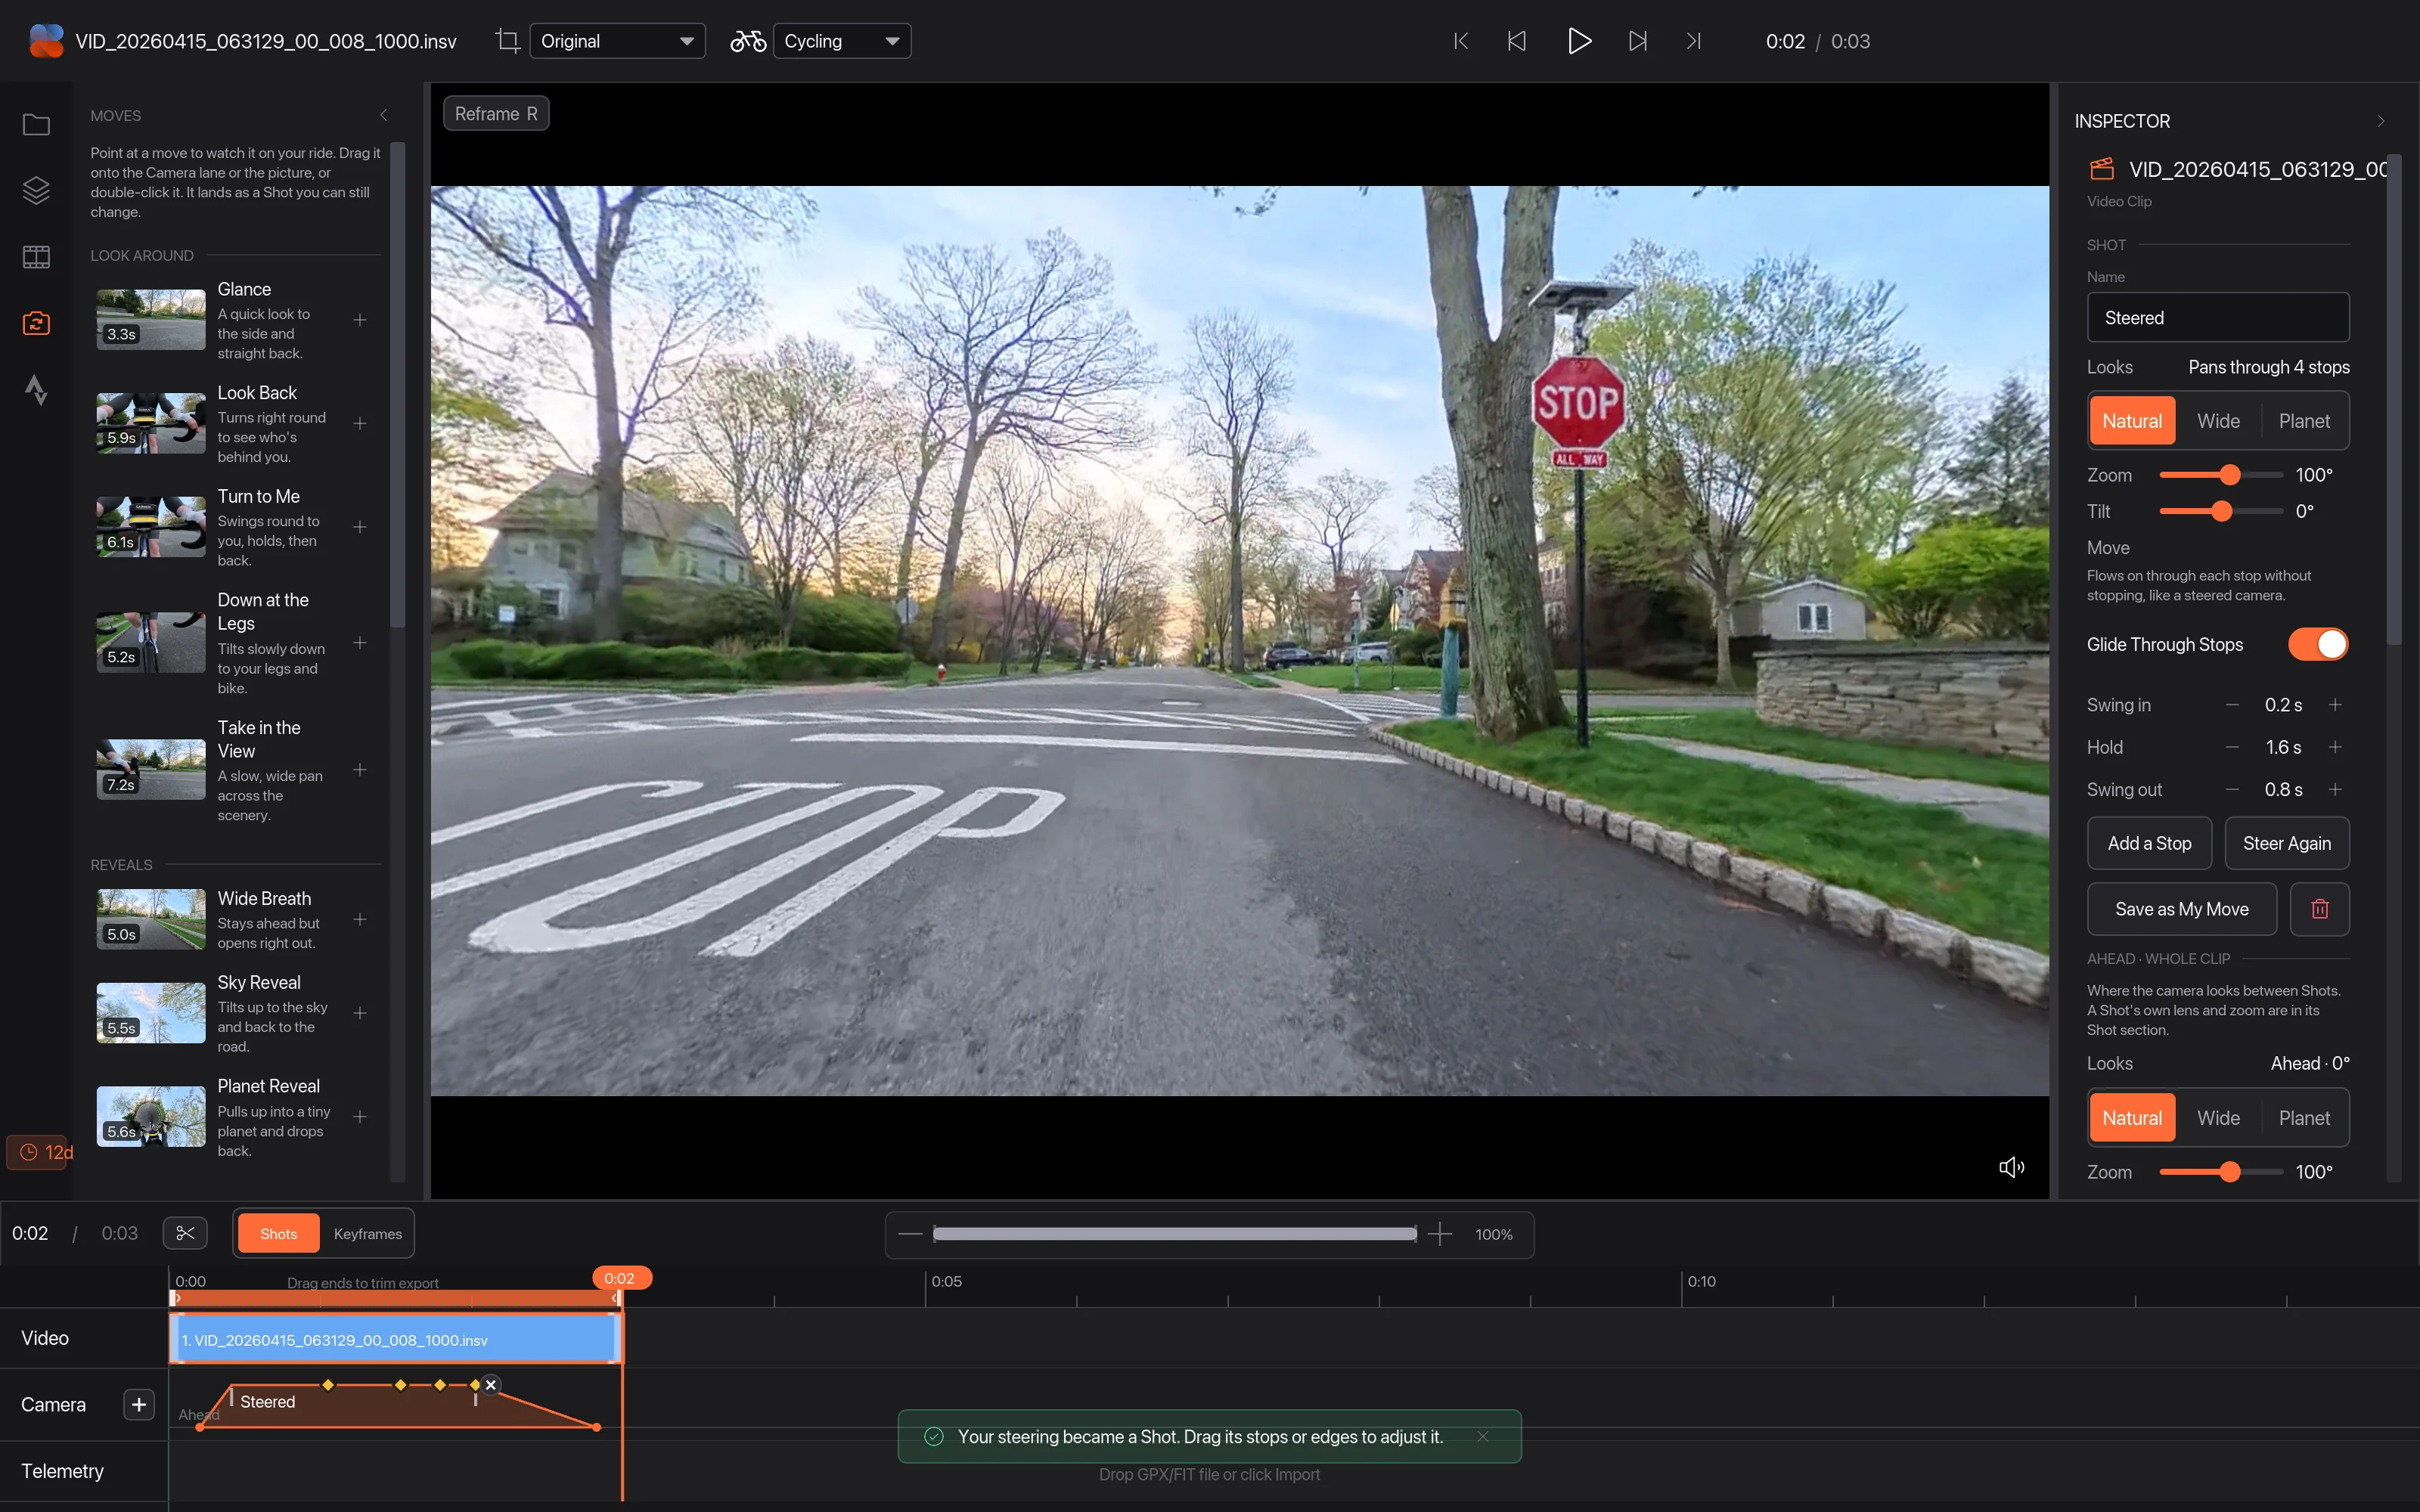
Open the Moves tab 1 for a library of camera moves: quick glances, looks back at you, reveals and more. Point at a move to watch it on your own ride 2. Drag it onto the Camera lane 3 or the picture, or double-click it to add it at the playhead. It lands as a Shot you can still change.
07Add your ride data
Insta360 cameras don't record your speed or location, so add the FIT or GPX file from your bike computer (see Add your ride from a FIT or GPX file). Then right-click the clip and choose Auto Sync This Clip 1.
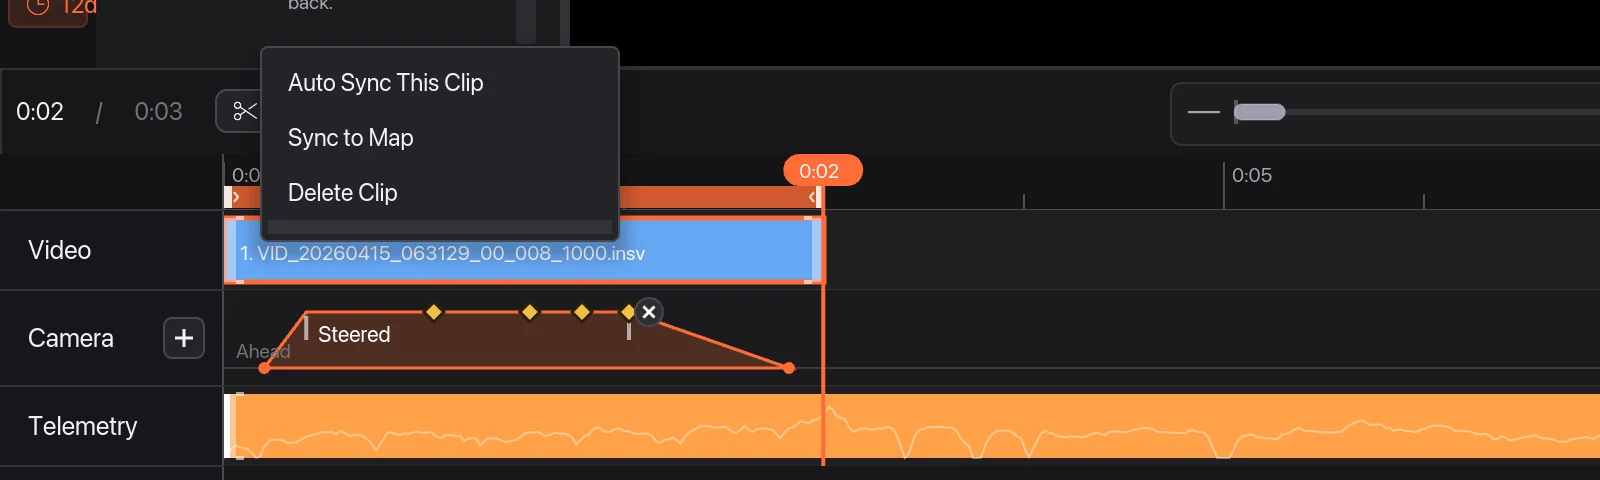
For 360 recordings, Telemetry Studio matches the turns the camera felt to the turns in your ride, so it lines up even when the camera's clock is off 1. Your speed 2 and other data 3 now follow the video.