The editor at a glance
What each part of the screen is for, once you've opened a video.
1 Top bar
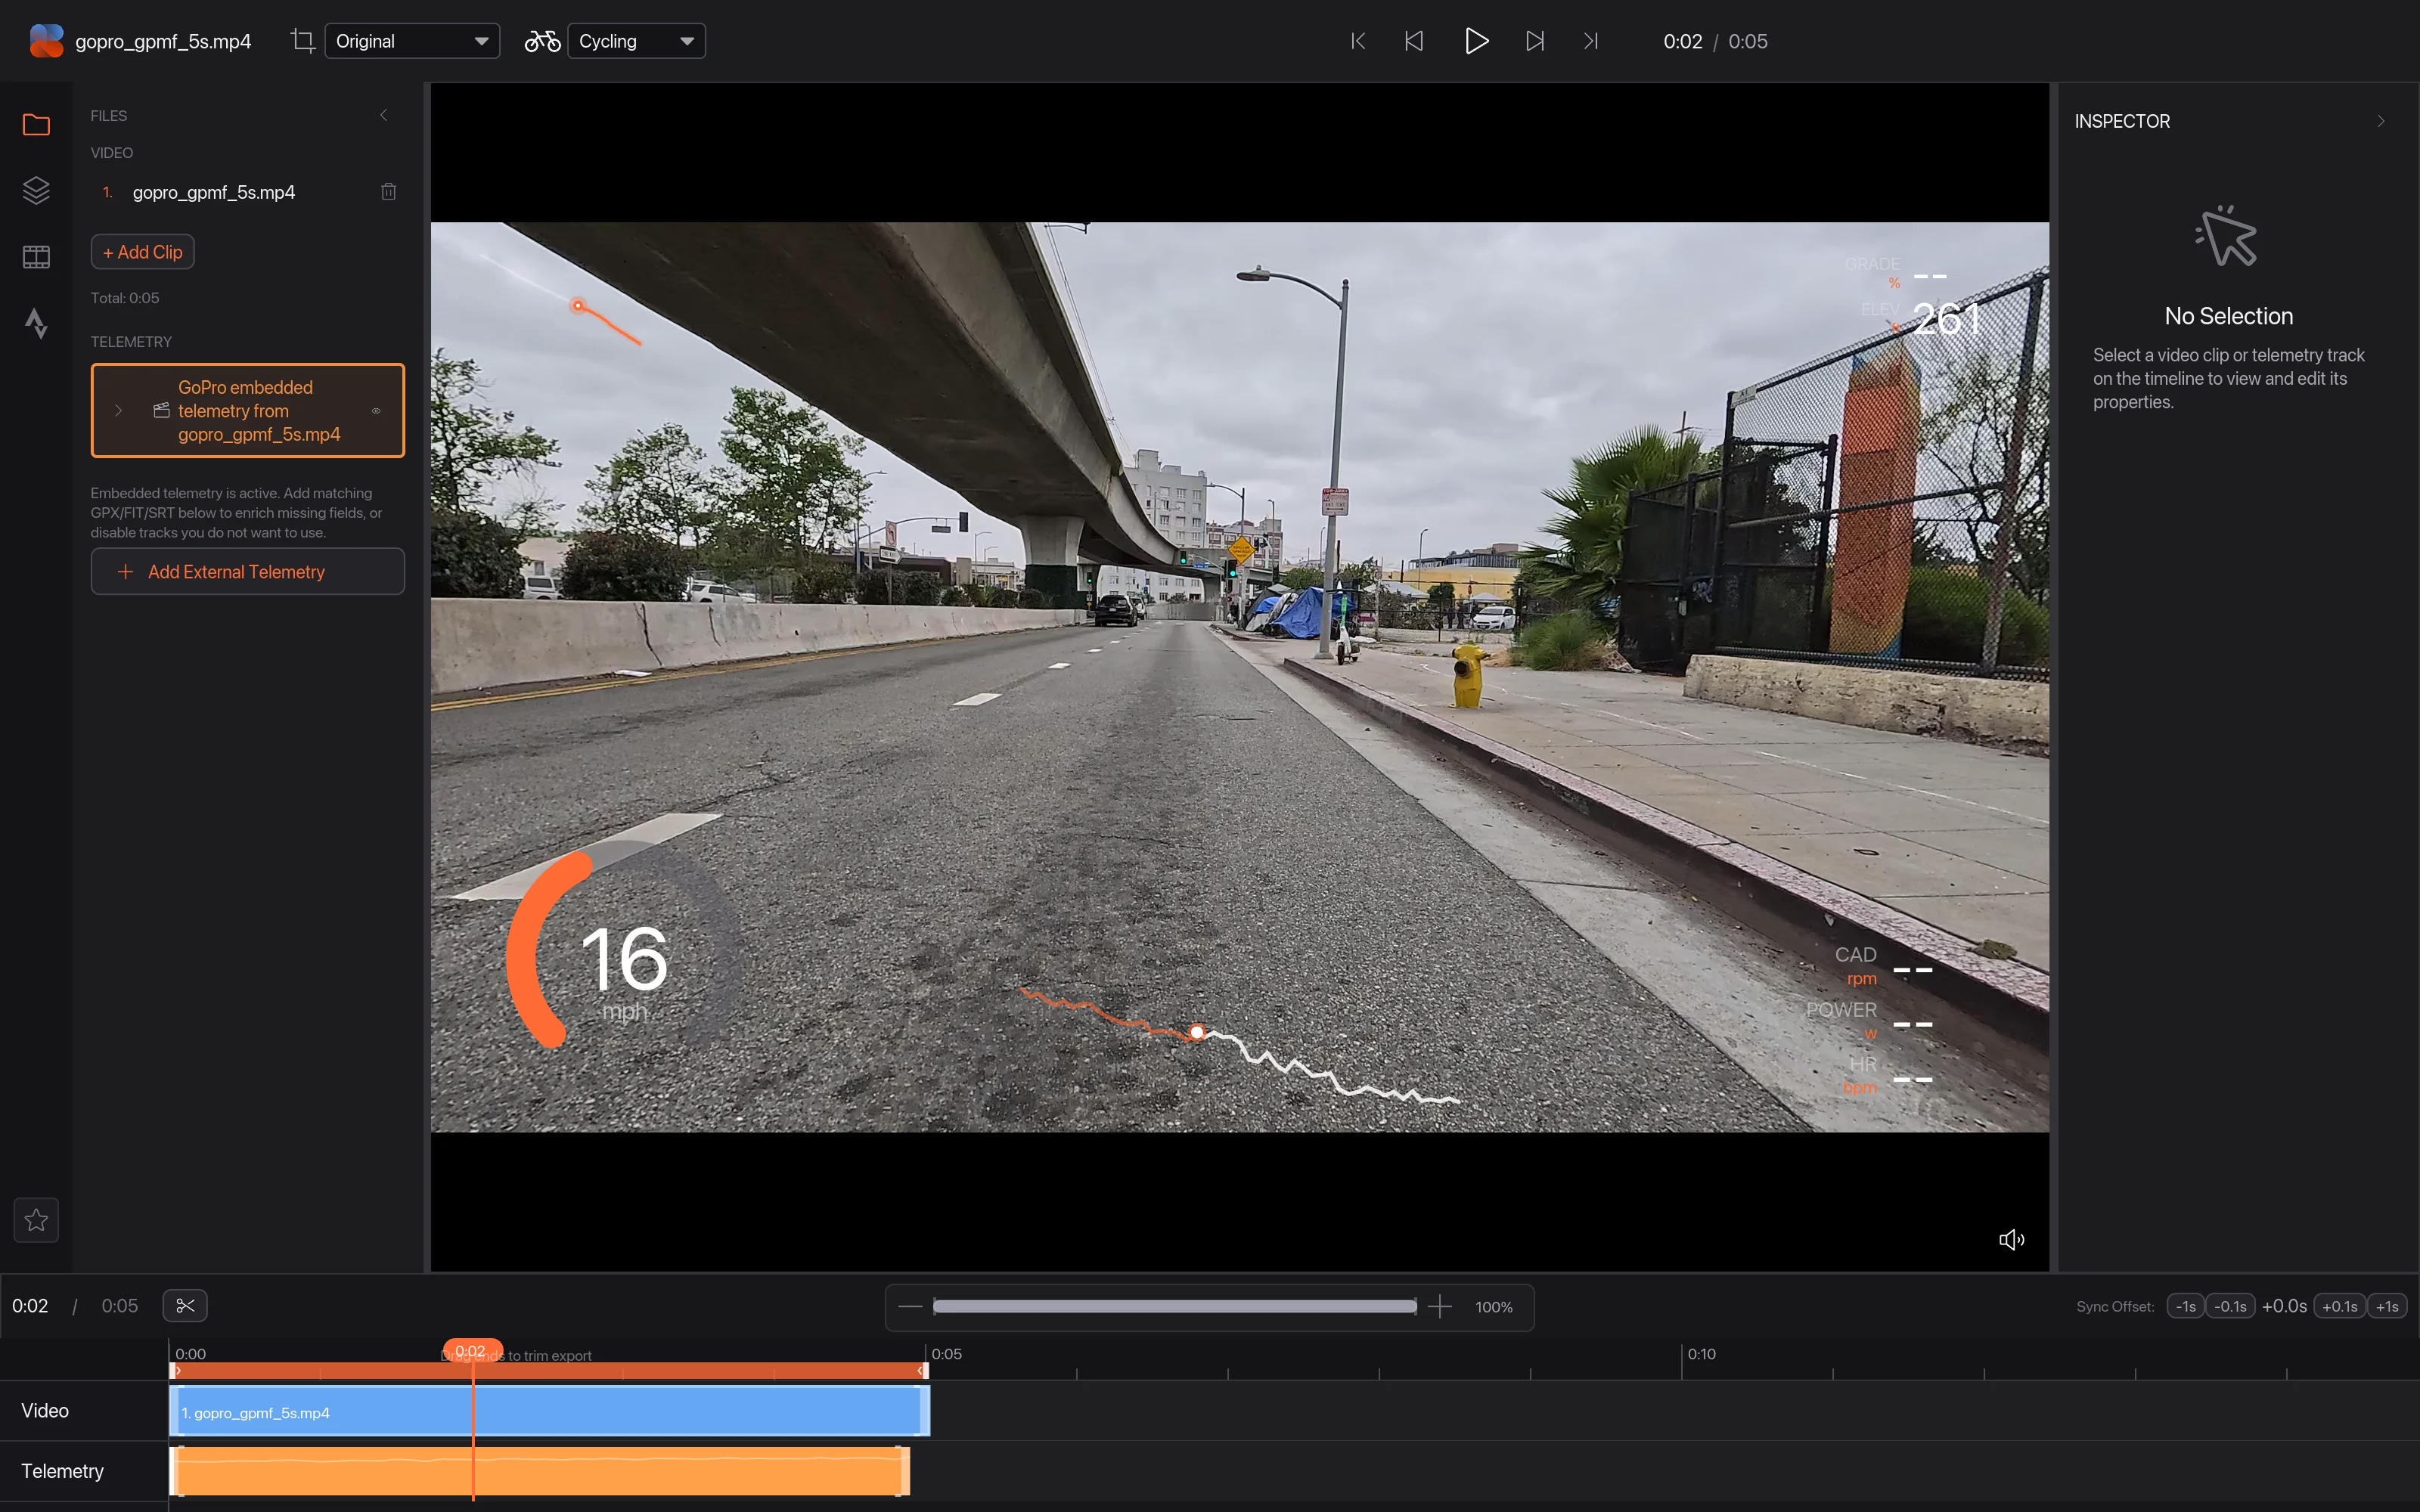
The project name, then two menus. The frame menu (Original) sets the shape of your video: keep the camera's own, or crop to 16:9 Landscape, 9:16 Portrait, 1:1 Square or 4:5 Portrait for social media. The sport menu (Cycling) picks the sport, which decides which overlays and units fit best.
2 Playback
Go to the start, back 10 seconds, play or pause, forward 10 seconds, and go to the end, with the playhead time and the length of the timeline next to them. See Playback and the timeline.
3 Tabs
The strip on the left switches what the sidebar shows:
- Files: your video clips and ride data
- Overlays: add, arrange and style the data on your video
- Animations: animated moments, like celebrations
- Strava: your Strava rides and segments
- Moves: camera moves, shown only for 360 video
4 Sidebar
The contents of the tab you picked. Press ⌘ 1 (Ctrl 1 on Windows) to hide it and make the preview bigger.
5 Preview
Your video with its overlays, as it will look when you export. To move or resize overlays, turn on Edit layout in the Overlays tab, then drag them here.
6 Inspector
The settings of whatever you selected: a clip, your ride data or an overlay. With nothing selected it says No Selection. Press ⌘ 2 (Ctrl 2) to hide it.
7 Timeline
Your clips on the Video row and your ride data on the Telemetry row, lined up in time. 360 clips add a Camera row. See Playback and the timeline.